Log (By Day)
Log (By Category)
Pictures
Pics of Me Working
Links
| ||||||||||||
Sunday September 20, 2020
Seatbacks, Electric Flap Assembly, Misc Riveting
(Fuselage)
2.0 Hours
| Previous - Index - Next |
I'll be waiting a few days for the angle to arrive so I can finish the rudder stops and finish all of the tail stuff. In the mean time, I worked on some miscellaneous stuff I'd noticed.
First, I noticed that I had not originally trimmed enough where the seat back brace inserts into the angle. You can see here where the interference was--it was occurring on both sides.
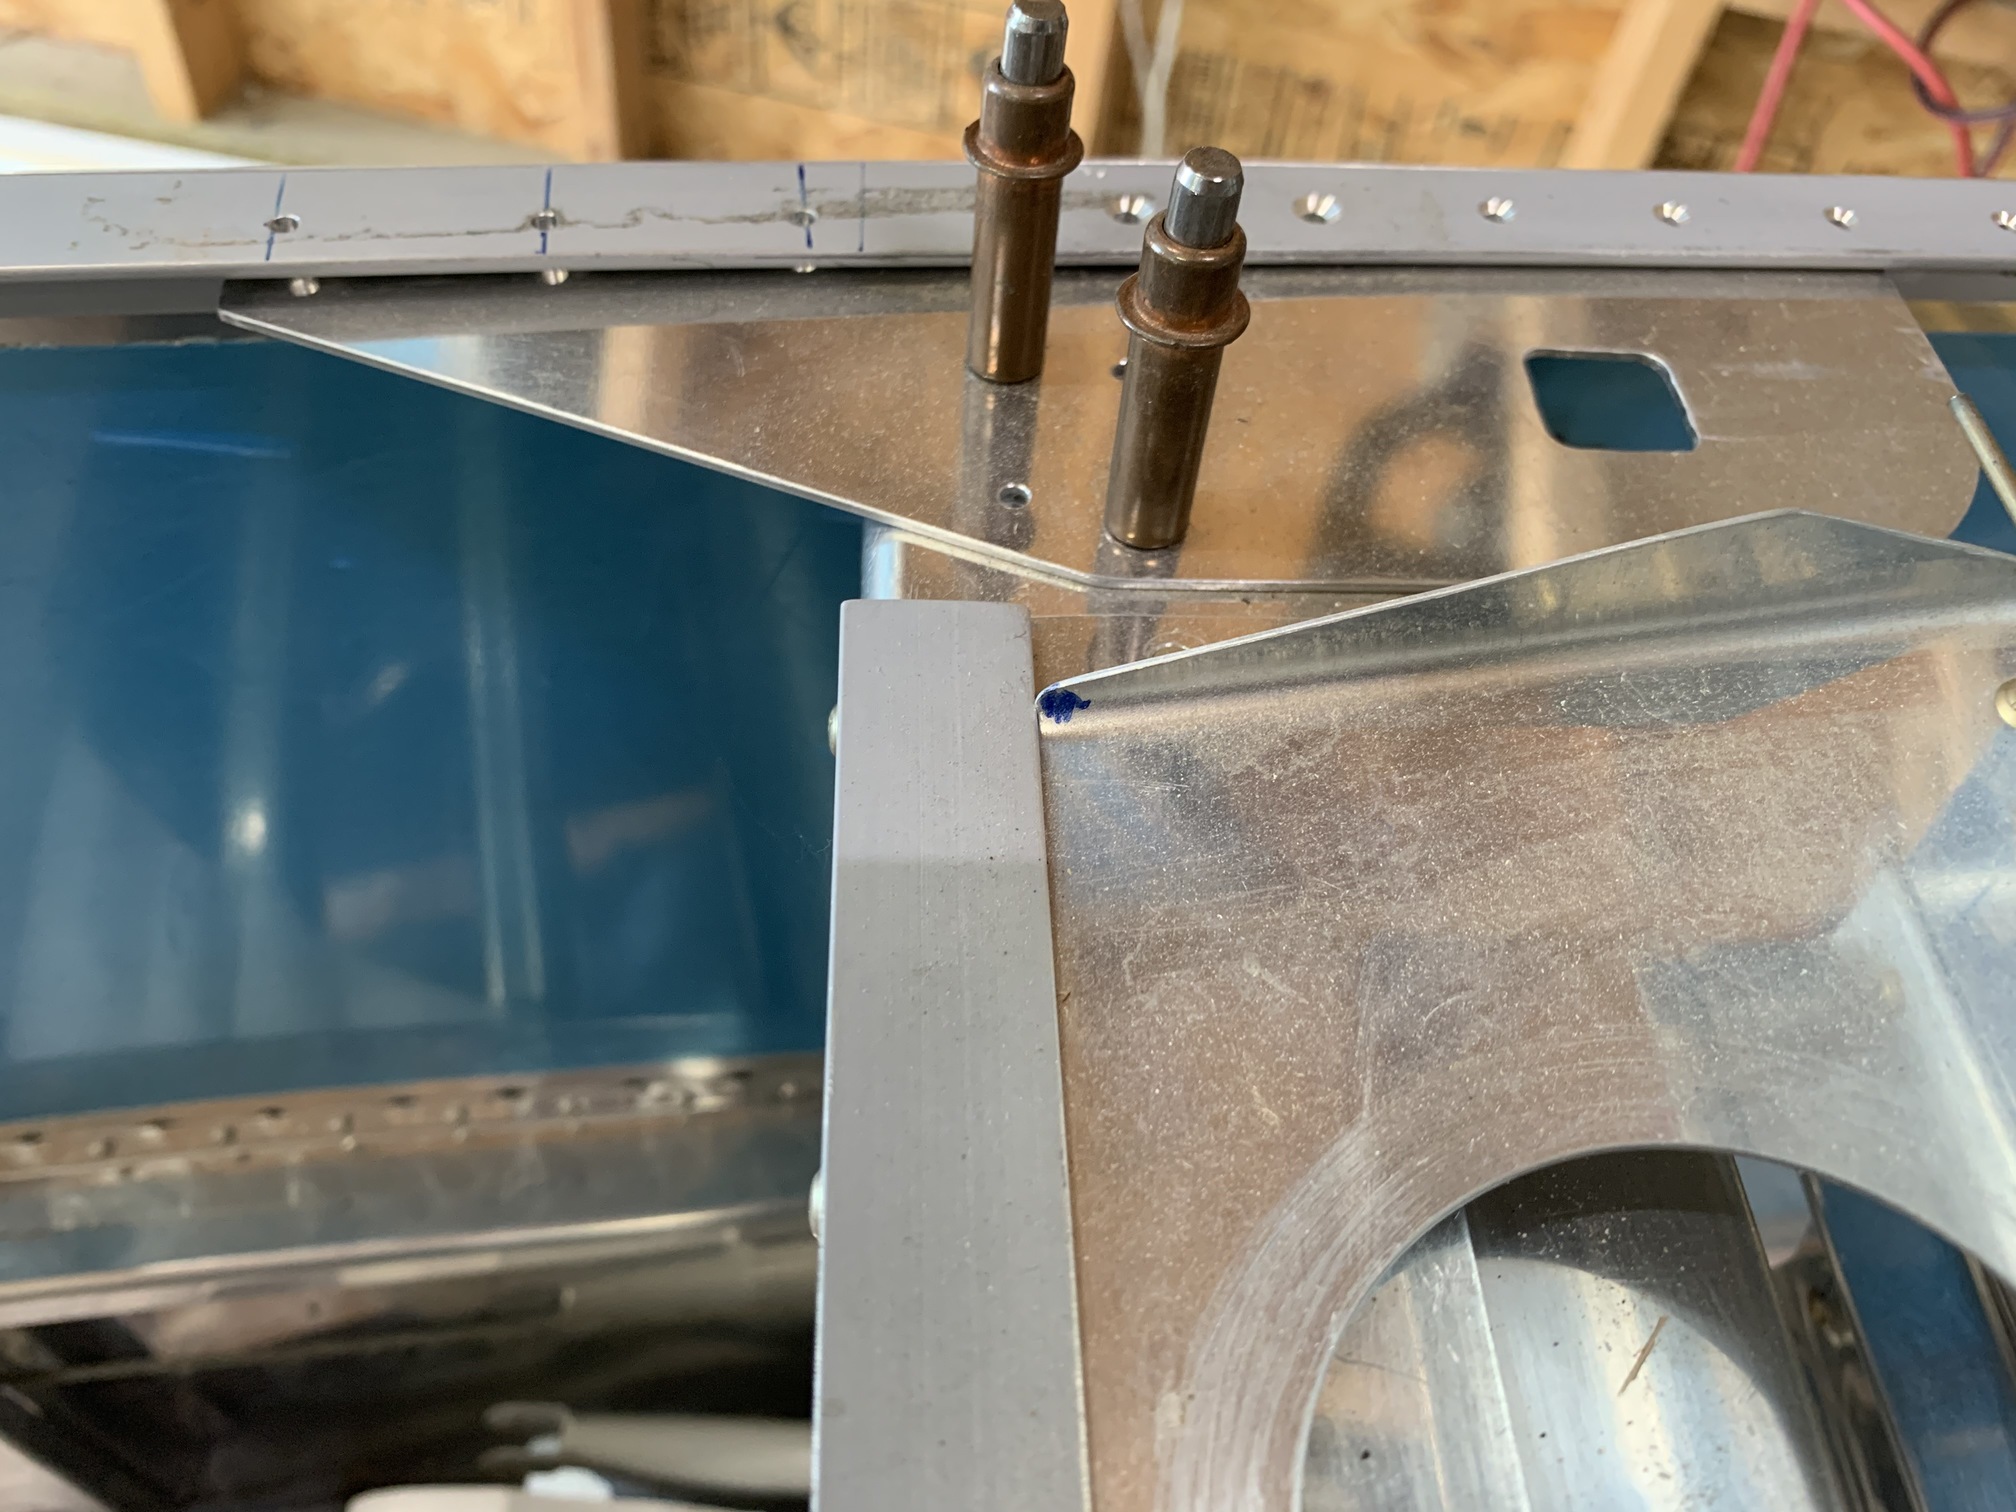
So, I removed the seat backs and removed some additional material in this area with a wheel in the grinder. Now there's plenty of clearance on both sides.

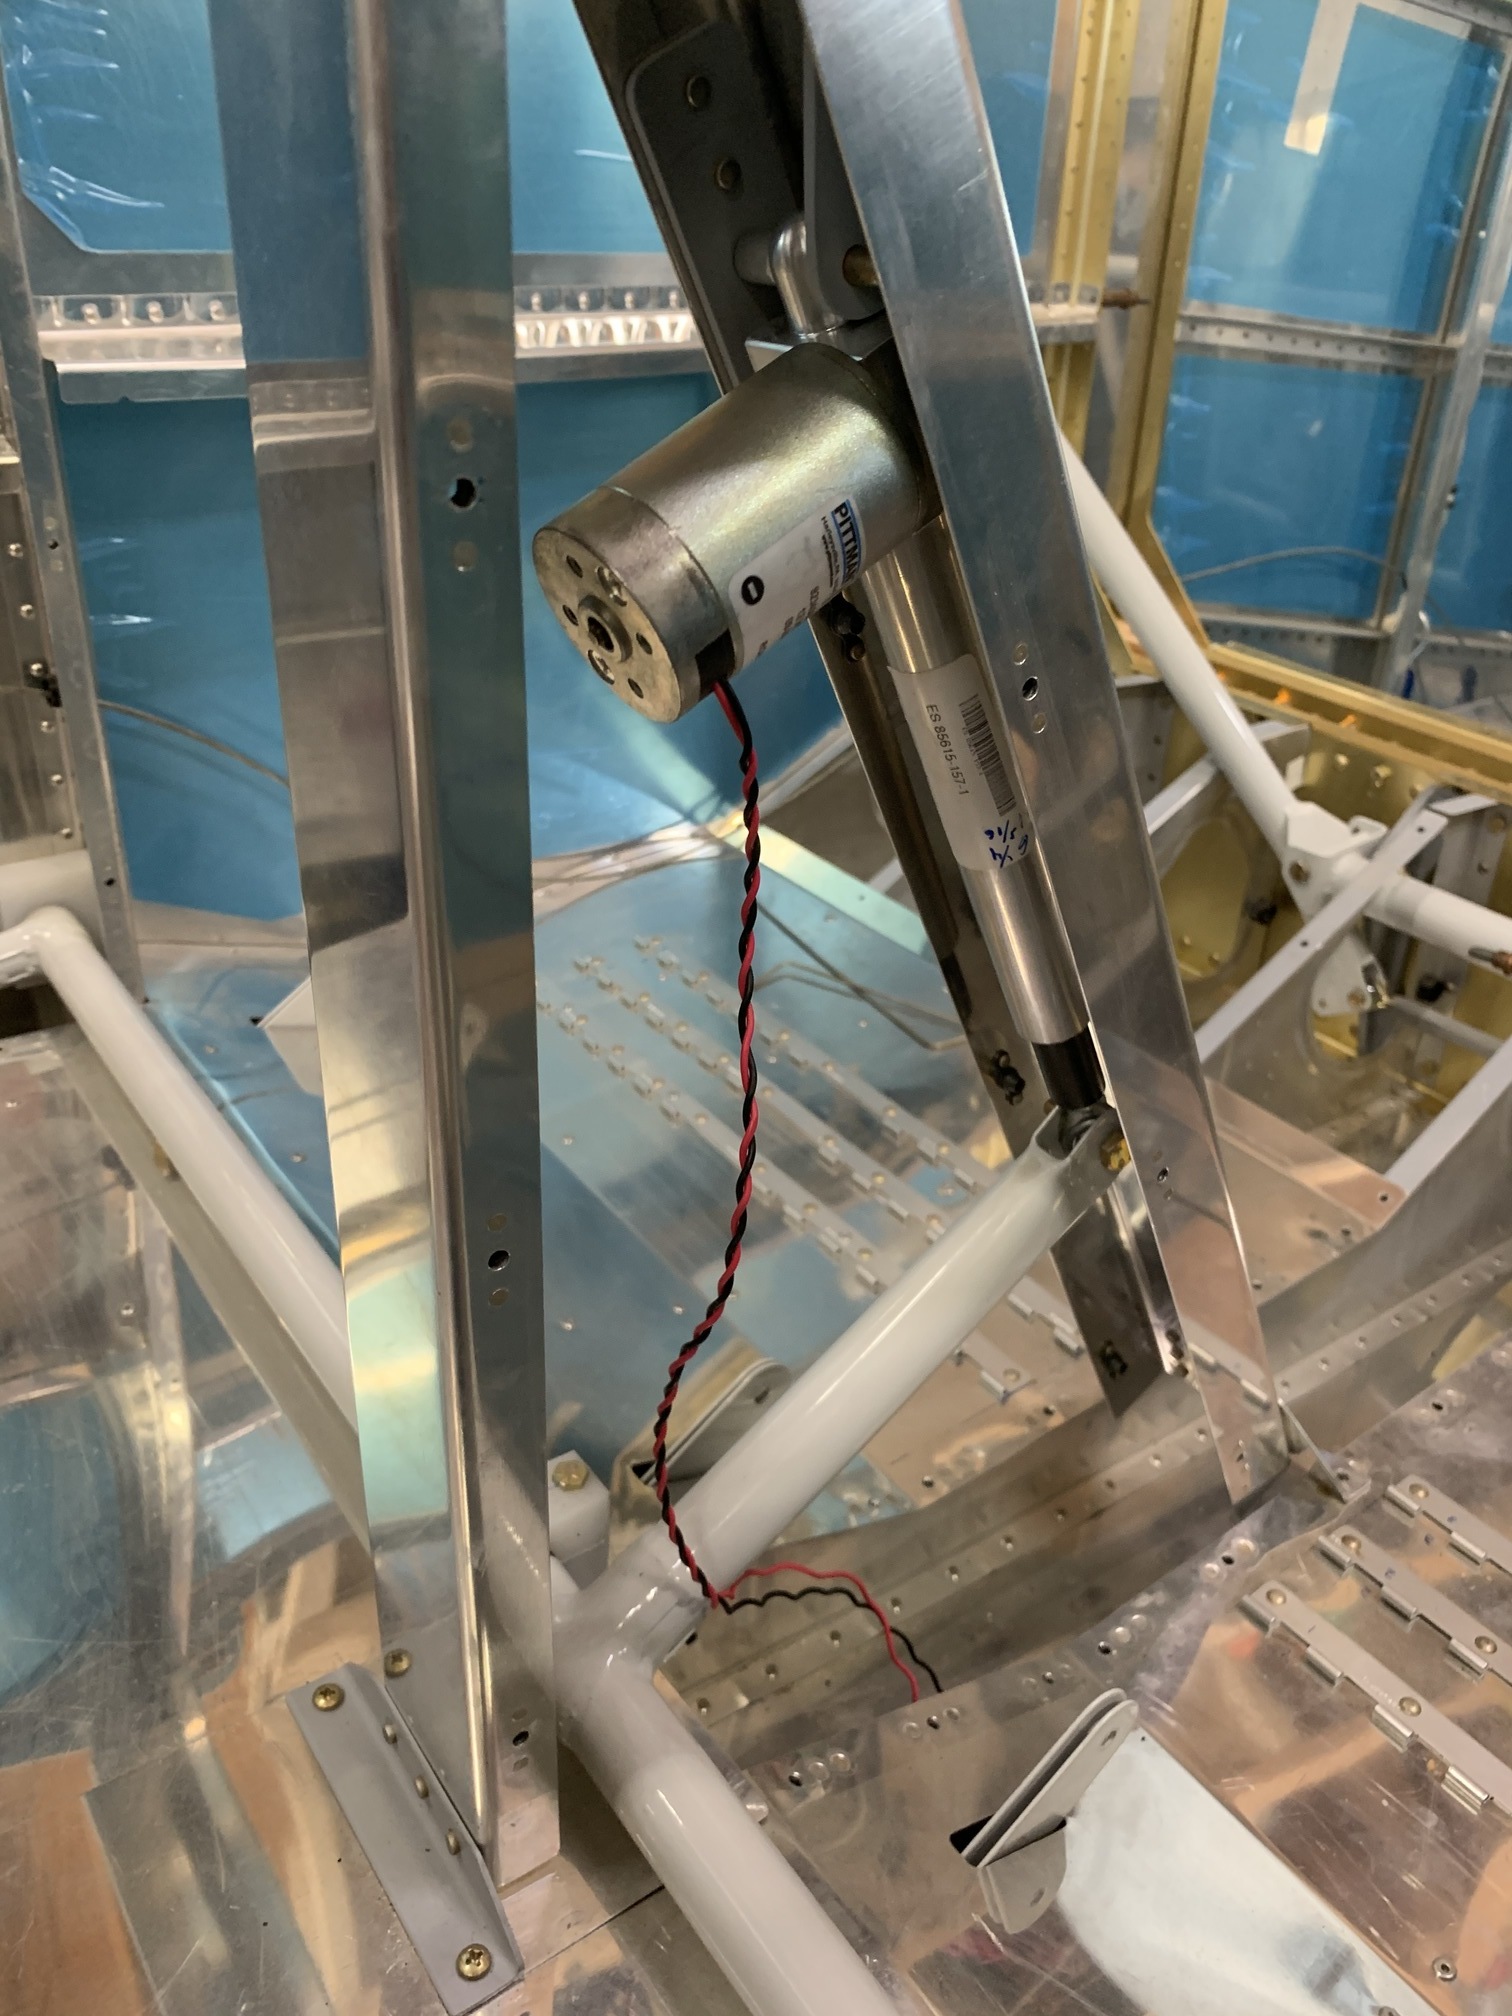
I had completed most of the flap assembly installation way back in the day, but it wasn't 100%, so I took some time to review the instructions and make sure I hadn't missed anything. I bolted the flap motor into place and ran it back and forth with a battery from my cordless drill. Everything seems to be right. The only things I still need to do are to safety wire the lower end and get the right bolt for the top. Then this will be done.
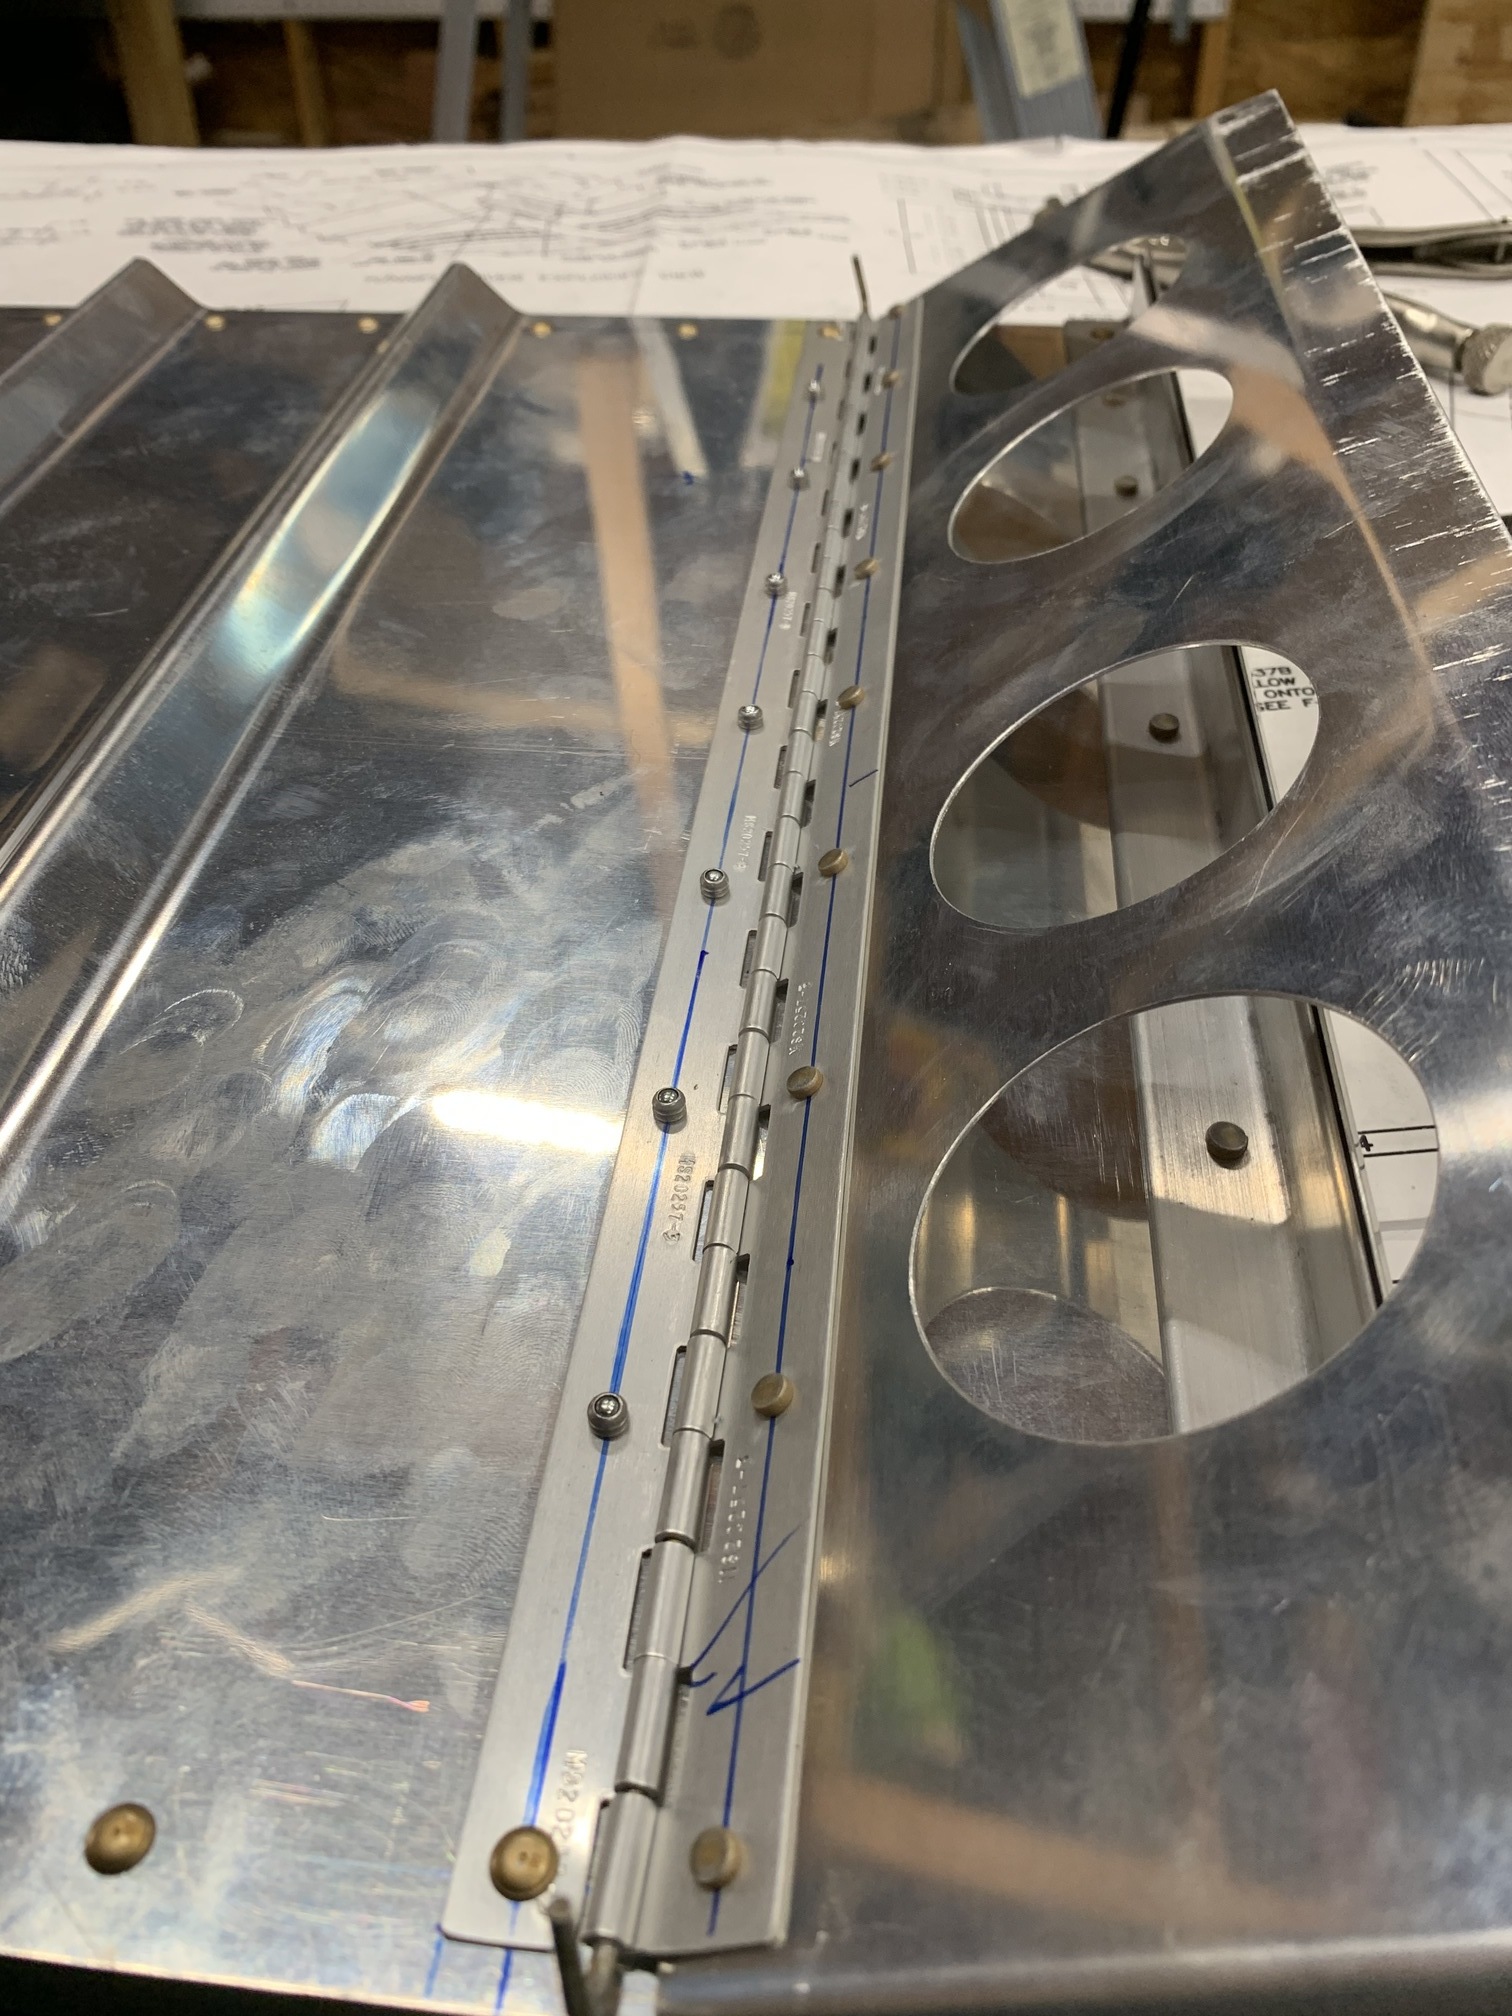
I noticed that the hinge pin connecting the upper seat backs to the brace weren't bent, so I bent both ends to keep them in place. This isn't something that will ever need to be removed.
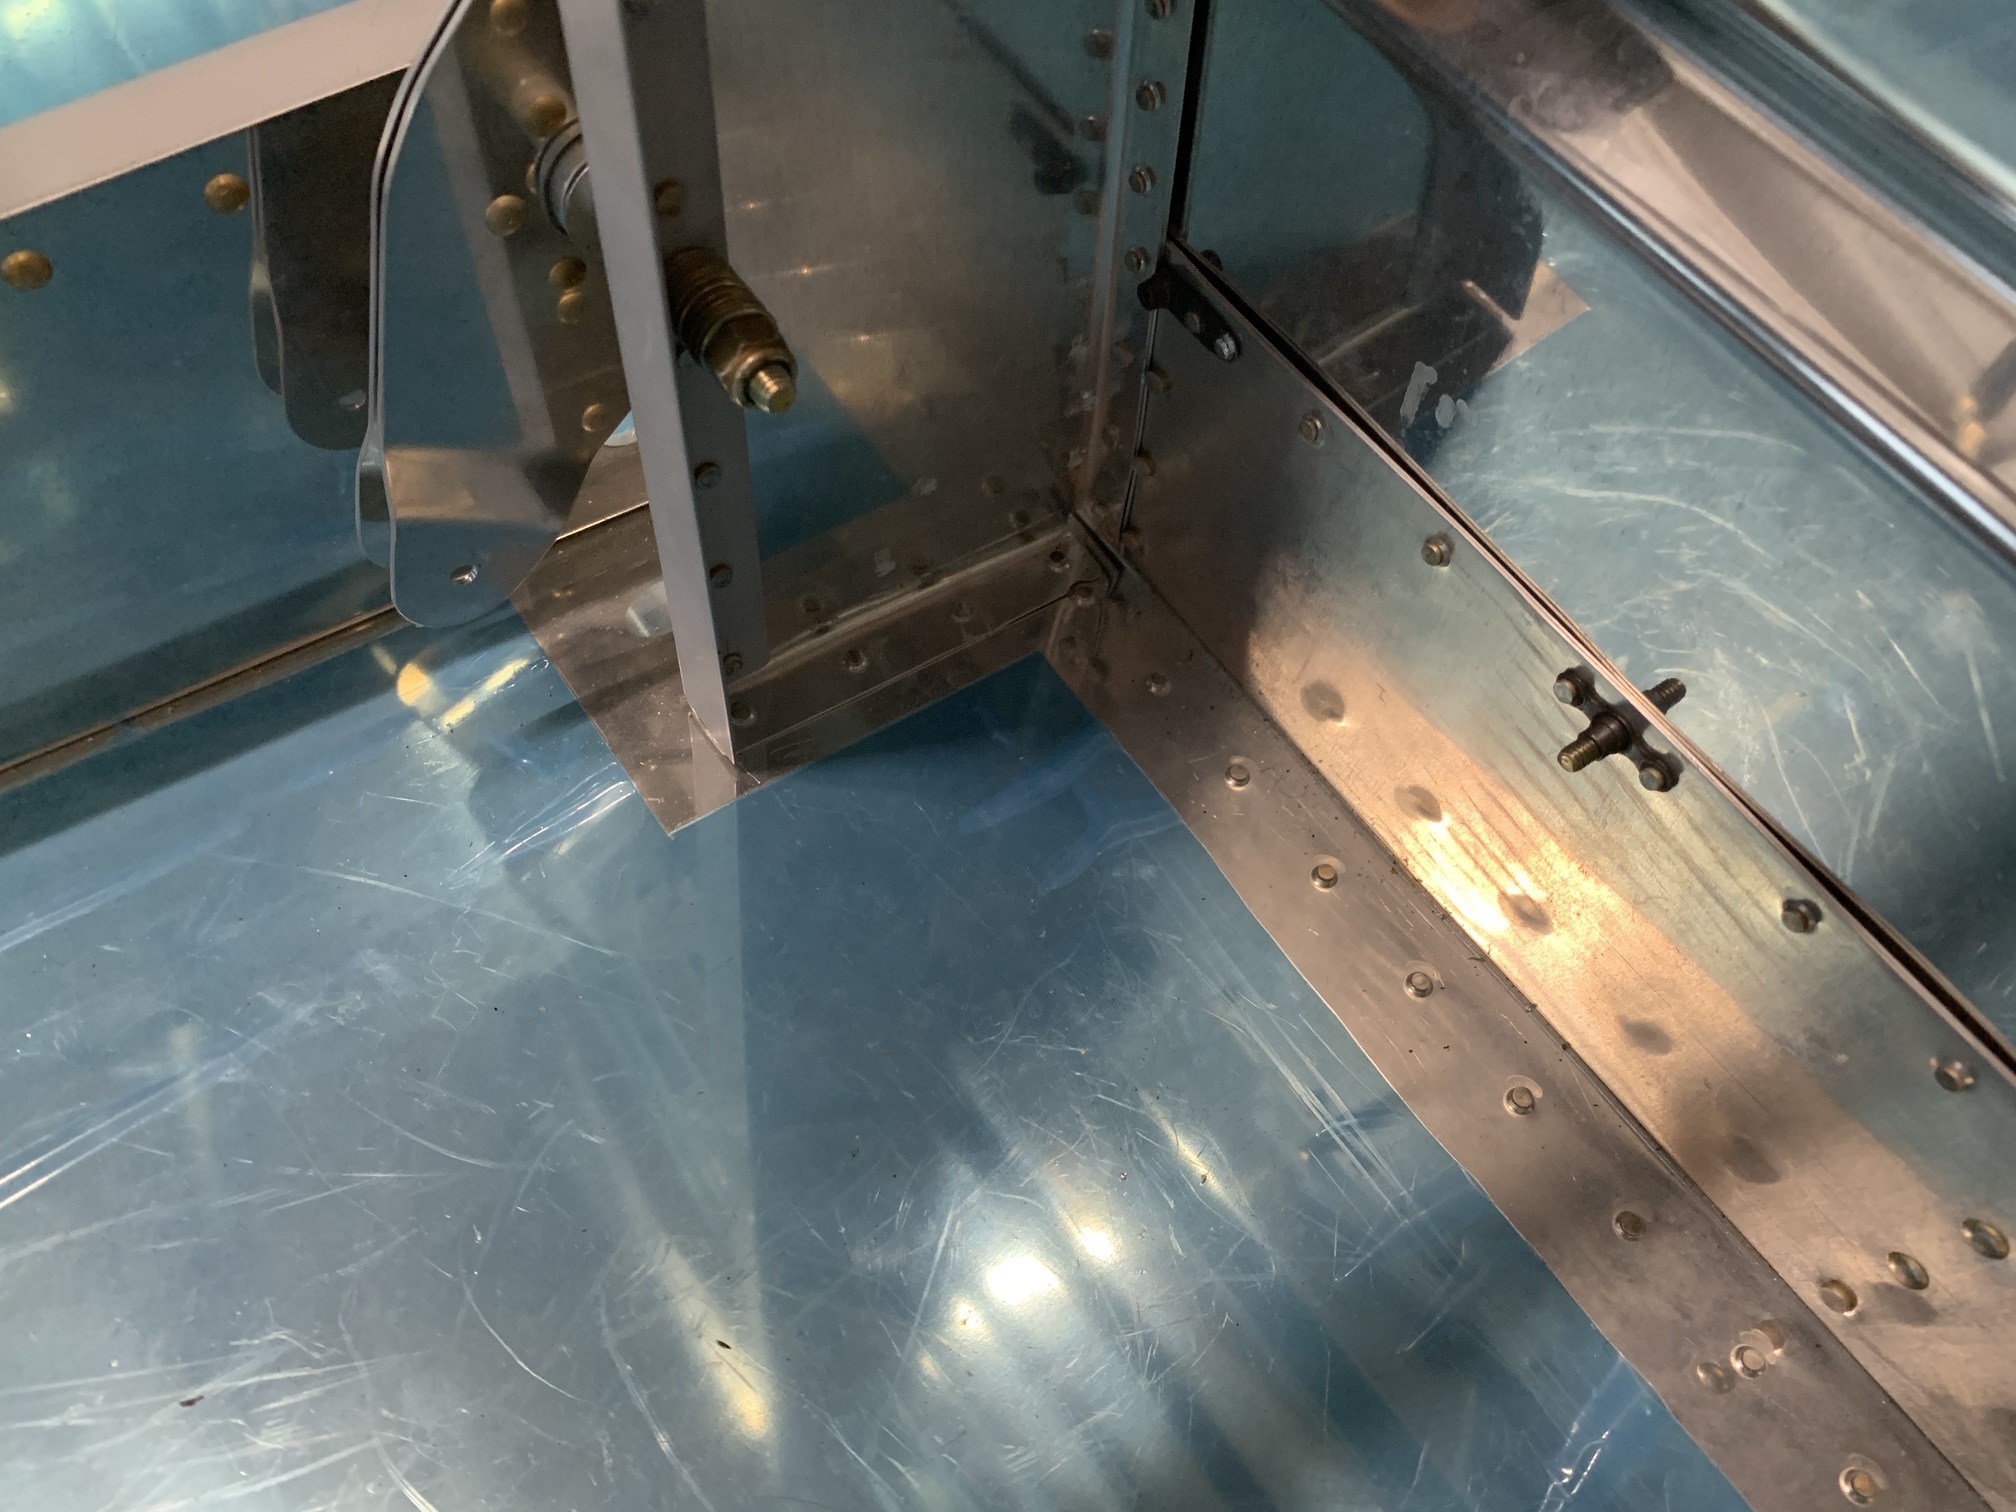
Then, finally, Emily helped me set these three rivets that connect the bellcrank channel to the bottom skin. One of them is overdriven and will need to be drilled/replaced.
| Previous - Index - Next |
This work is licensed under Attribution-NonCommercial-NoDerivatives 4.0 International![]()
![]()
![]()
![]()