Log (By Day)
Log (By Category)
Pictures
Pics of Me Working
Links
| ||||||||||||
Sunday January 2, 2022
Canopy Latch Mechanism
(Canopy)
4.0 Hours
| Previous - Index - Next |
First thing today, I worked on the little cutouts in the C-712 latch angles. Here I measured and outlined the notch.
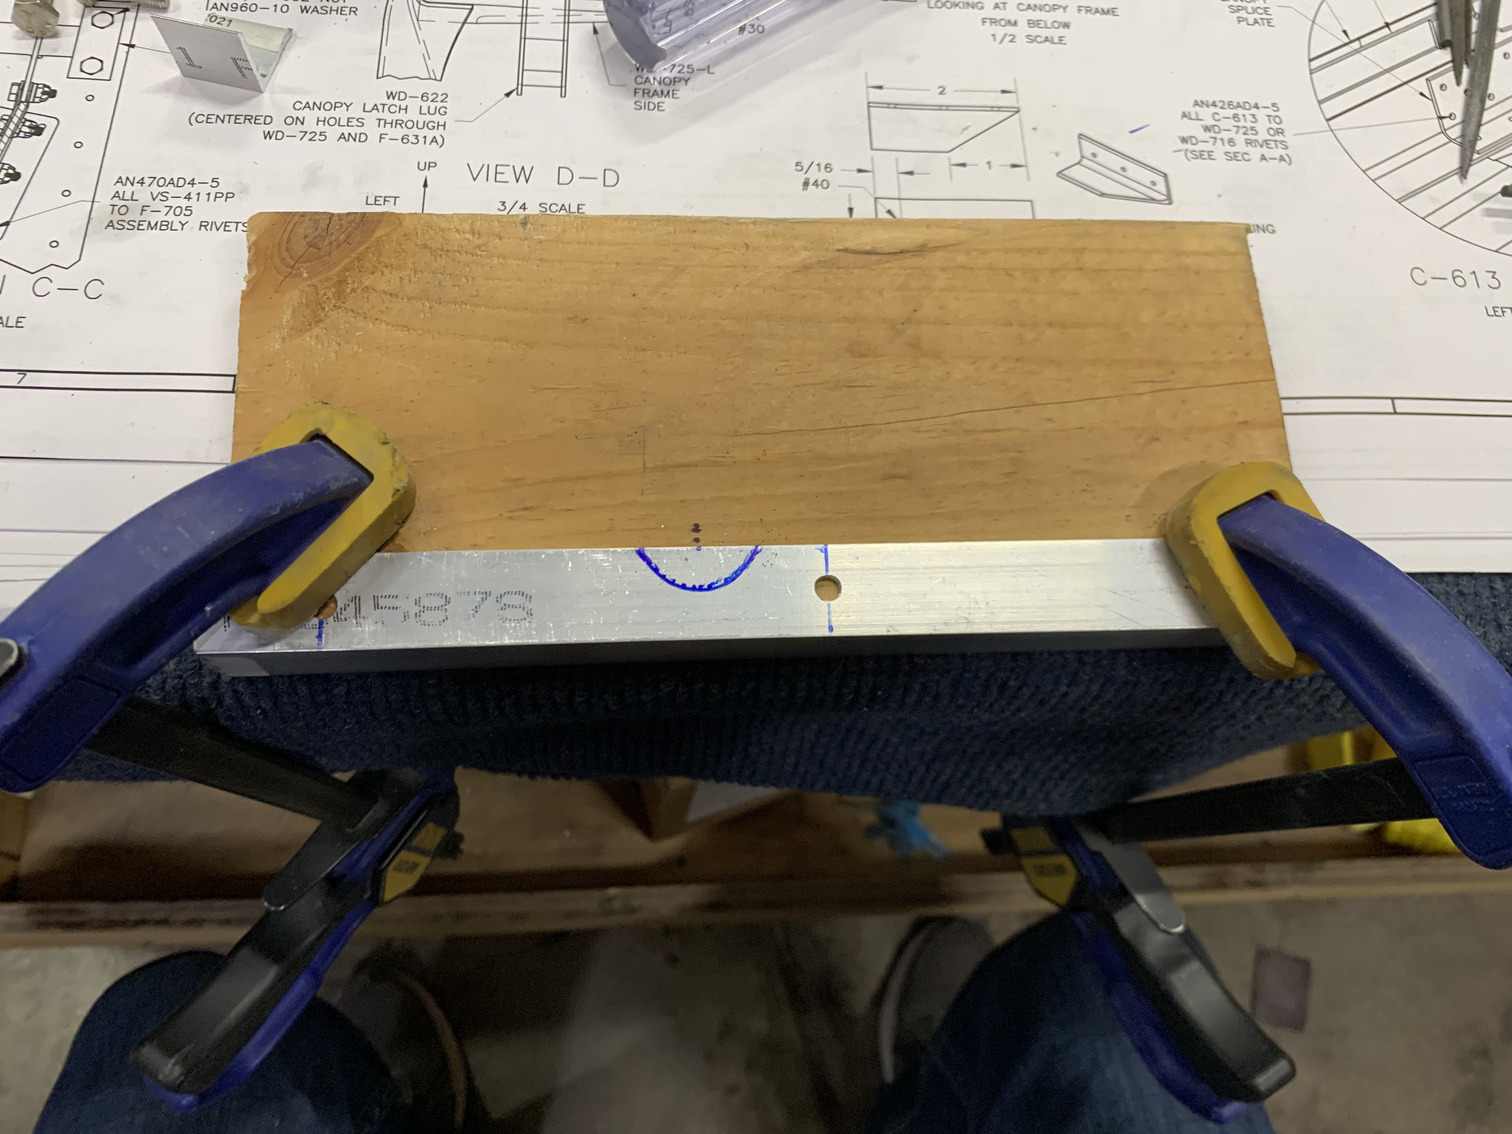
Then I used the band-saw, some files, and emery cloth to get these finished nicely.
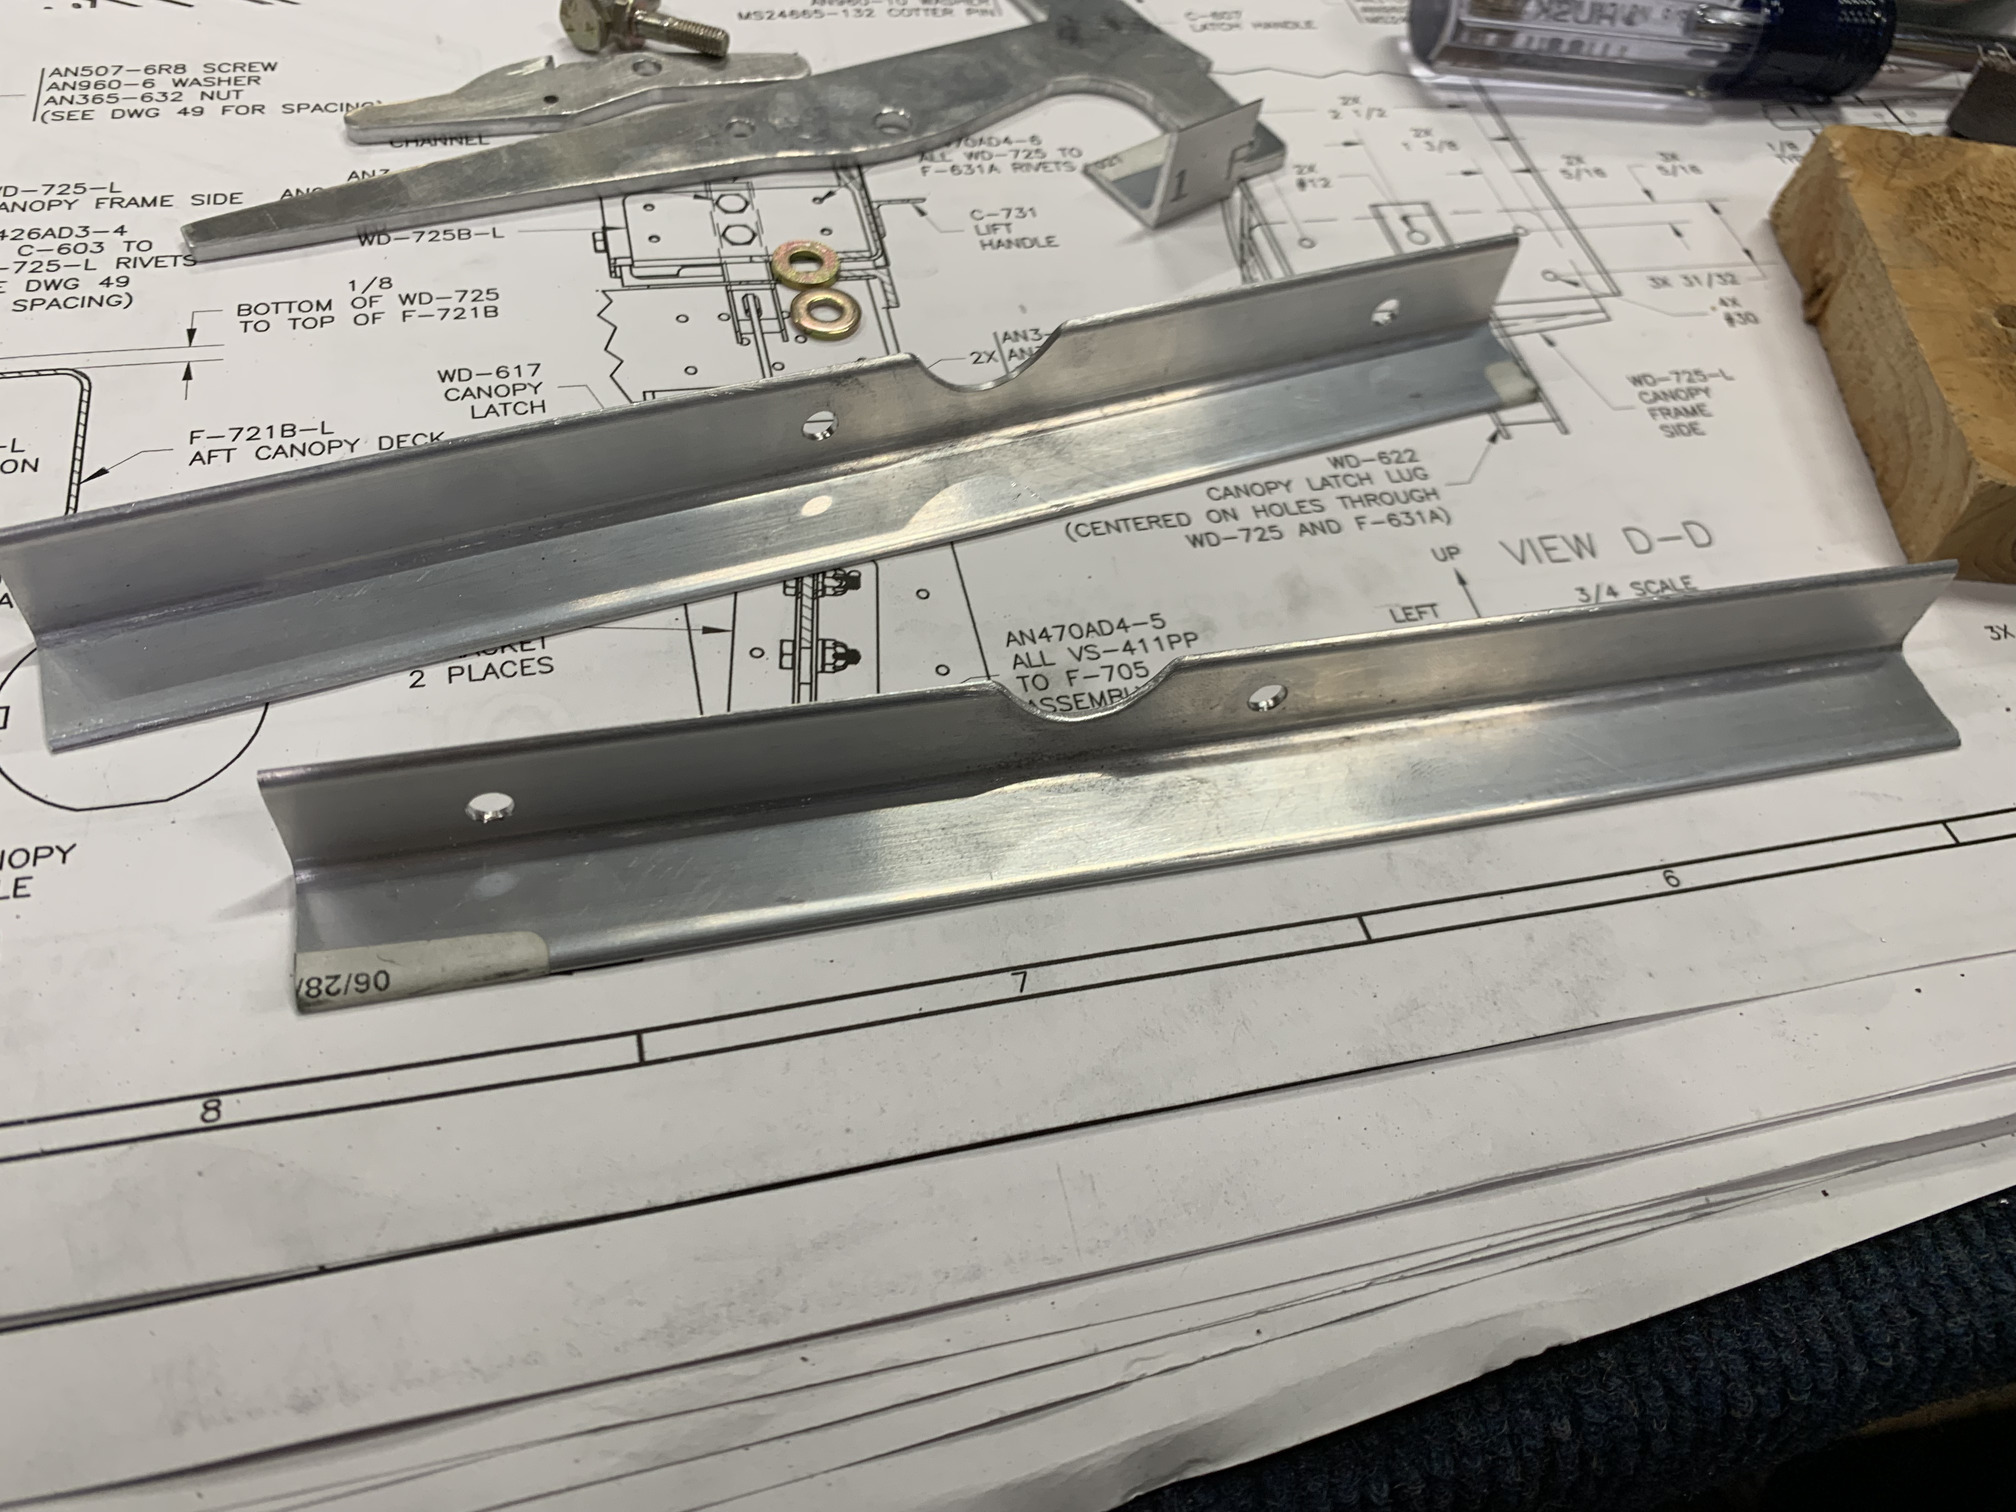
Here's the reason for the cutout. This eye-bolt attaches to the C-607 latch handle in that spot.
I bolted some 0.016" spacers and a piece of paper between C-607 and each angle. This is to give room for UHMW tape to help the handle slide smoothly.
Then, using the latch handle to position the assembly, I drilled the bottom row of rivets, using the skin as a guide.
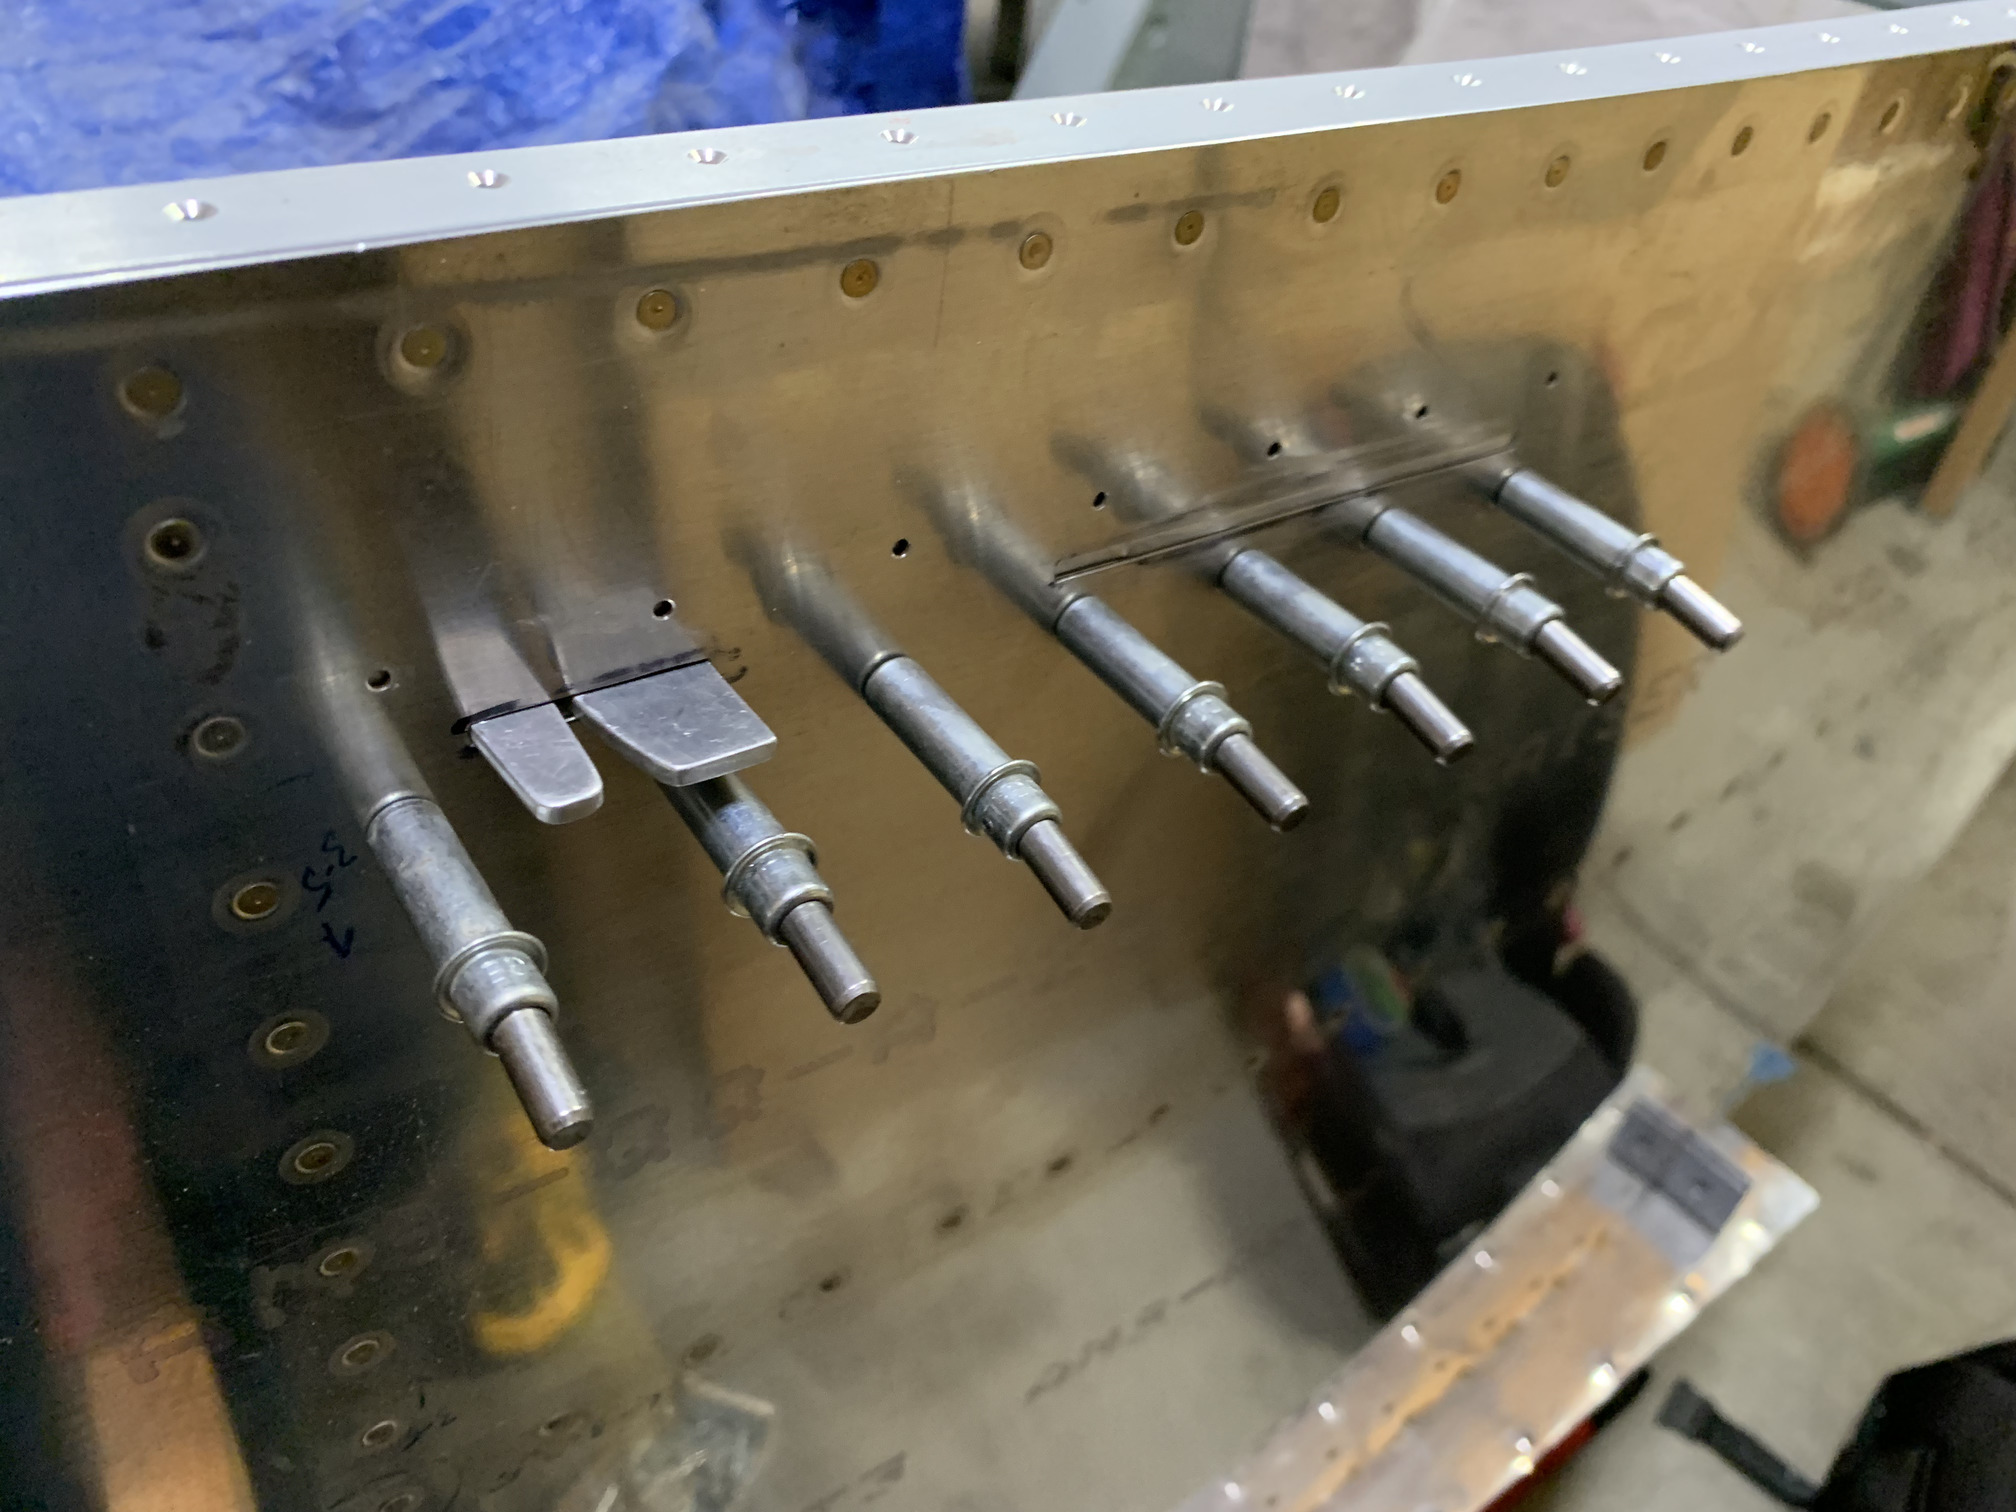
And the top row...
I dimpled the skin (was able use the squeezer for all of them) and countersunk the angles. Then I cleco'd the latch assembly to the skin again (without the extra spacers) and drilled a small hole in the F-704K for the small pin/spring assembly that keeps the latch pushed over against the handle.

I installed the knob on the latch handle, but misread the instructions and drilled the hole in the knob too big, so I'll order a new one and replace it. I could see the retaining screw falling out eventually if I leave it like this.

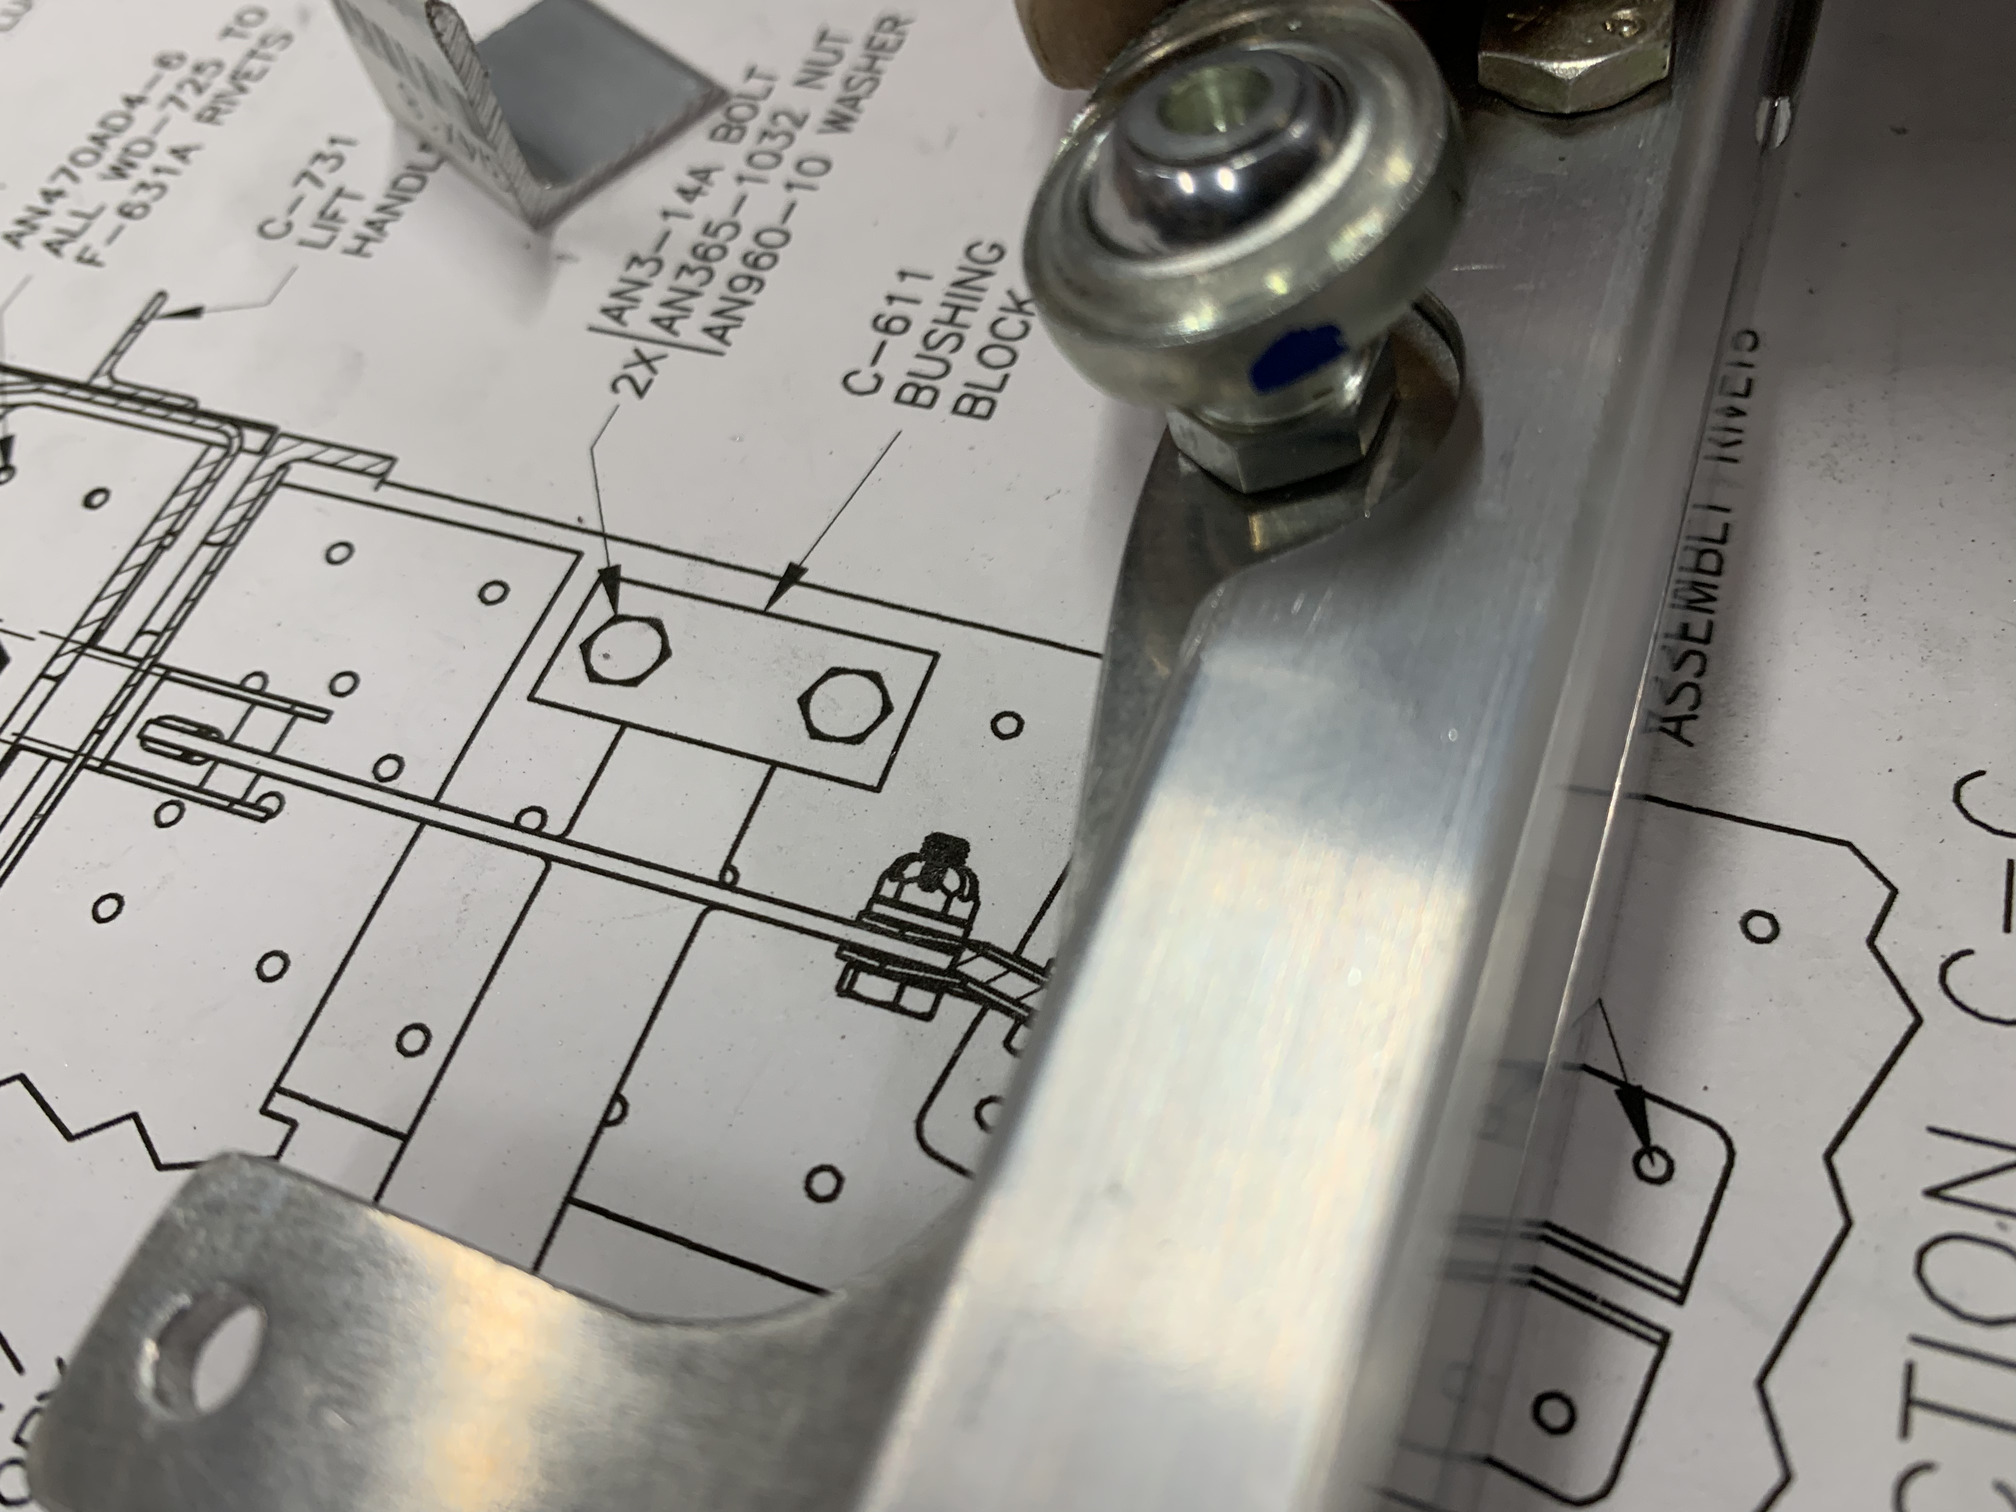
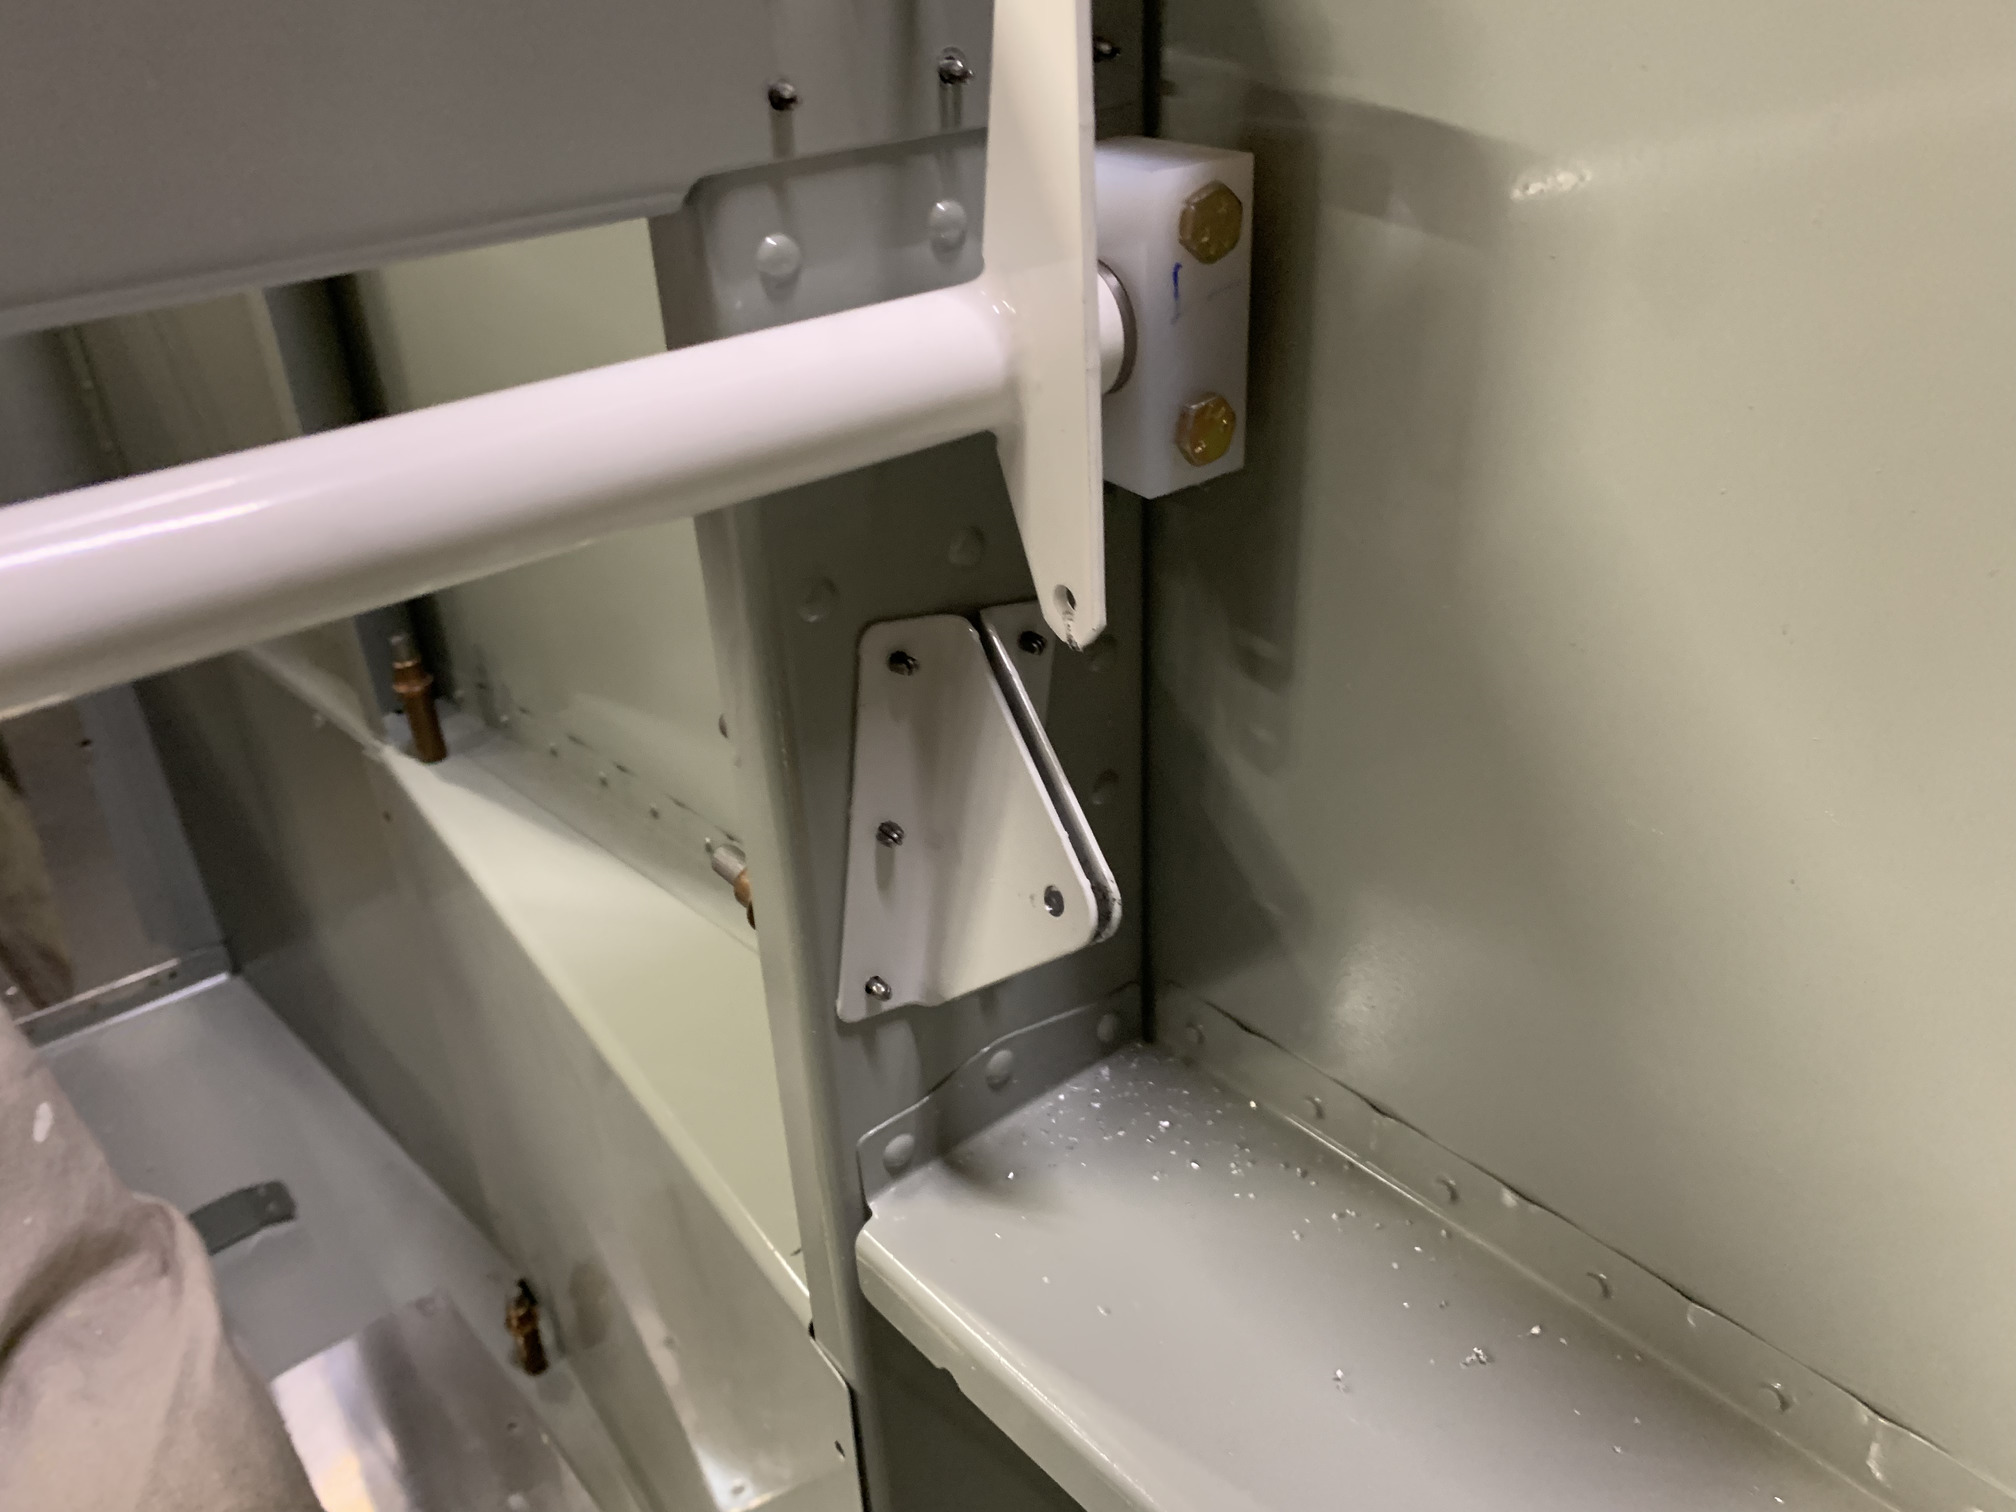
Then, I started working on the latch weldment. Here it is held in position. It has little fingers that stick into holes in the F-705 bulkhead.

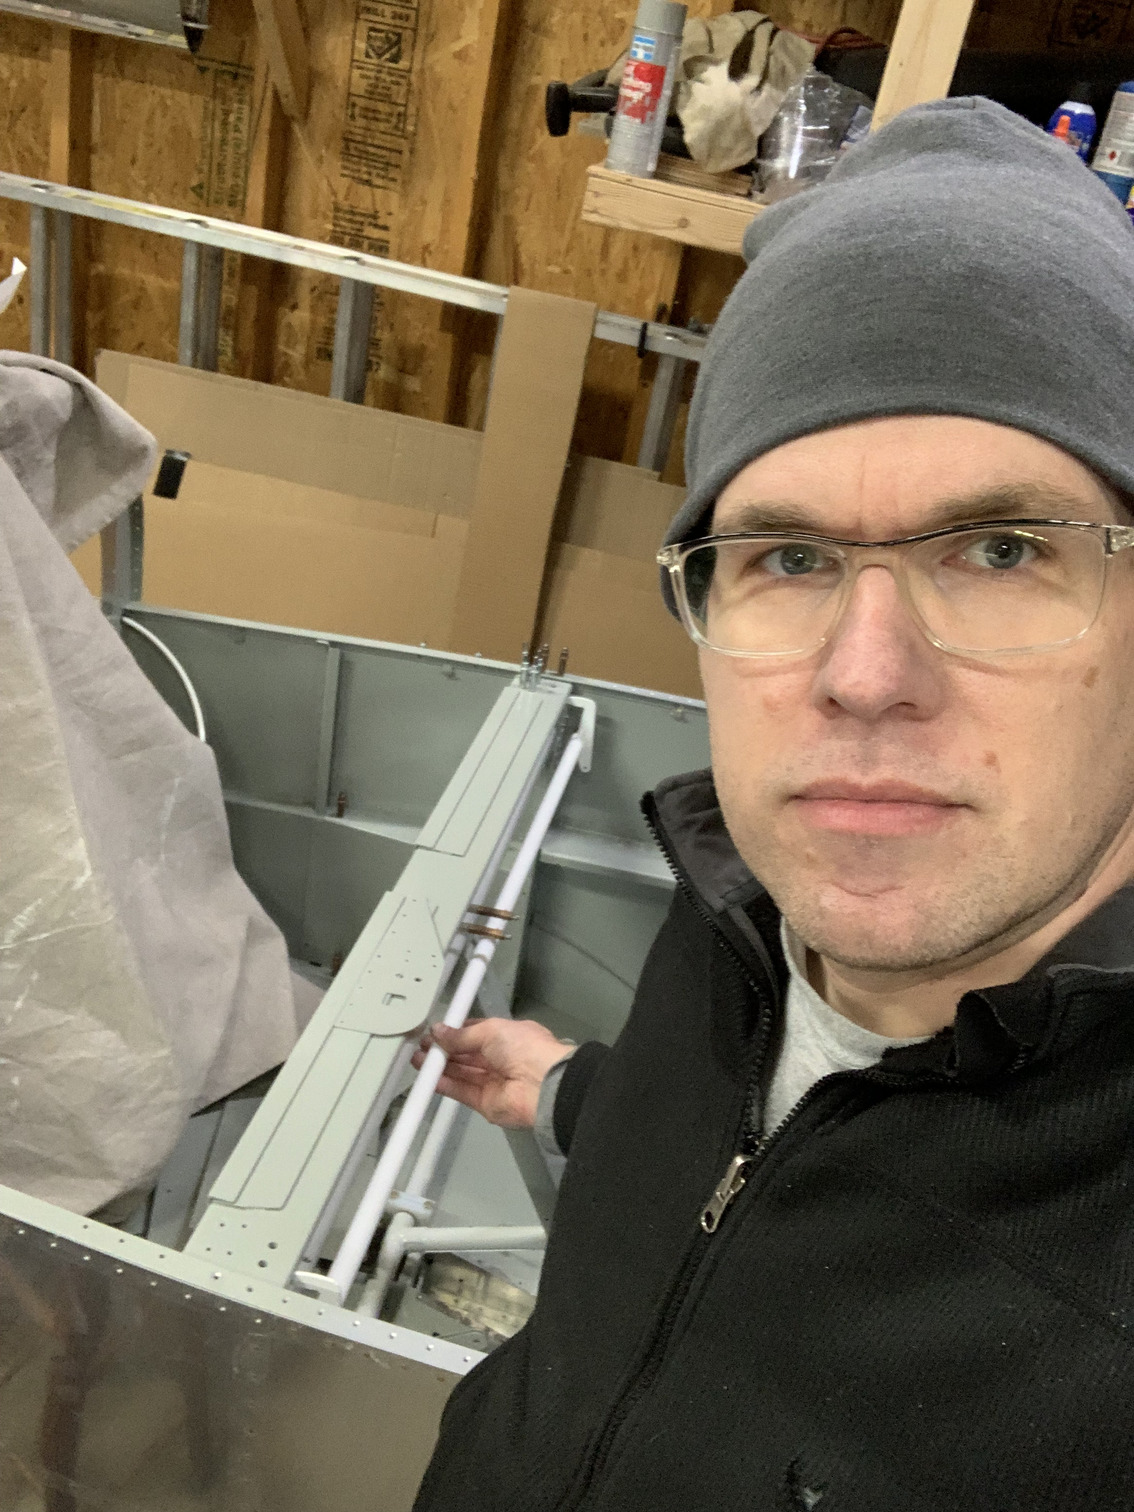
Here's a picture of me, since I don't often include these. Some day I'll need to prove to the FAA that I actually built this thing.
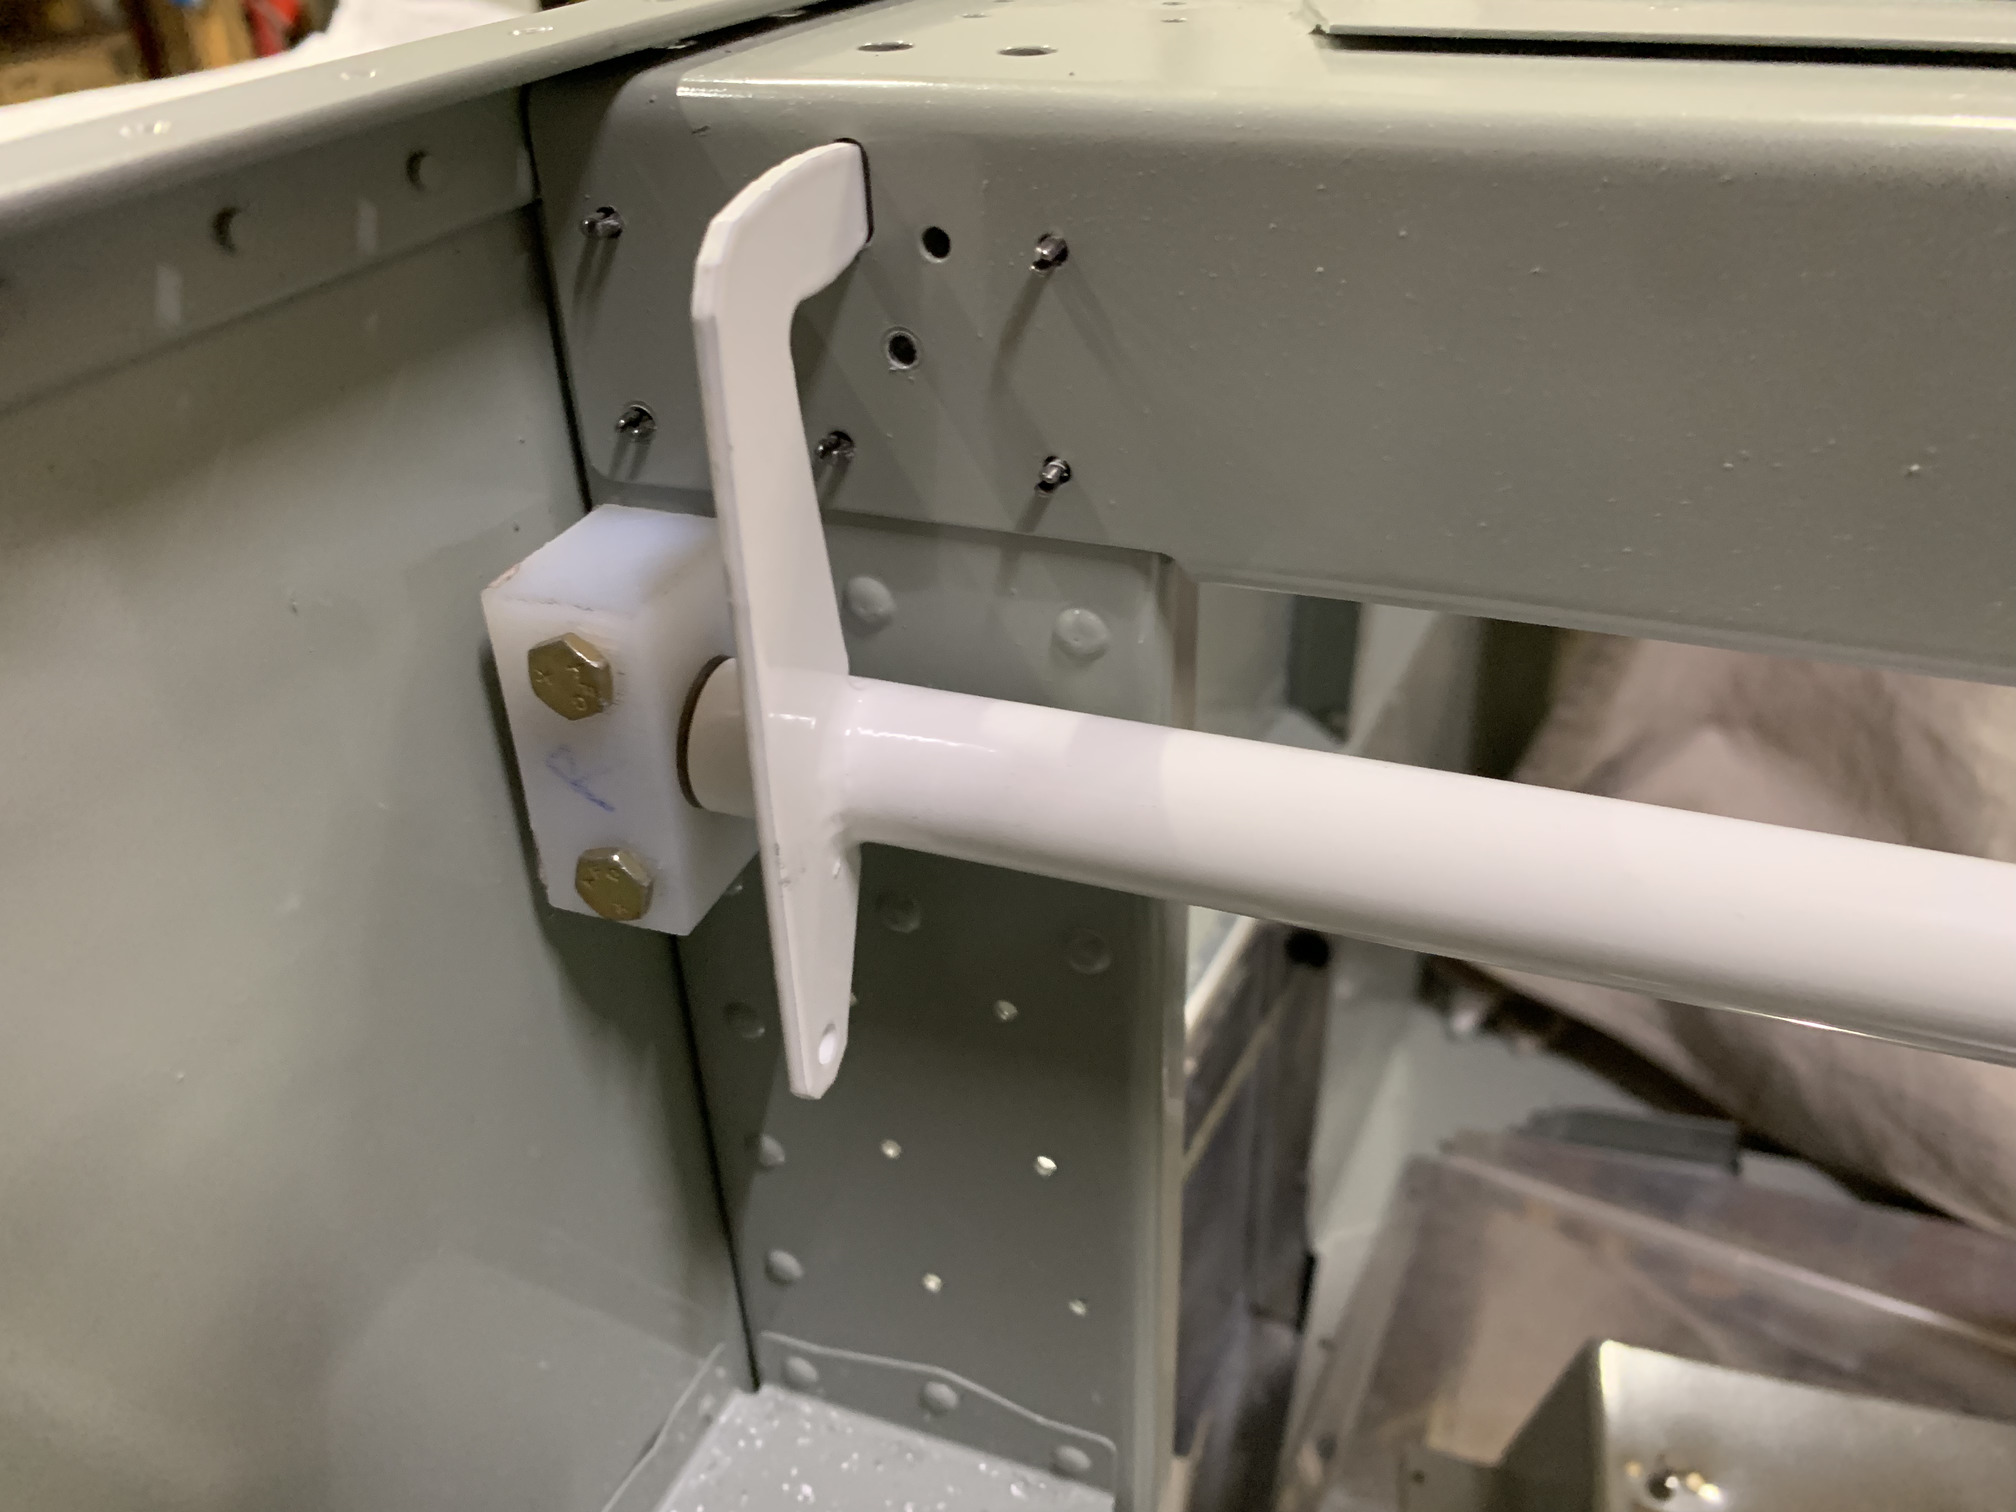
I placed the UHMW blocks on the ends and clamped it in place on the bulkhead. Then, I back drilled the bolt holes from the bulkhead into the blocks just a little bit. I finished the holes on the drill press.

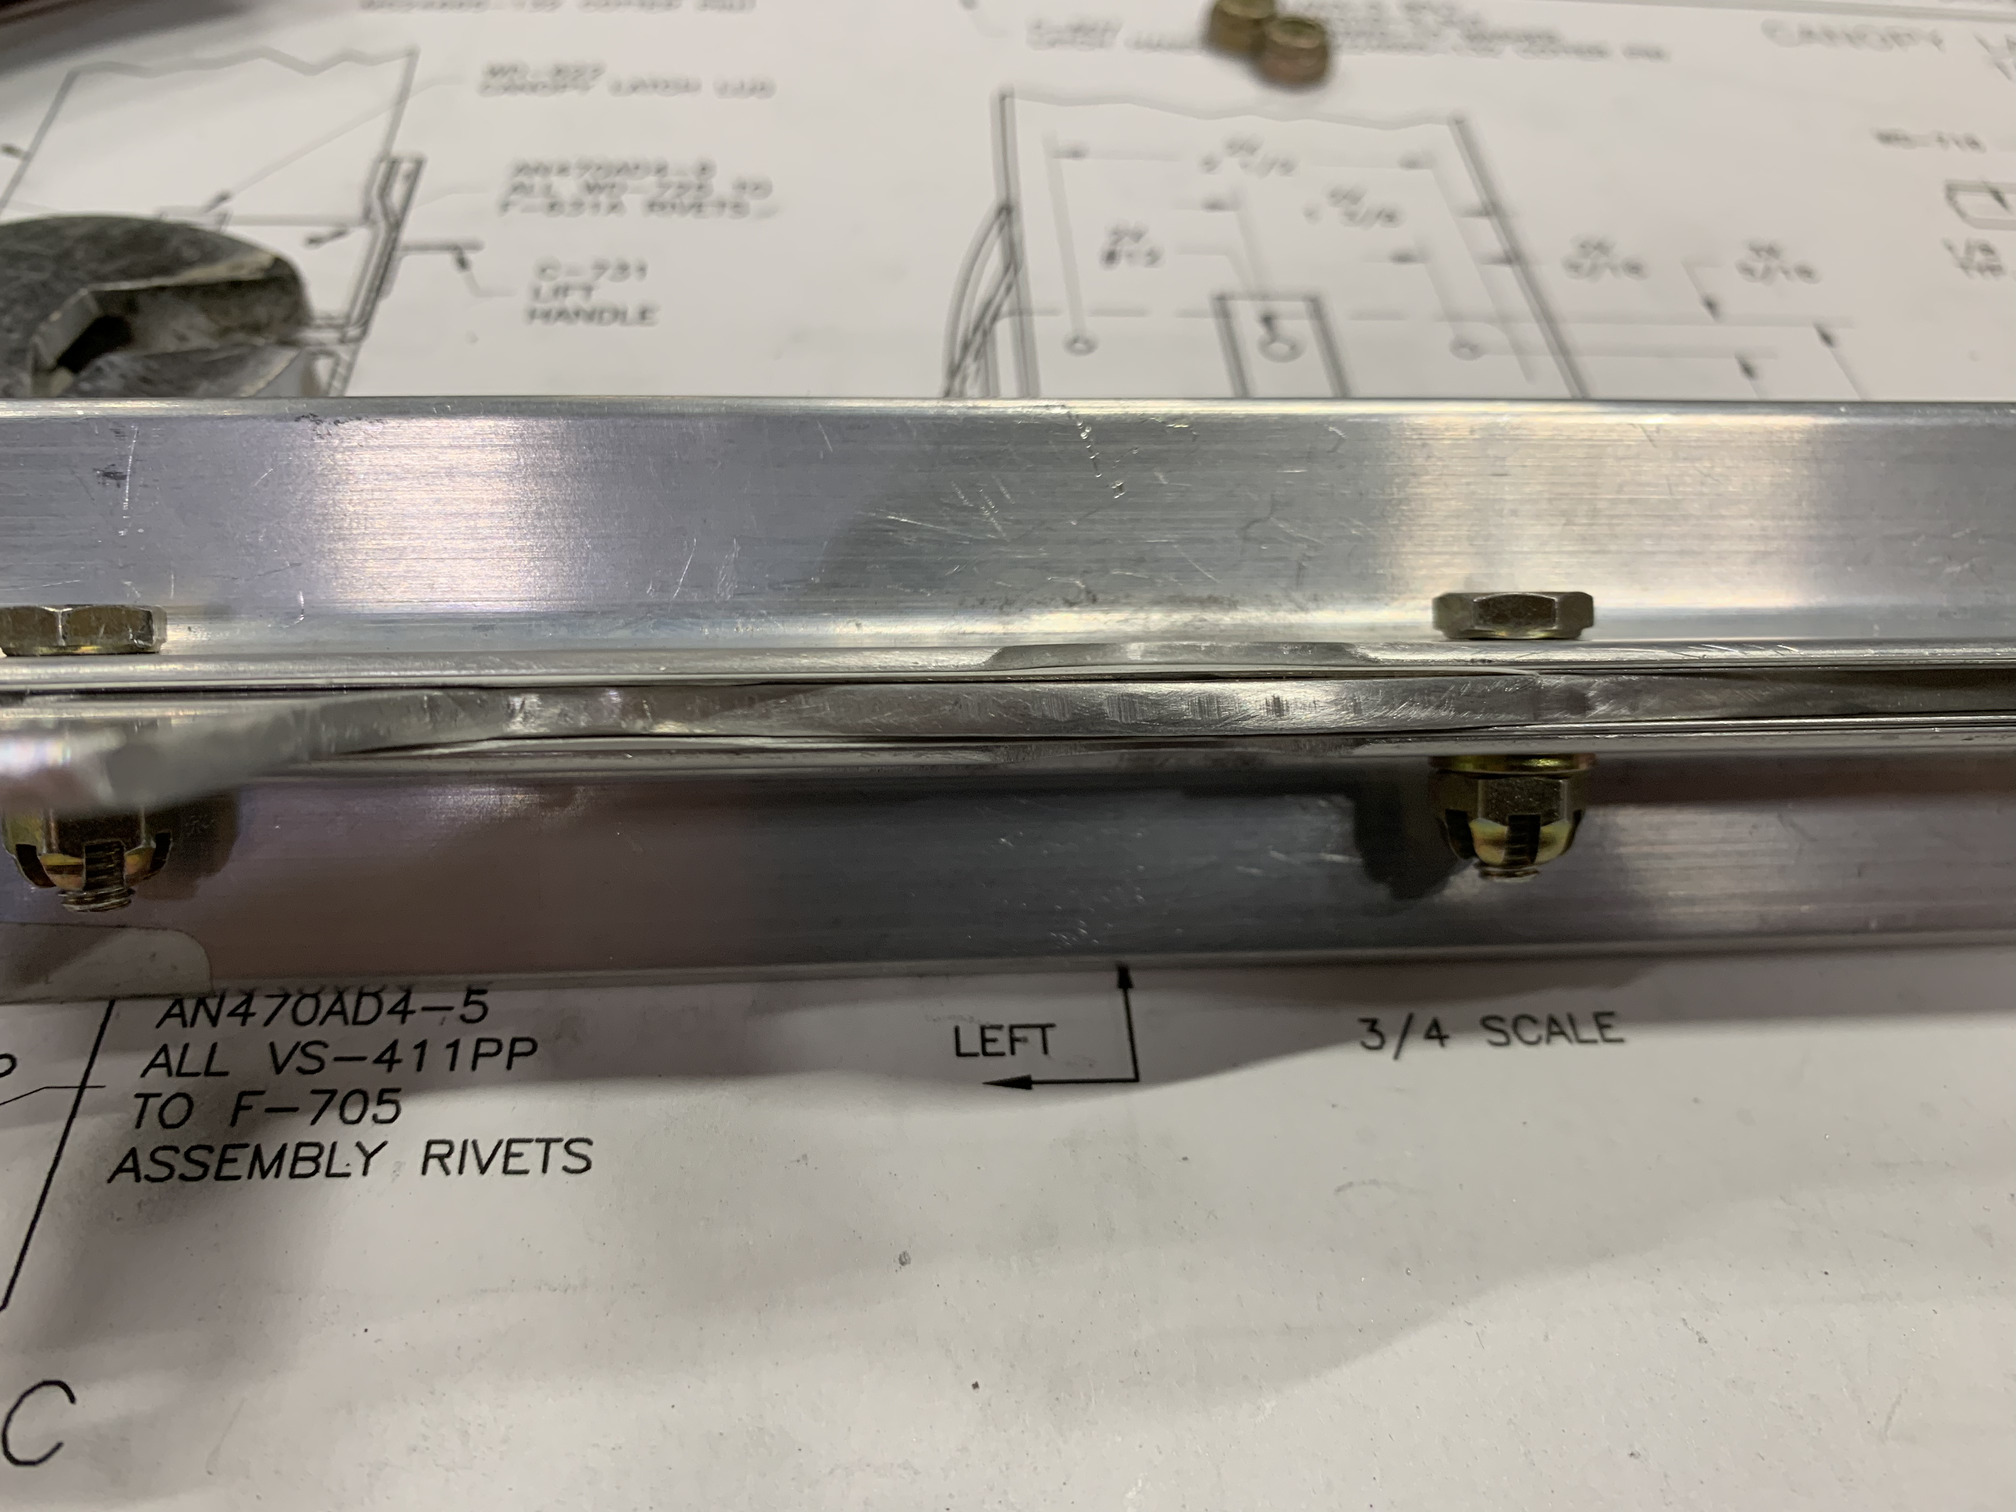
The weldment was a tight fit in the UHMW blocks, so I smoothed the ends of the weldment with scotchbrite pads. Then, I bolted the assembly in place with temporary nuts. By the way, these empty holes you see in the lower part of the picture can have rivets driven through them...they aren't used for anything else on the right side (only the left).
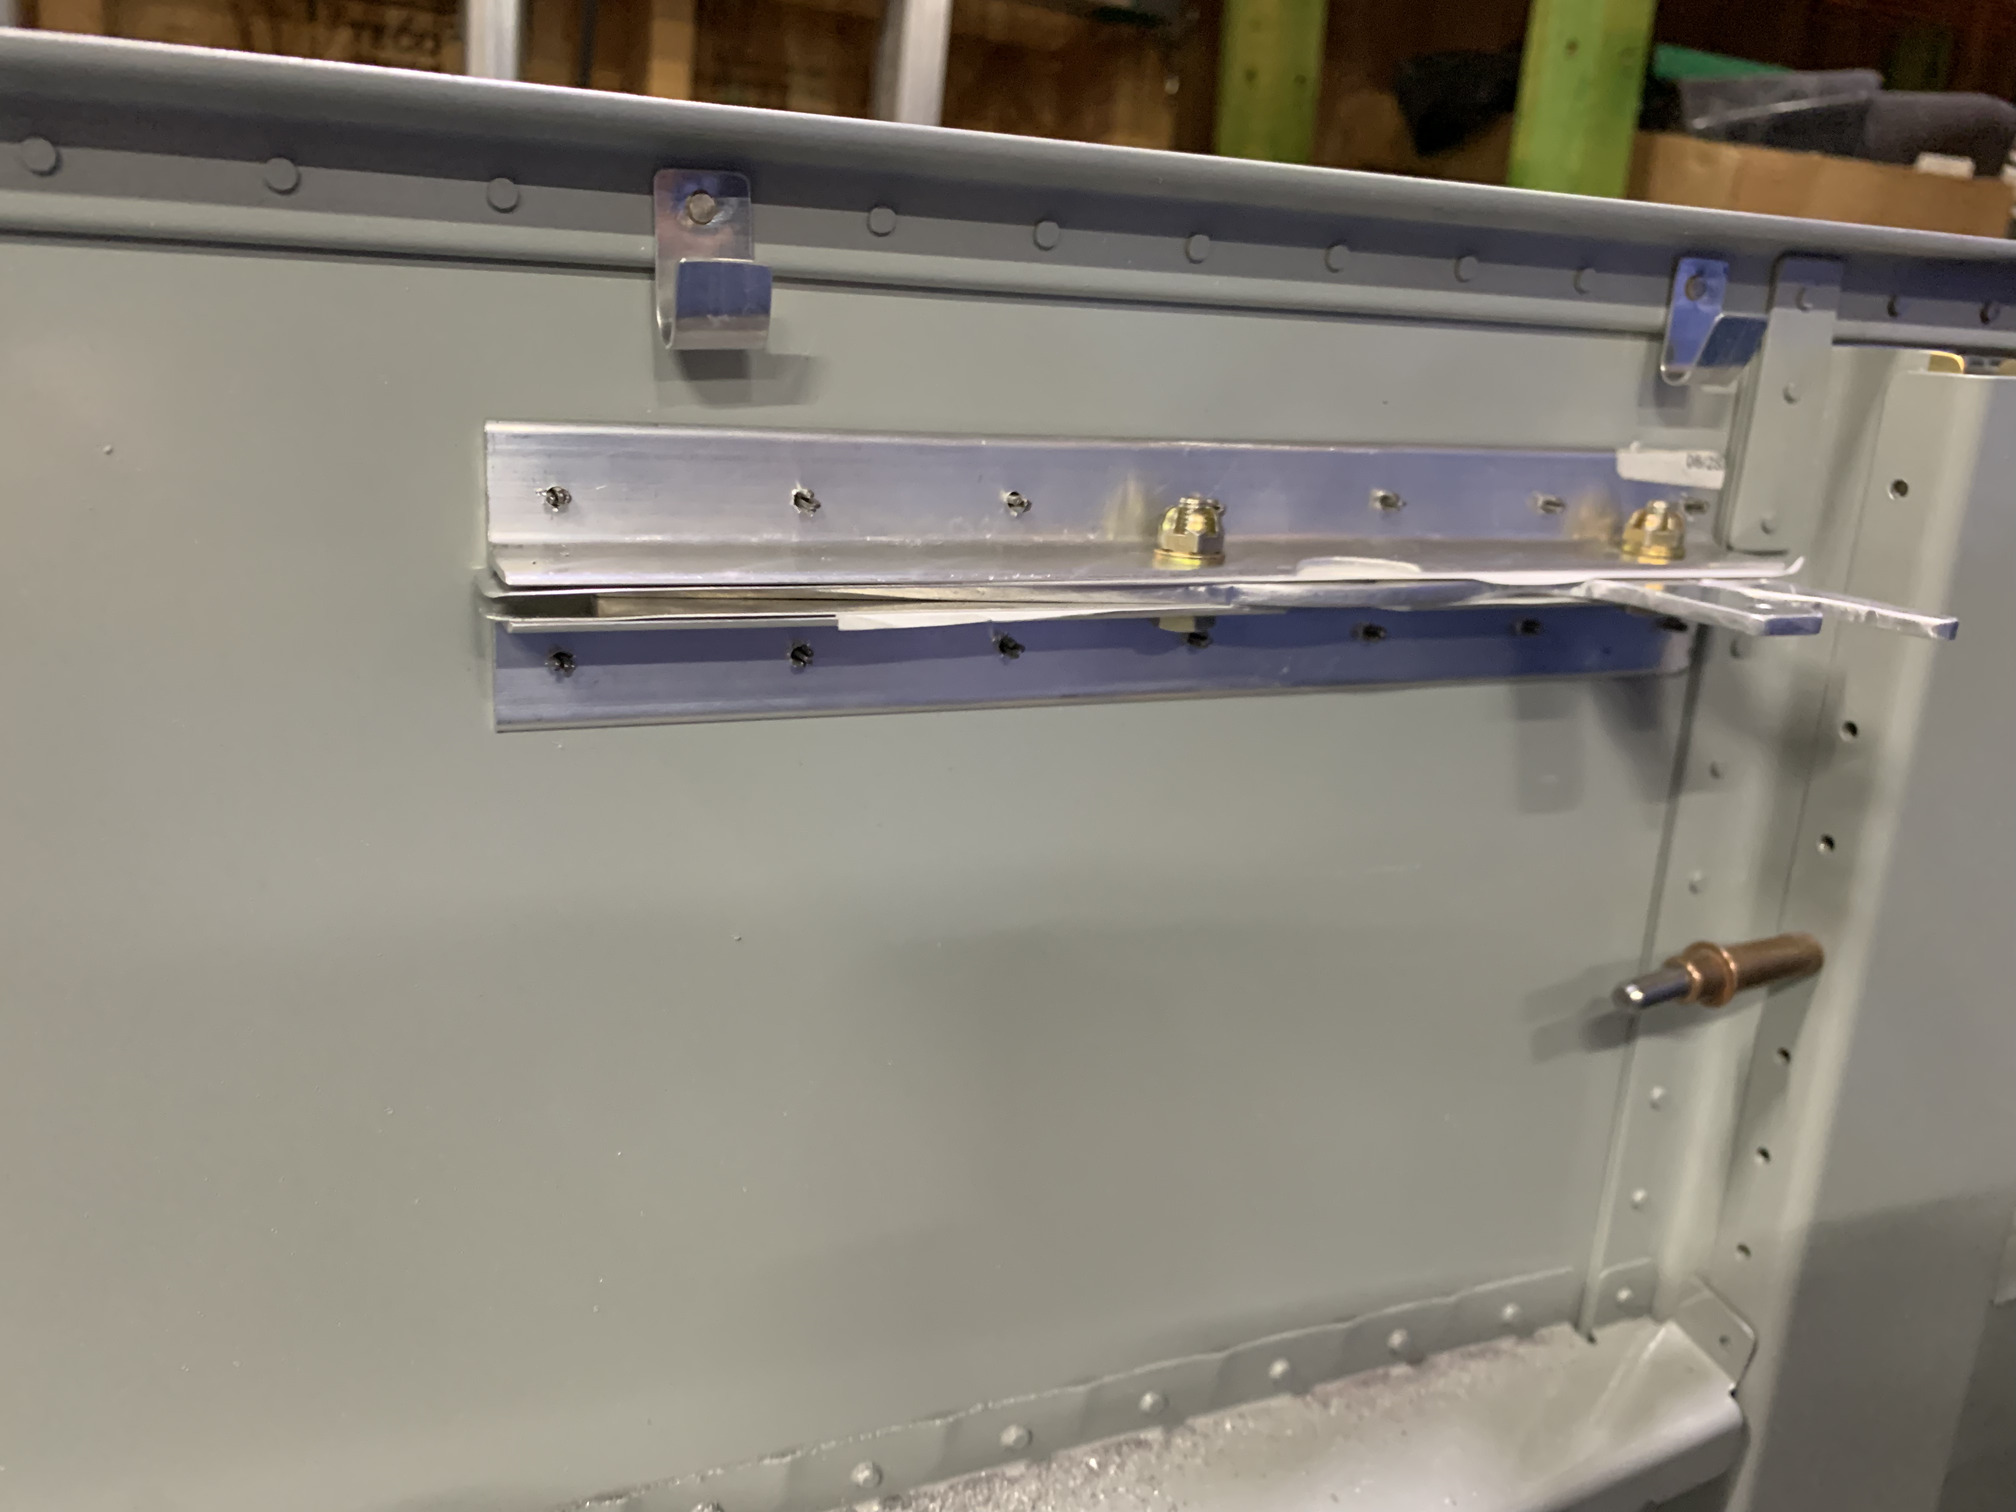
Here are the VS-411PP brackets that came with the fuselage kit cleco'd in place. I could have riveted these in place with the F-705 bulkhead a long time ago if the instructions had made it clear.
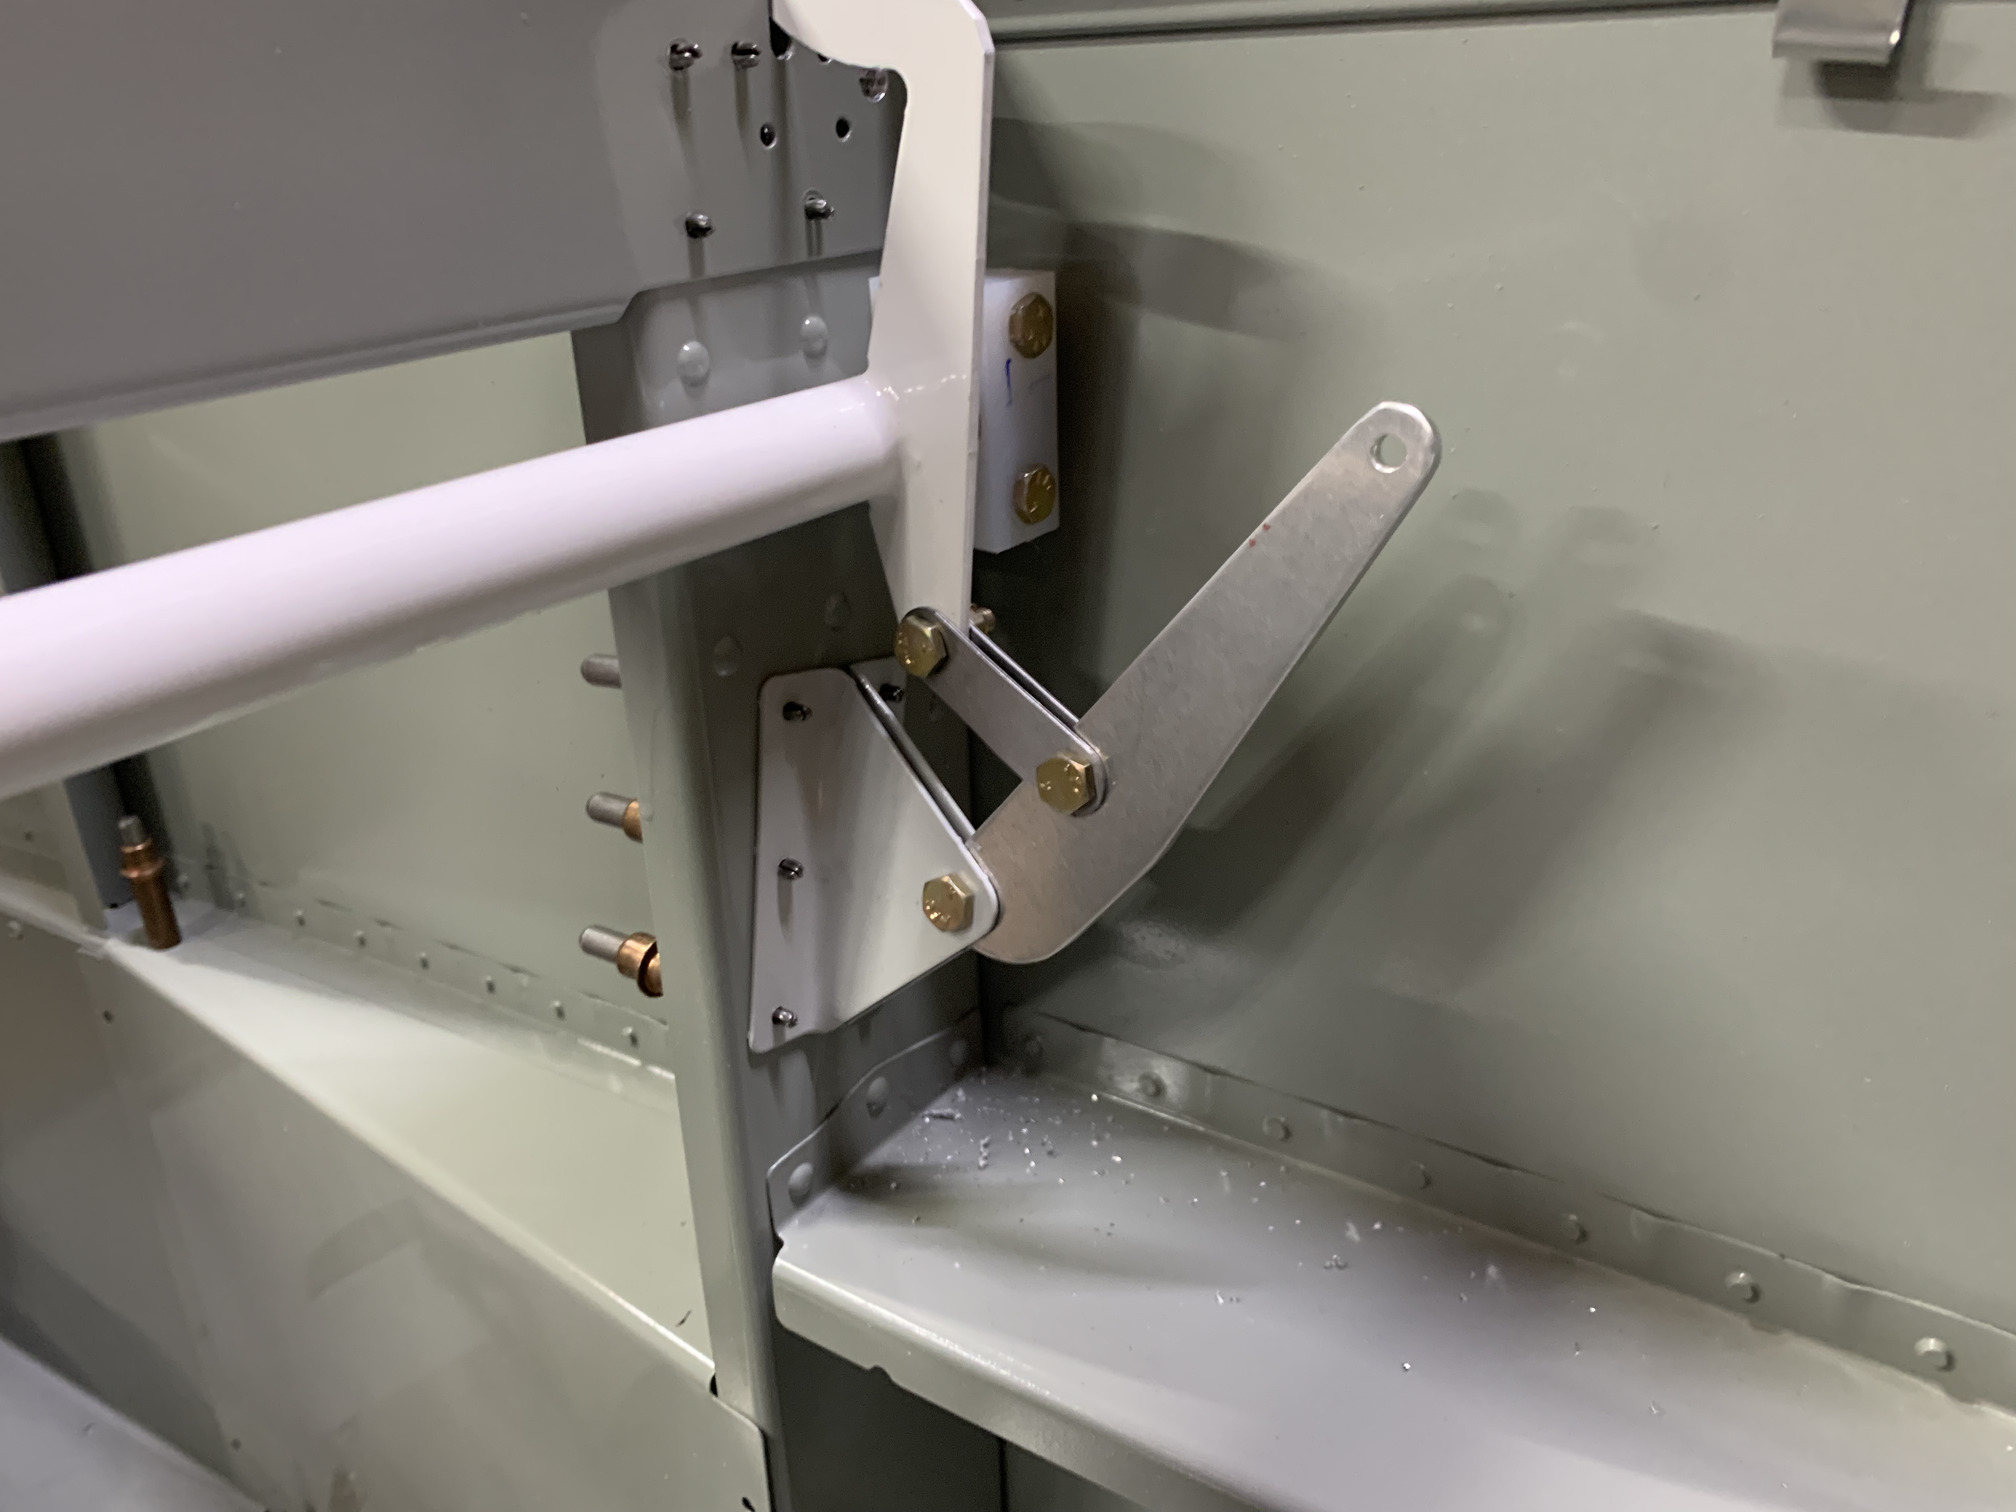
I edge-prepped C-605 and bent the C-606 links and then bolted it all together.
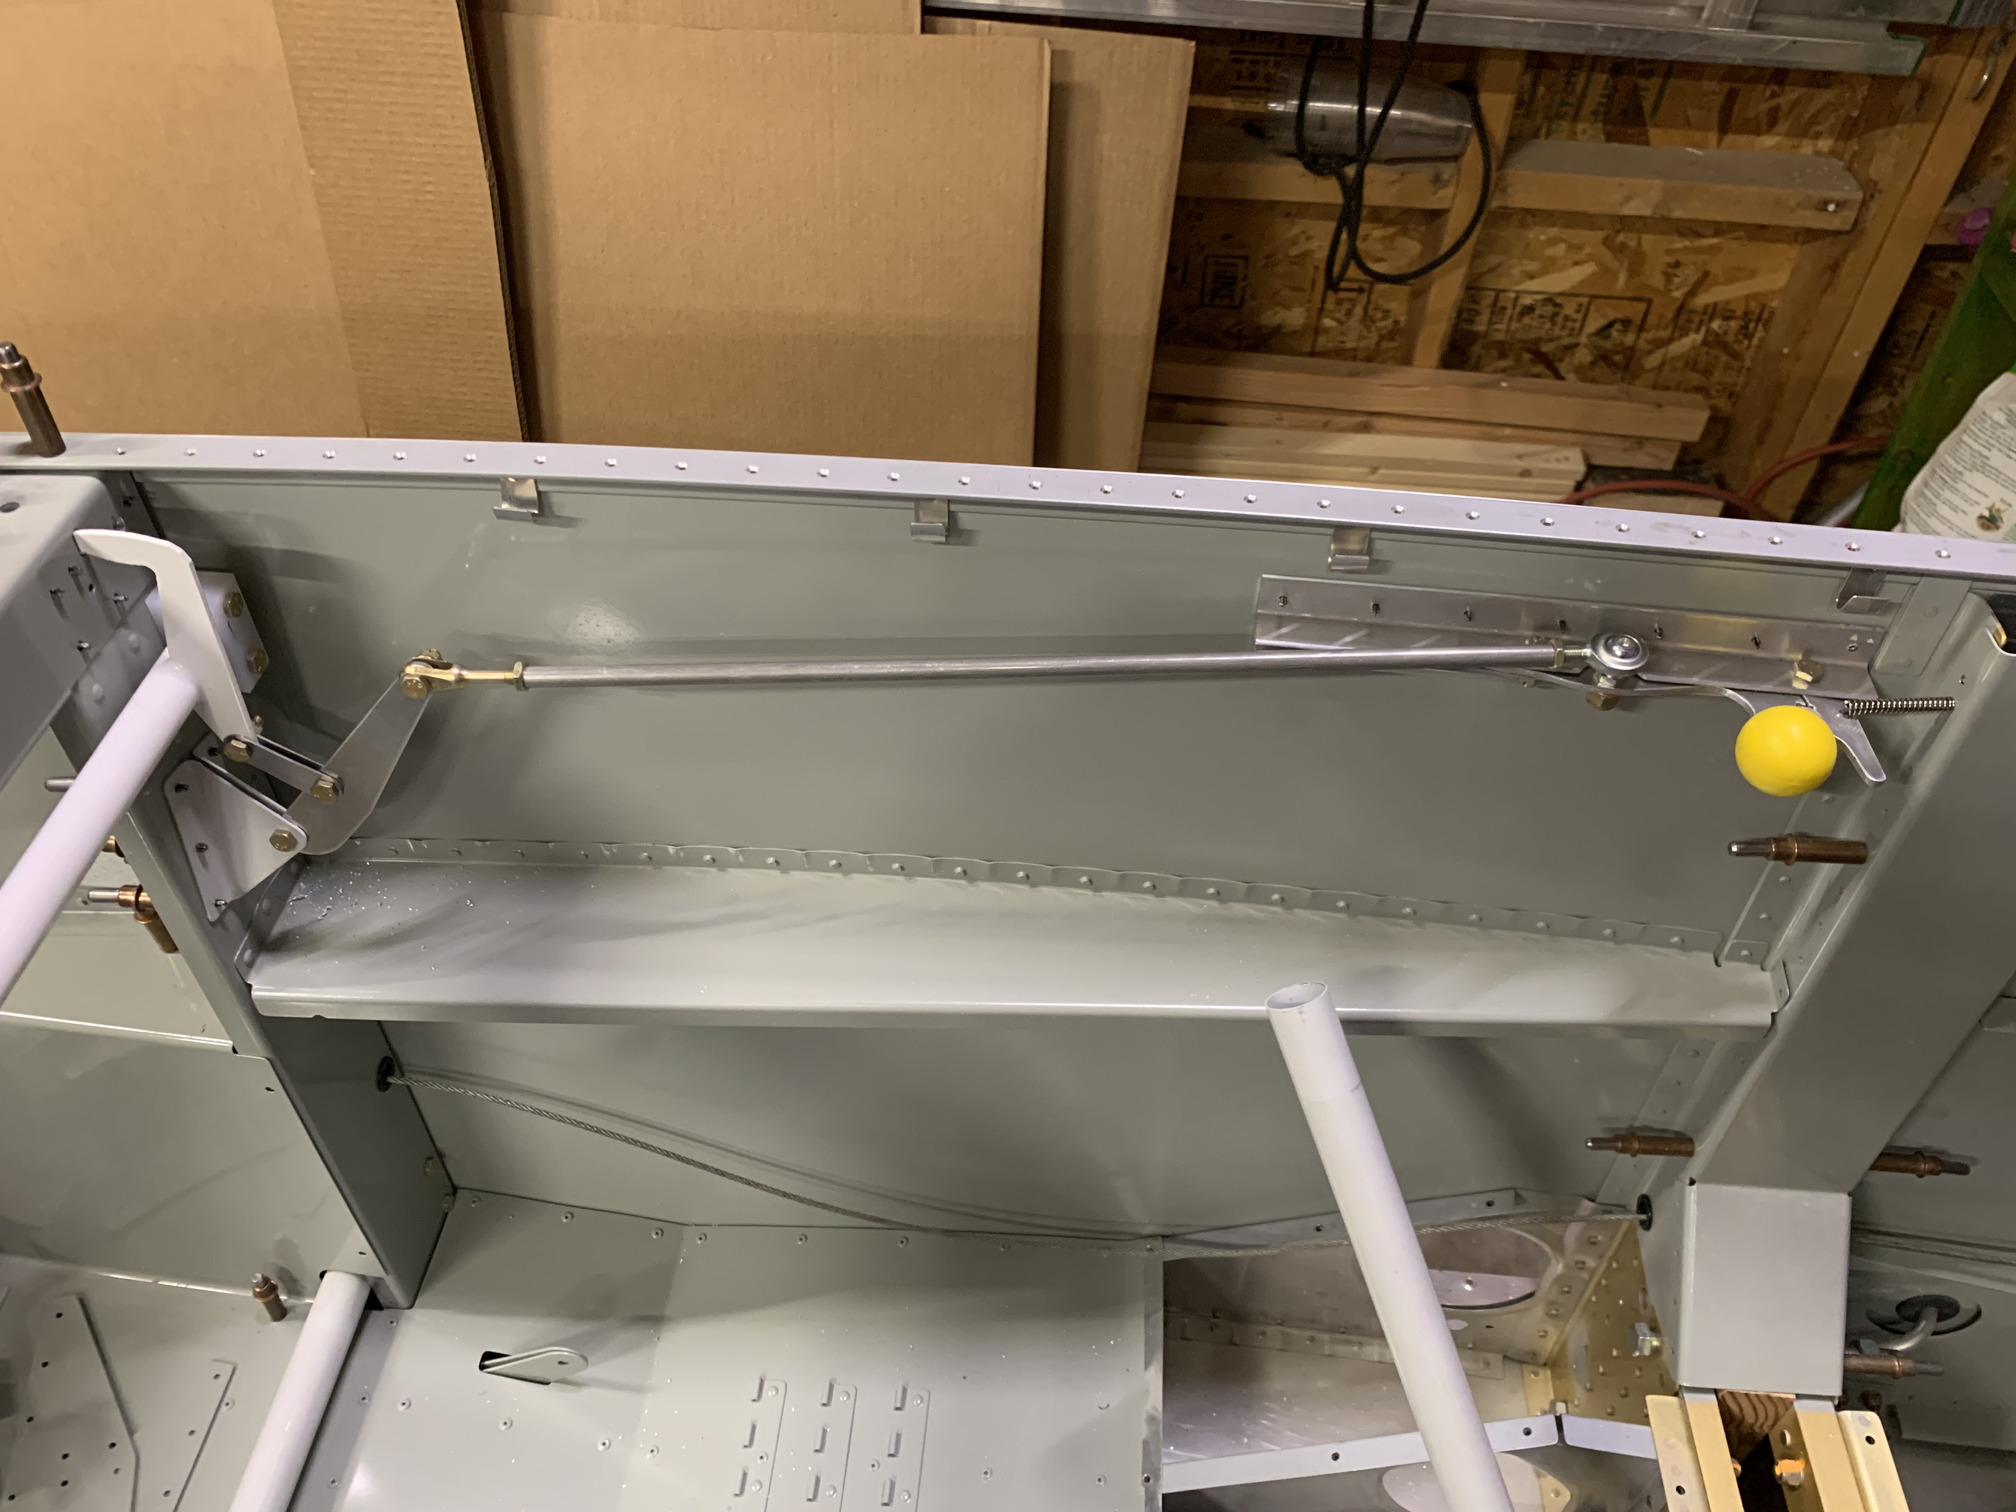
Finally, I cut the C-710 pushrod to length and tapped both ends to 1/4x28 as specified. Then, I installed the hardware in the ends and attached the pushrod to the C-605 and C-607. Here is the entirety of the latching mechanism in the latched position. The canopy has lugs that get held down by the fingers on the weldment.
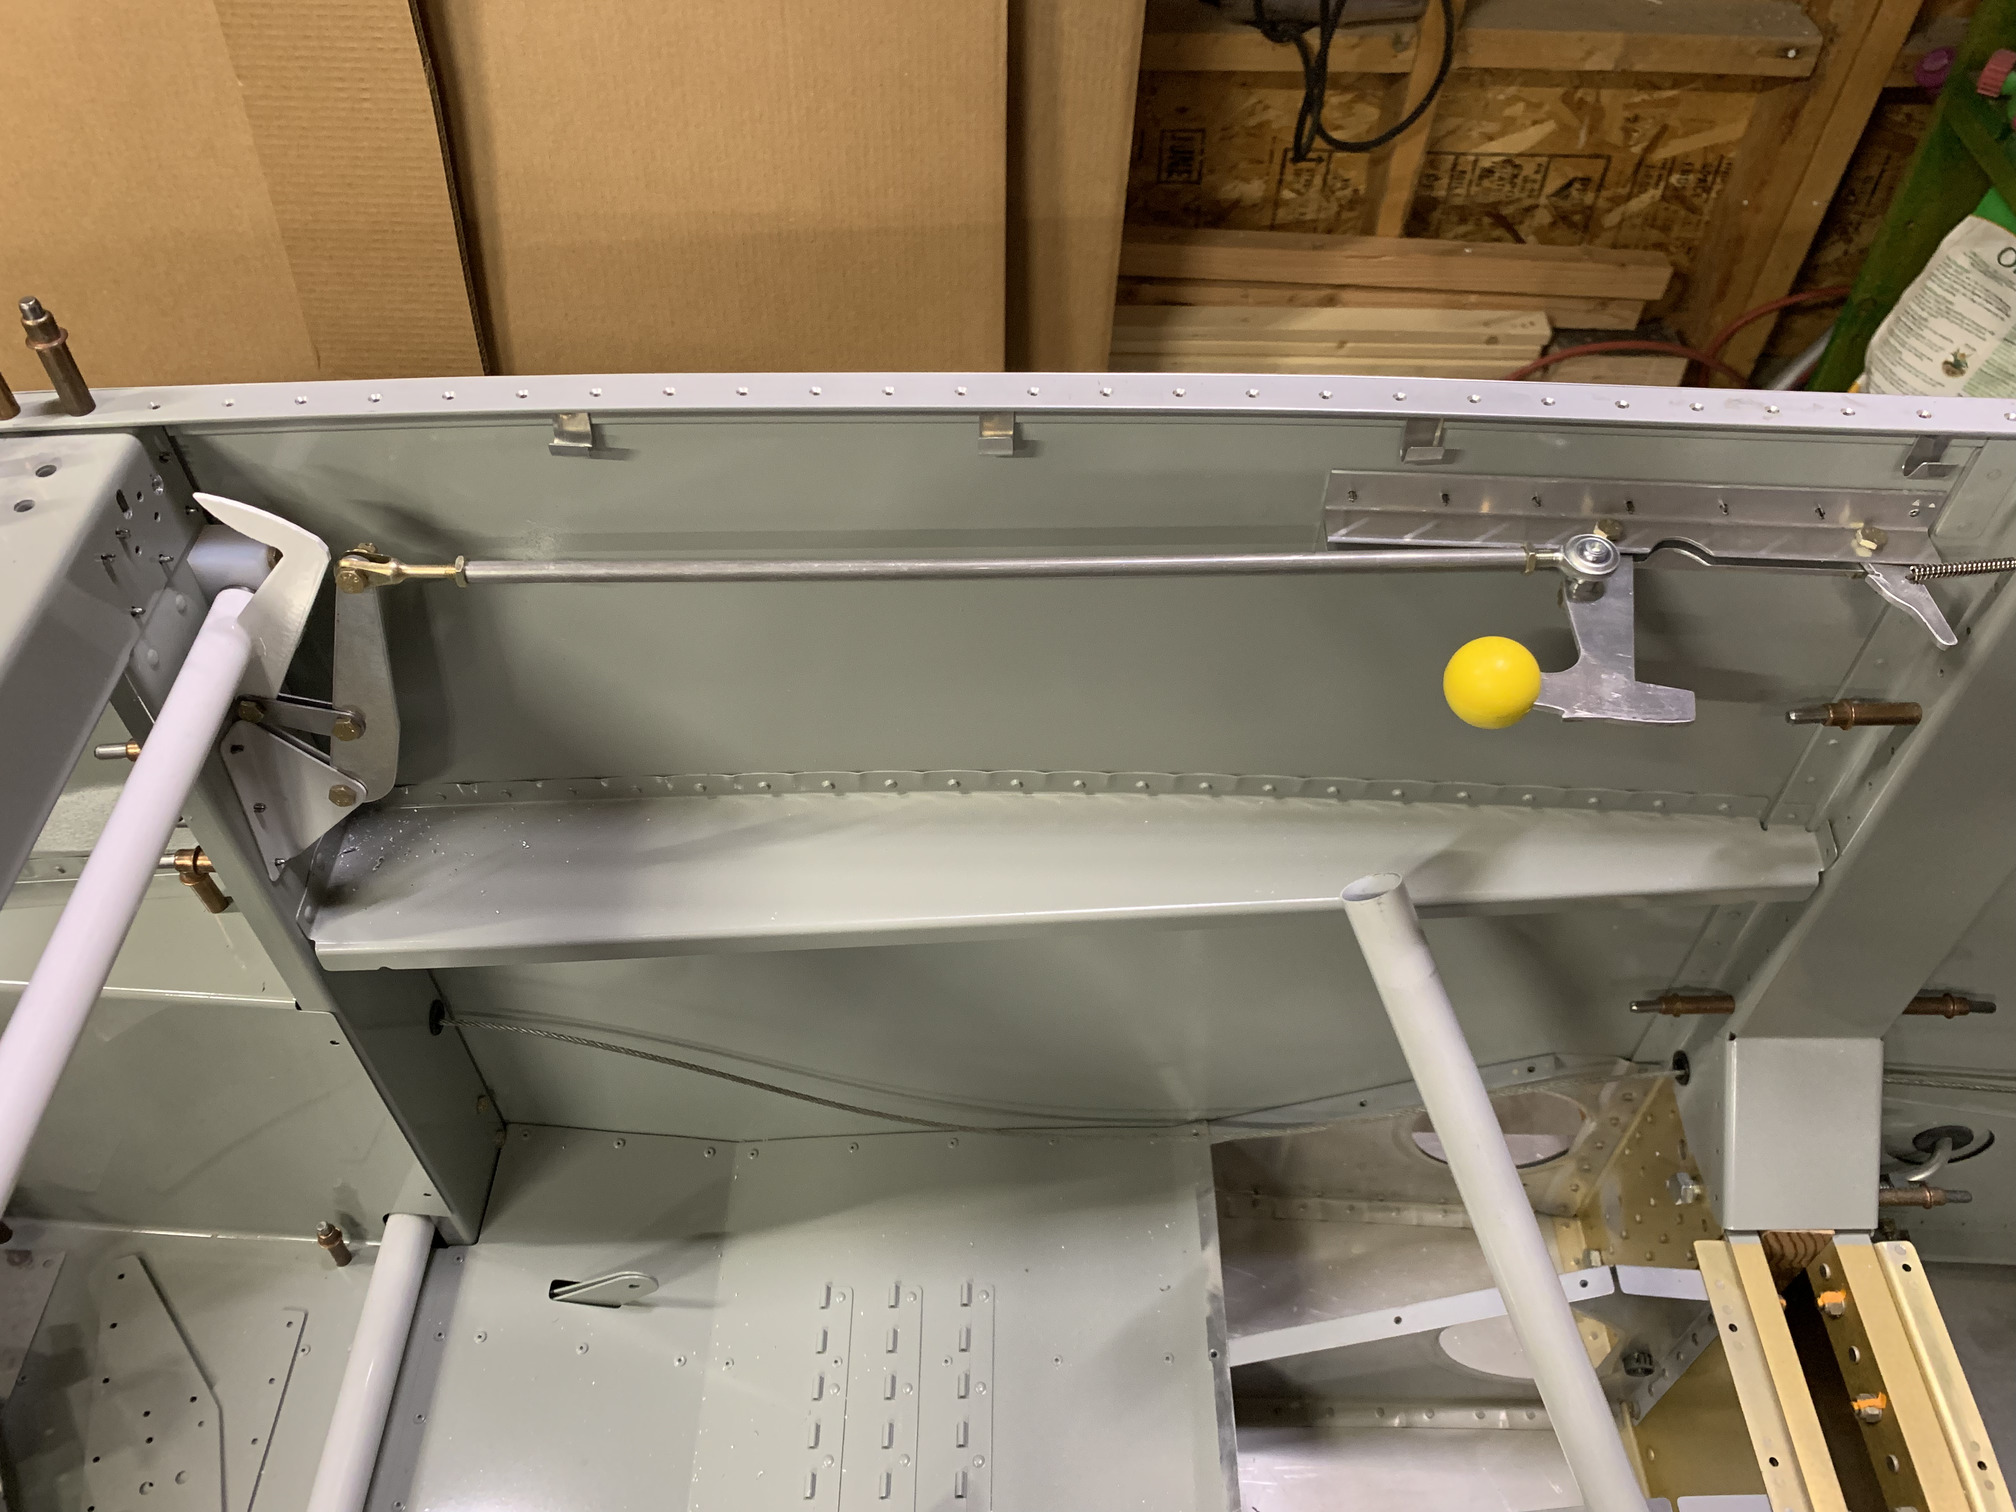
And here it is in the unlatched position.
These parts all need to be taken apart and then primed/painted. Then the latch angles and the remaining rivets in the F-705 bulkhead can all be riveted.
| Previous - Index - Next |
This work is licensed under Attribution-NonCommercial-NoDerivatives 4.0 International![]()
![]()
![]()
![]()