Log (By Day)
Log (By Category)
Pictures
Pics of Me Working
Links
Friday October 27, 2023
Cockpit Fit Testing, Panel Planning, Left Seatback Modification
(Center Fuselage)
1.8 Hours
| Previous - Index - Next |
I'd recently gotten it in my head to do a fit test in my plane with the seats and my canopy. I'm tall, at 6'5", but I had done a fit test in the Van's RV-7 at Oshkosh before I started building, so I wasn't tooooo worried.
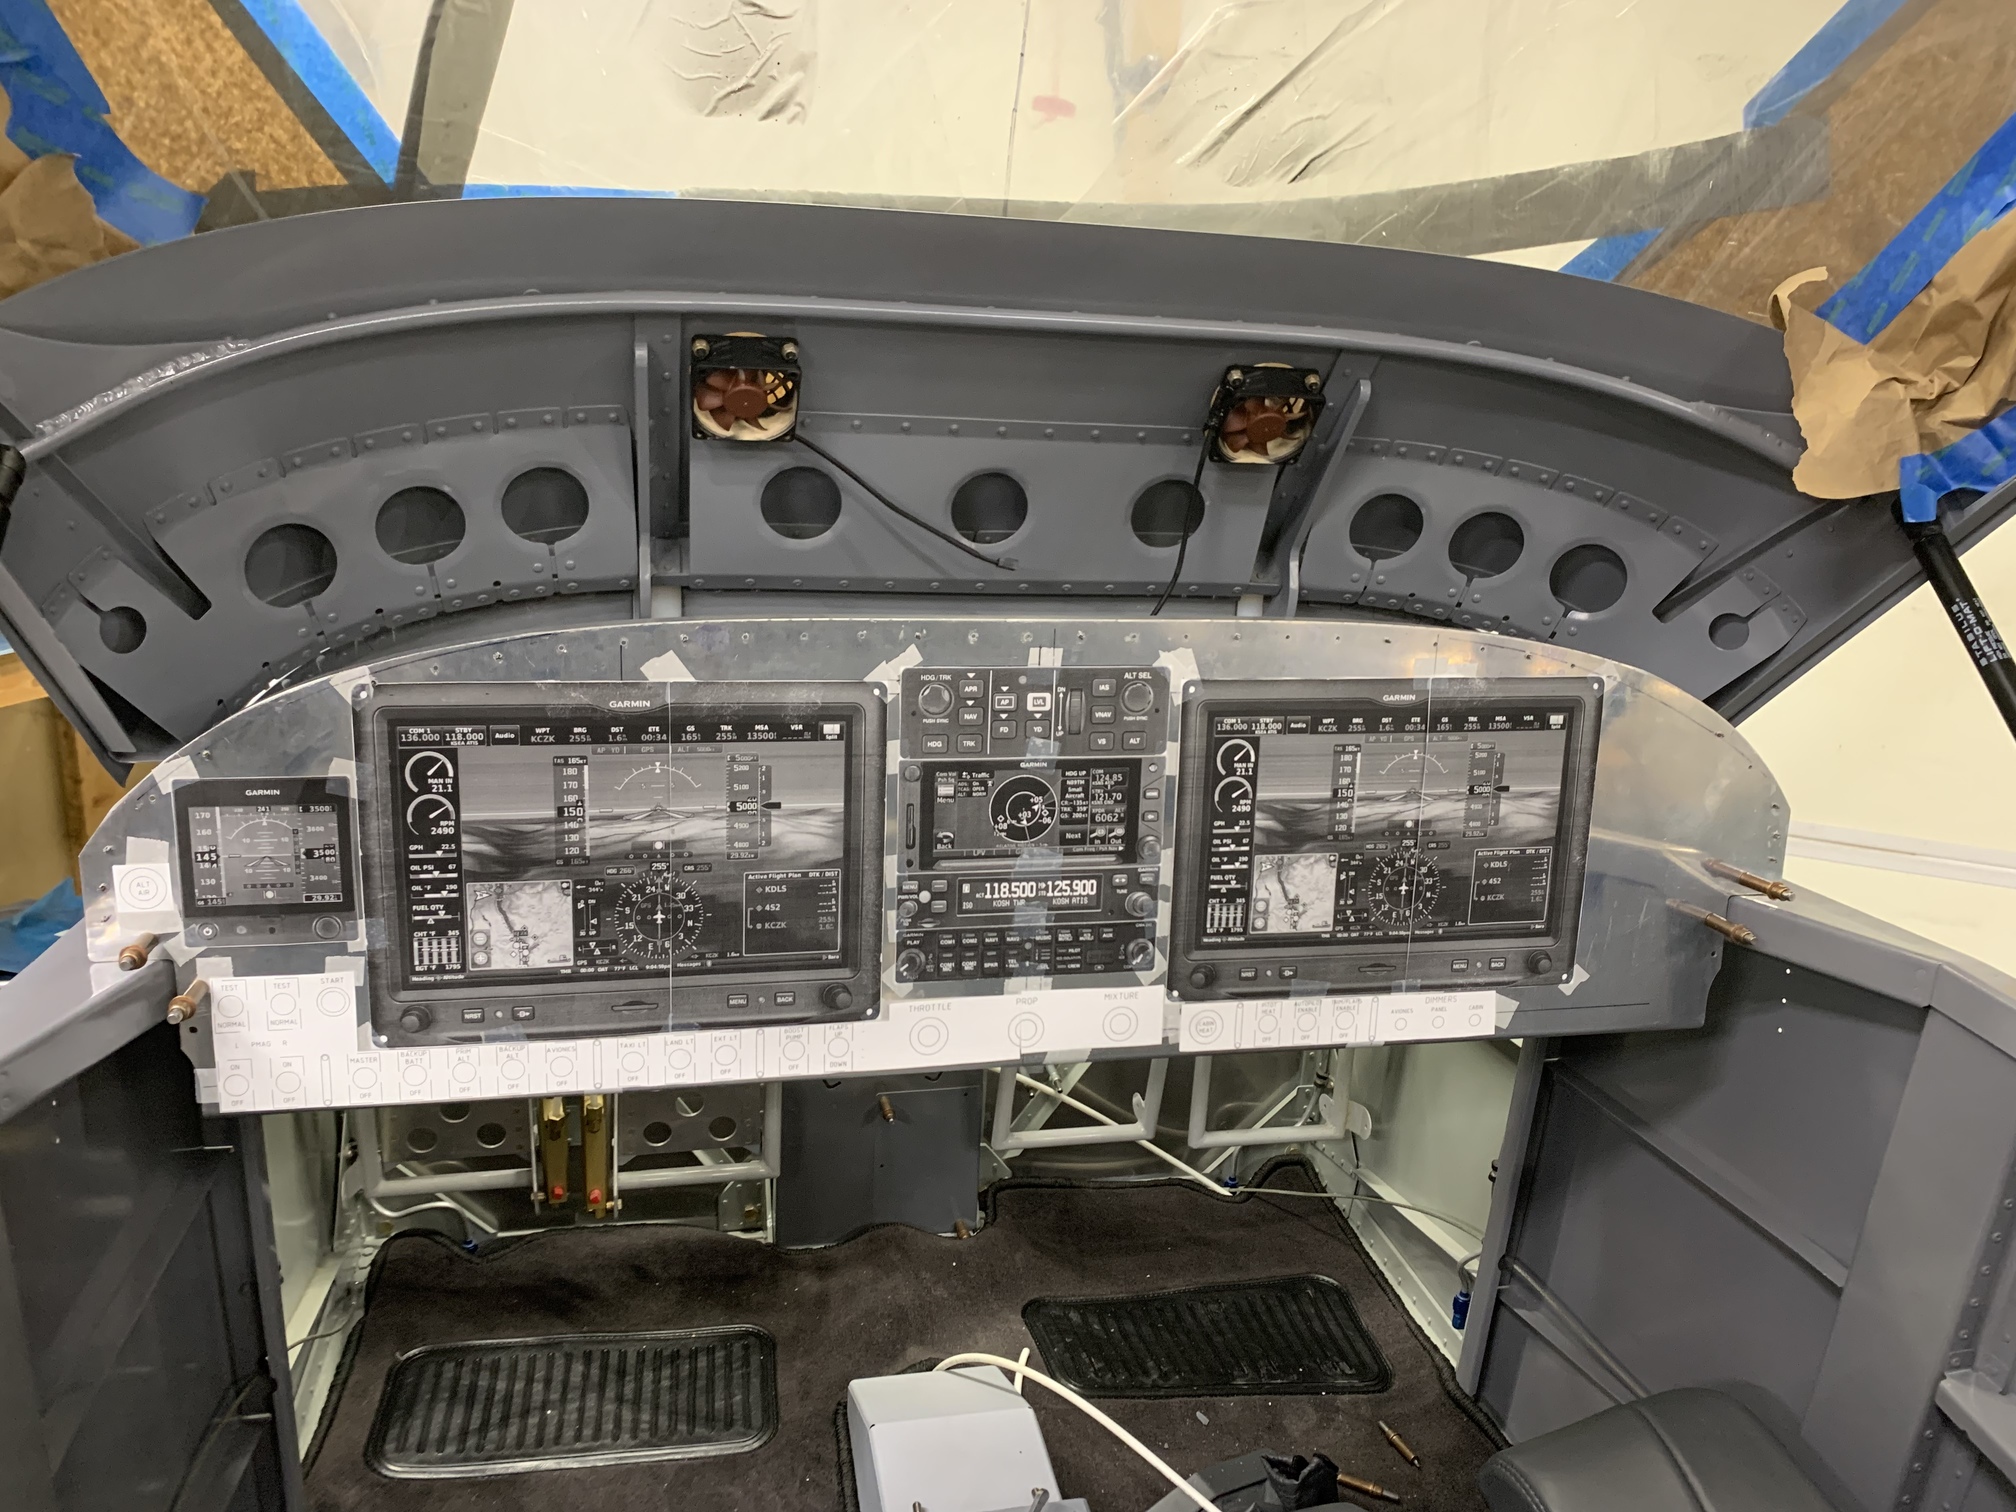
I put the panel in place, temp installed the canopy, and put the upholstered seat back and seat cushion in the plane.
I positioned the rudder pedals somewhere close to neutral and placed one of the vent brackets in place. Leg room seems good...my knees don't come too close to the panel or vent brackets.
At this stage, it's a very compact and tight panel with a lot of functionality. I'm sure I'll make a few more changes, but I'm quite happy with it at.
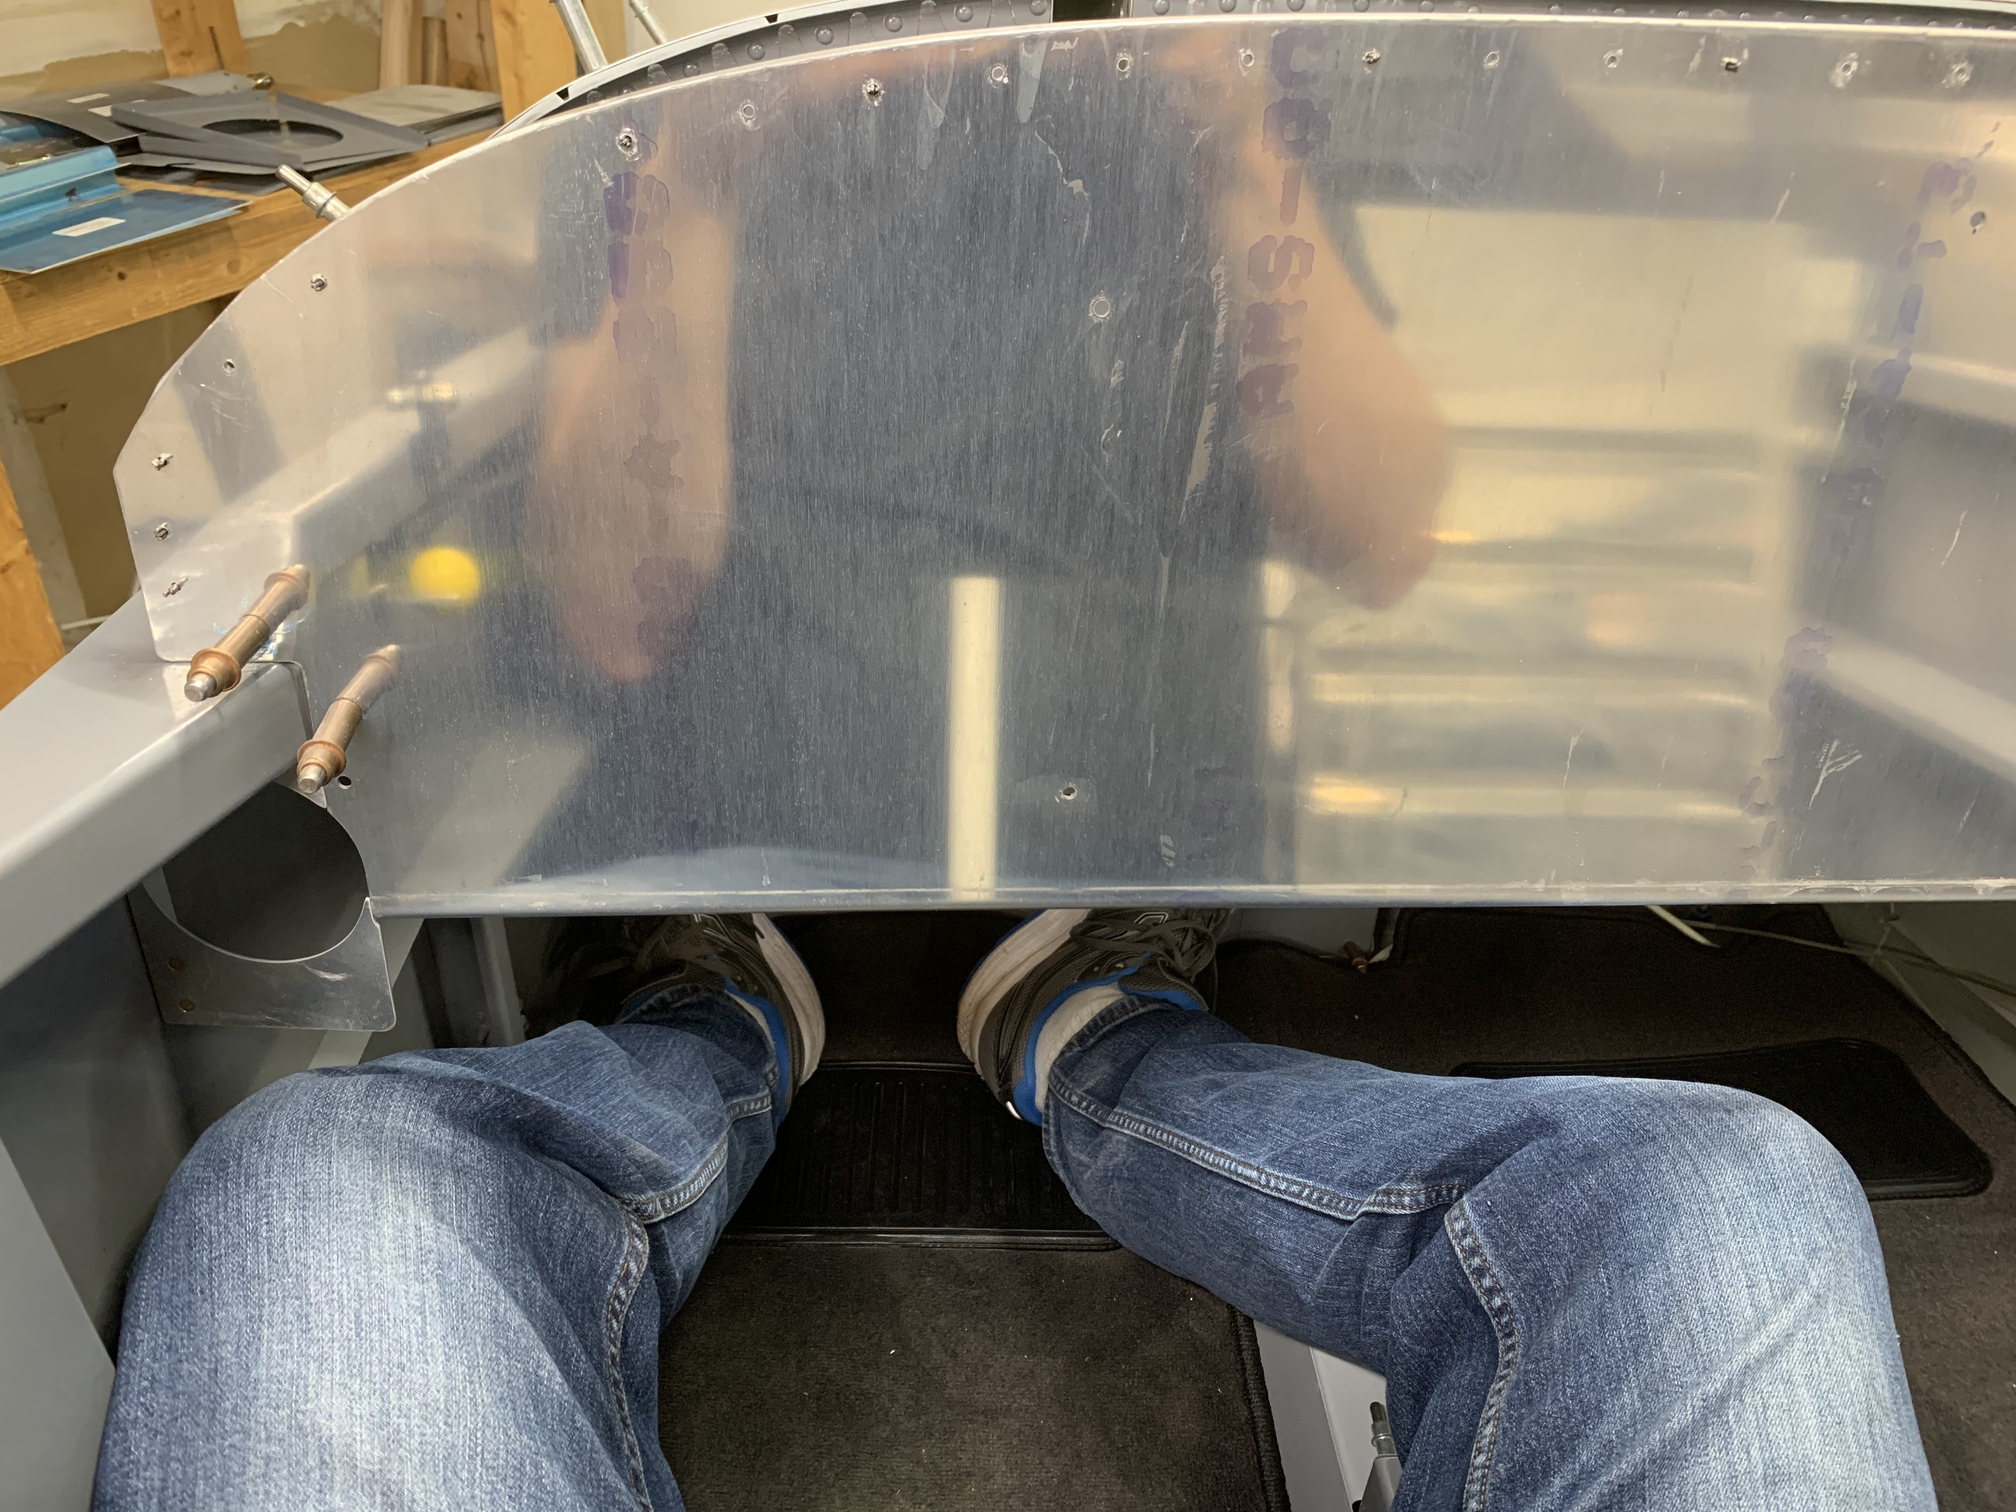
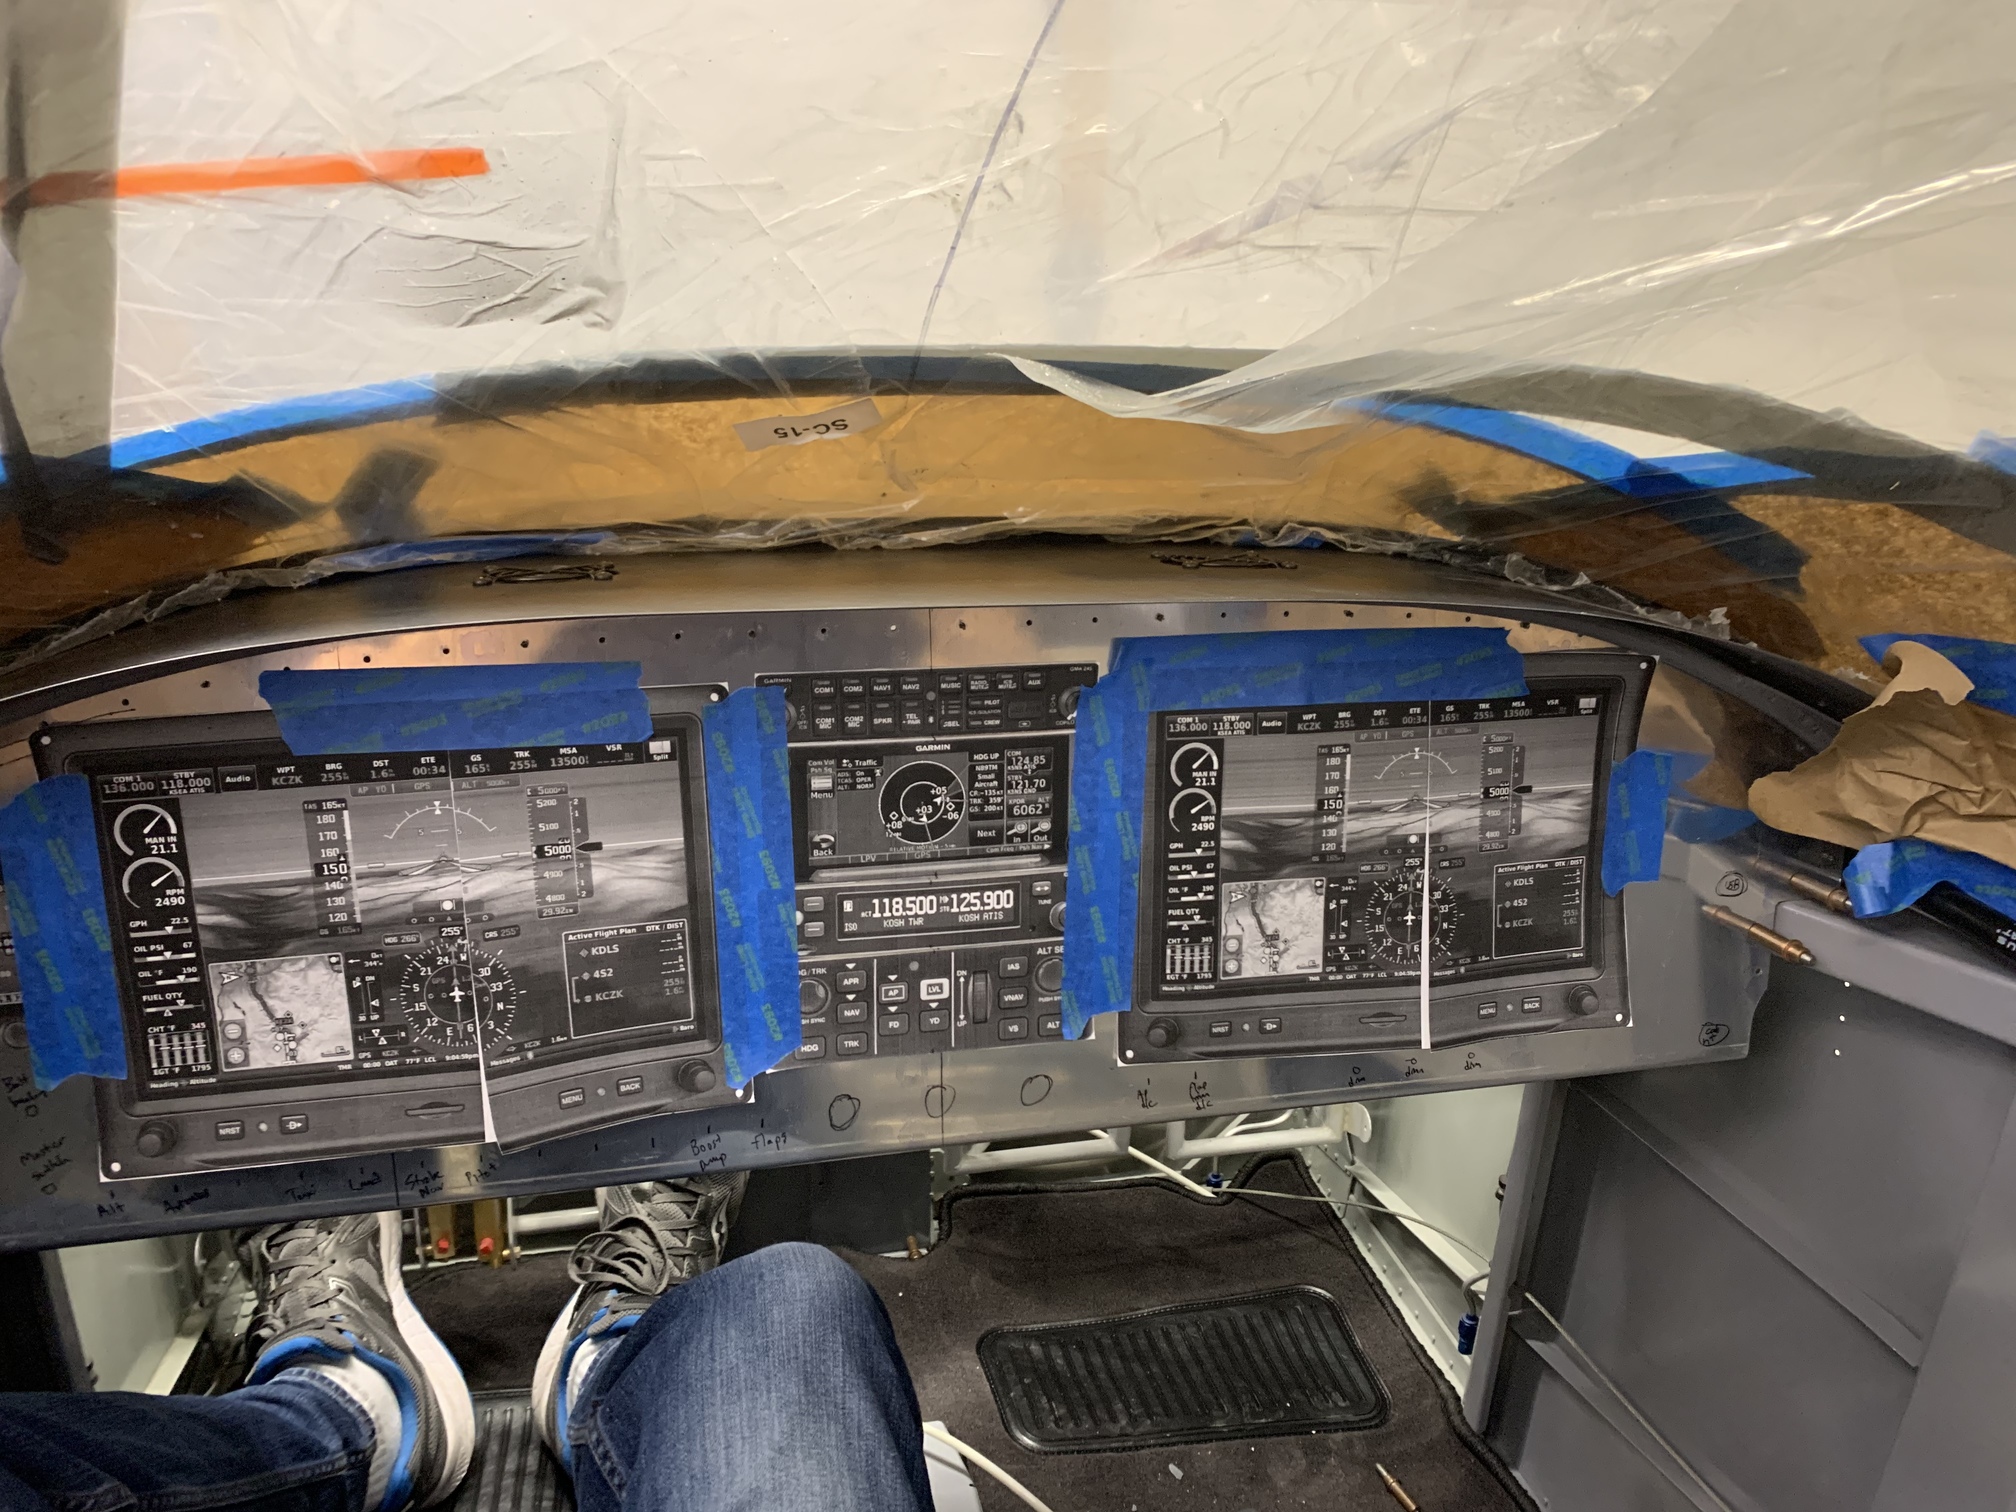
Head space is another matter. I fit...but just barely. There would definitely be no space for the band on my headset. If I sit up straight, my head touches the canopy. This picture doesn't do a great job of showing the issue.
I'm going to attack this issue from two directions. First, I pulled out the seat back brace and just let the aluminum seat rest against the bulkhead, which gives me a little more aft "lean" to the seat and helps a bit with the head to canopy spacing. Second, I'm going to order another seat bottom cushion with 0.5" less memory foam, which should get me a little bit further from hitting my head. I may still end up having to use a "no headband" headset like the CQ1 in-ear headset, but we will see.
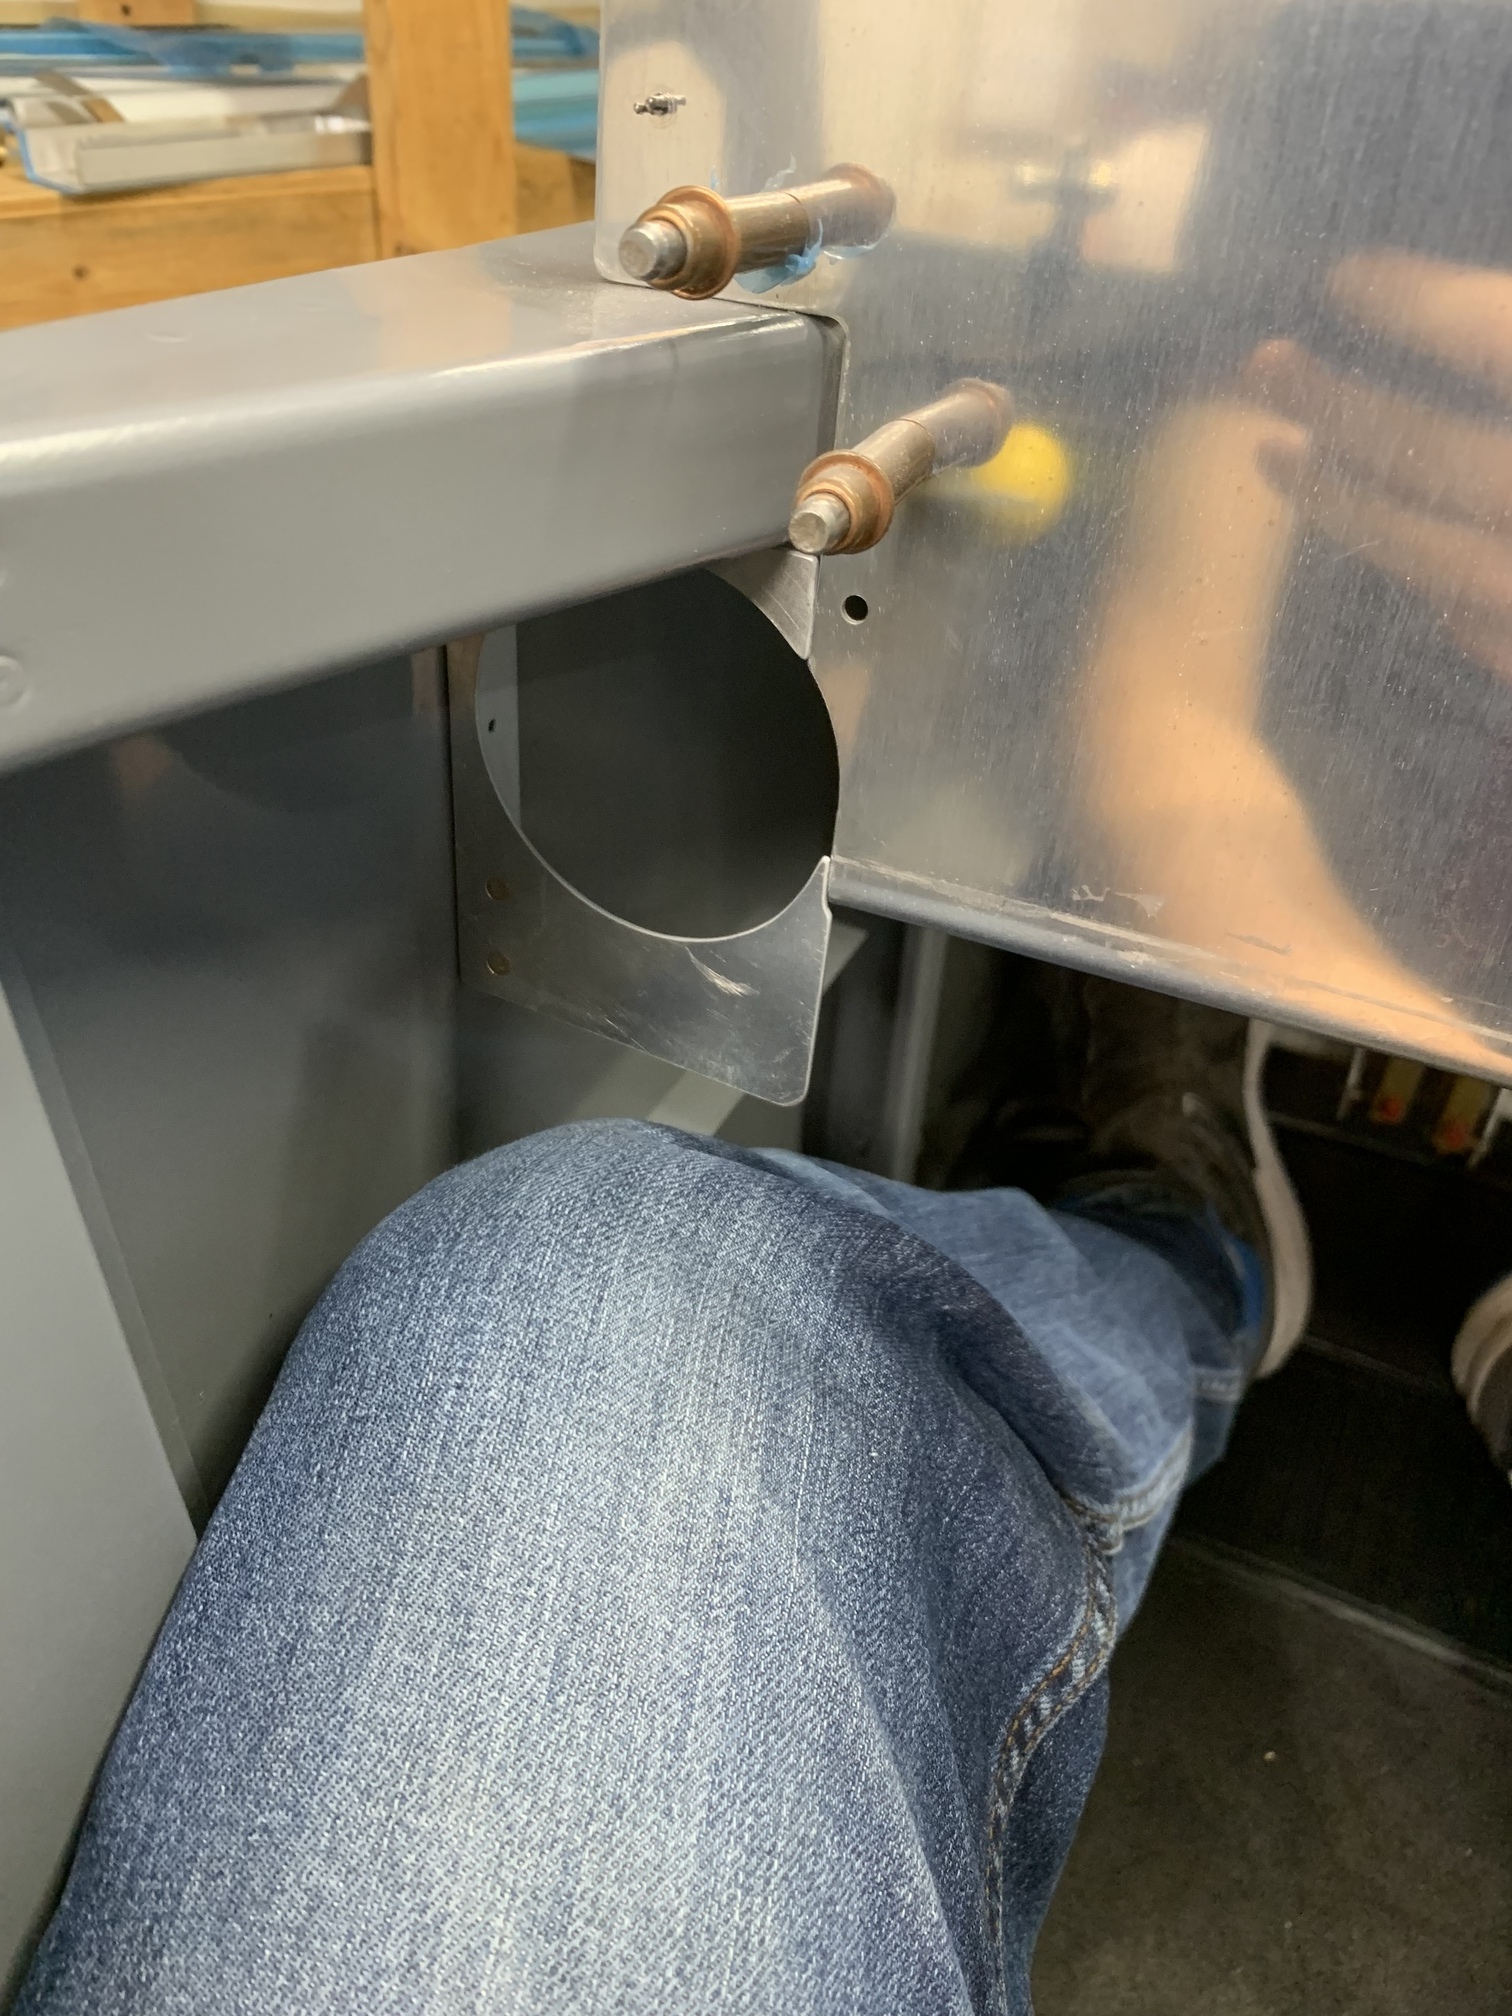
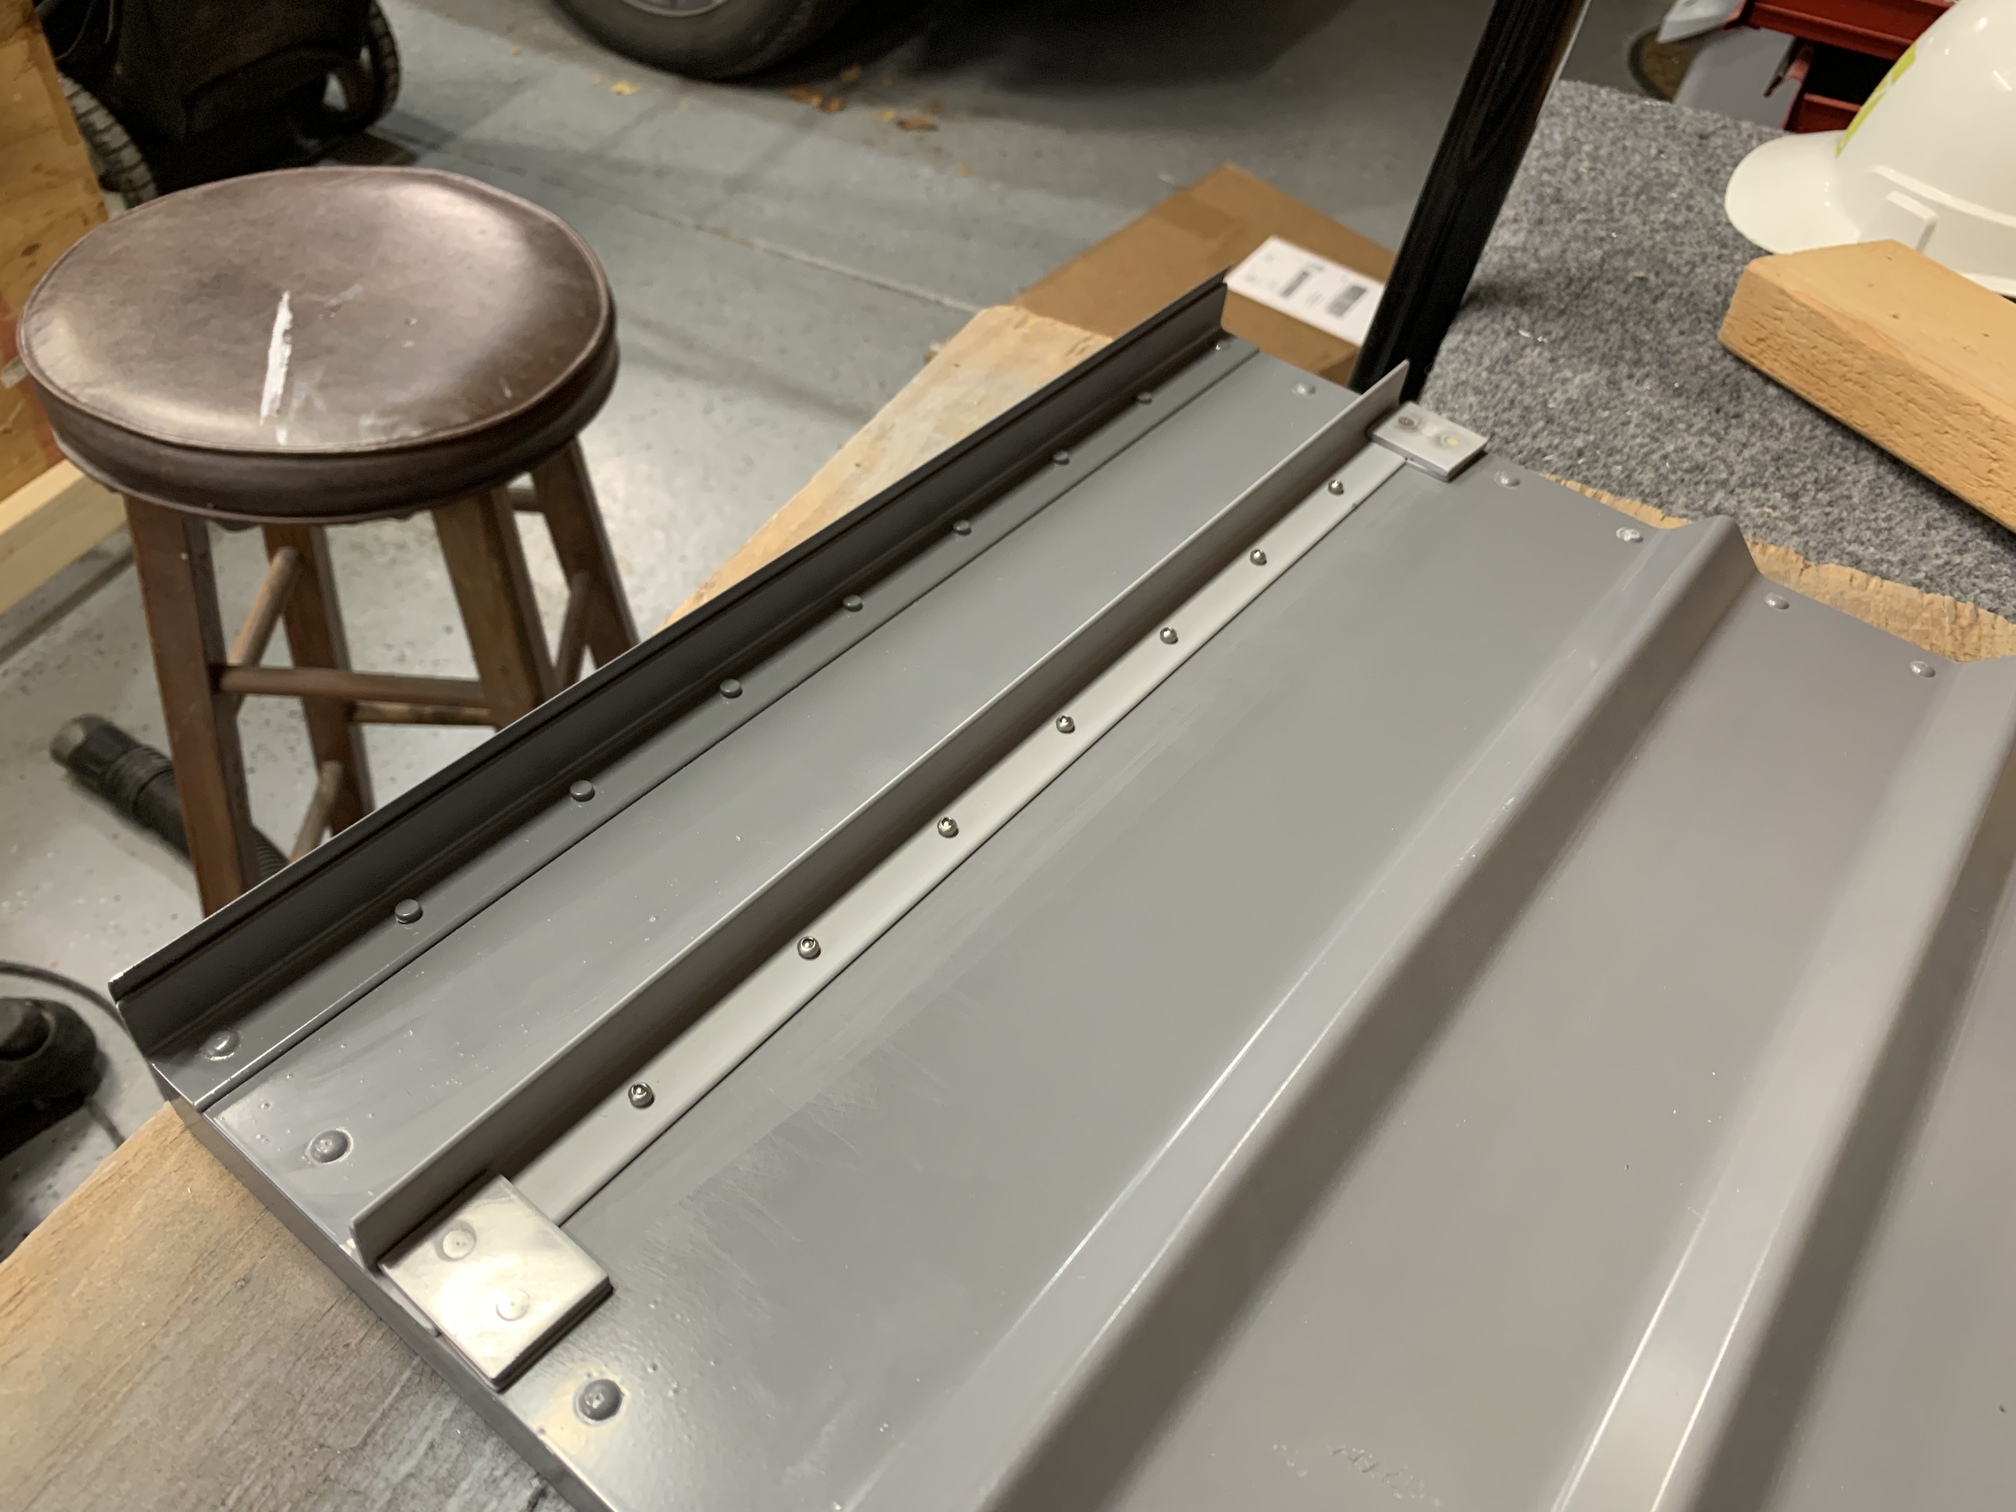
Having settled on not using the seat back brace, I decided to modify my left-side seat-back to permanently rest against the bulkhead. I drilled out the hinge from the seat back brace.
In place of the hinge, I installed a piece of angle with a couple of spacers on the outside edges where the seat will contact the bulkhead. This gives two strong points for the seat to contact the bulkhead and lifts the seat away from the canopy latch weldment that runs right between the seat and bulkhead. It also prevents the shop heads of the blind rivets from touching the bulkhead.
I'll leave the right-side seat in the normal configuration where the seat back brace is inserted into a tight slot on top of the bulkhead; that way it won't move when I'm flying solo. I don't expect many, if any, of my passengers to be as tall as I am.
I've also been working on designing my panel. I've basically settled on a Garmin G3X system with two 10" displays as well as a G5 for backup. In the center will be a GTN 650xi GPS navigator and a GTR200 backup/secondary radio in addition to an audio panel and the G3X autopilot panel. I started with a pretty basic layout on the actual panel using printouts and drawing in the spots where I thought the switches would go.
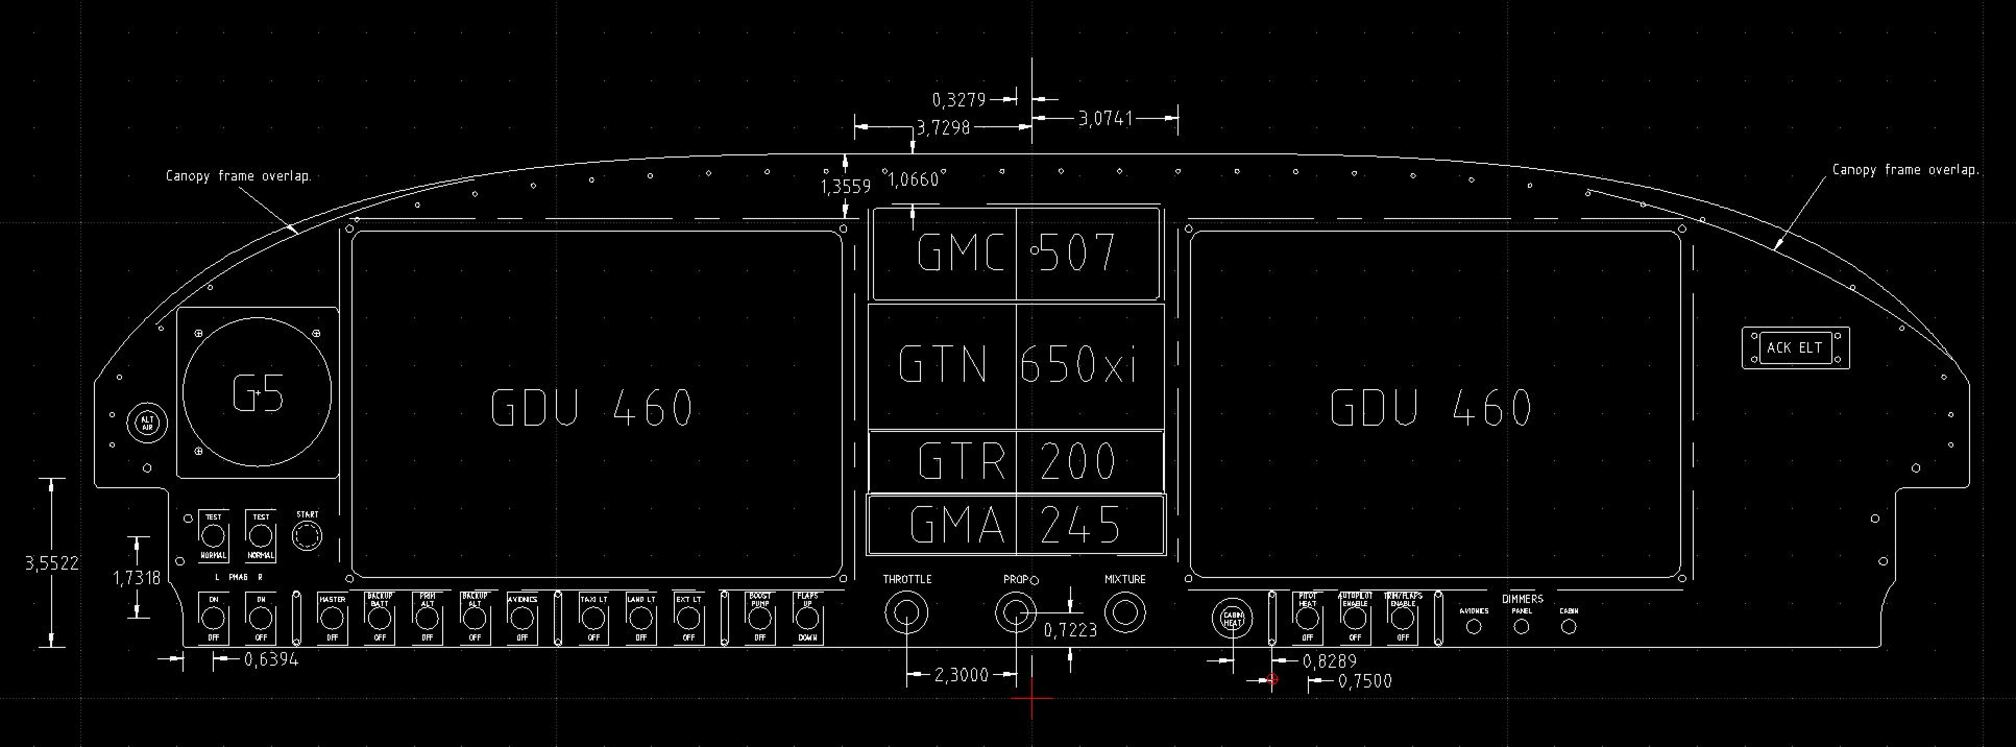
I needed something much more precise and easier to move around, though, so I started a project in CAD. I don't have any CAD experience, so this was all learning on the fly. There were quite a few issues to work through with this.
First, the RV-7 panel CAD files from Van's are great, but they don't tell you that they represent the unbent panel (before the lower edge is bent around for stiffness). So I had a whole panel designed with an extra inch of space on the bottom. I'm not interested in extending my panel down (which lots of people do), because I want to preserve as much legroom as possible. So that required a lot of adjusting.
The other major issue for me is the canopy frame. You may recall from earlier in my log that the forward canopy frame weldment had extremely poor fit. Specifically, the welded tube did not conform to the canopy skin. This is a common problem, but I think my fit is worse than average. I did what most people do and just skipped riveting some of the skin rivets to the frame. The only issue is that the frame takes a bit of a "dive" across the front of the instrument panel when the canopy is closed. You can see this in the above picture.
The fit with the 10" garmin screens is pretty tight when I leave enough space for a row of switches at the bottom. The canopy frame issue made this even tighter because it meant I had to squeeze the screens down and toward the middle to get them away from the frame. You can see in the CAD drawing below where I've illustrated how far the canopy frame comes over the panel. Fortunately, it's less of an issue on the left side than the right, so I was able to shift everything to the left (toward the pilot) and eventually make it all work.
One unconventional modification I've included is to move the throttle, prop, and mixture controls up onto the panel. Typically, these sit below the panel on another bracket, but I wanted to preserve as much leg room as a I could.
Finally, I laid it all out with printouts of the avionics and schematics of the switches and control cables. It's nice to sit in the plane and do a little imagining...
I ended up using a lot of SPST switches in this panel. I could certainly have consolidated to fewer switches by using multiple position switches or combining functionality (e.g. combining the alternator switches into one). However, in my mind, the point of having a backup battery or alternator is redundancy. If both alternators use a single switch and that switch fails, then I've lost both of those items. Since I have the space, I like the idea of having separate switches and a few less single points of failure.
I've also elected to skip the keyed switch for the PMAGs and starter that are popular in many light aircraft. Again...it's a single point of failure that could take out the engine. Instead, I have two switches for PMAG grounding (which turns them on or off), two switches for PMAG testing (d/c them from ship power to test the built in generators), and a separate starter switch.
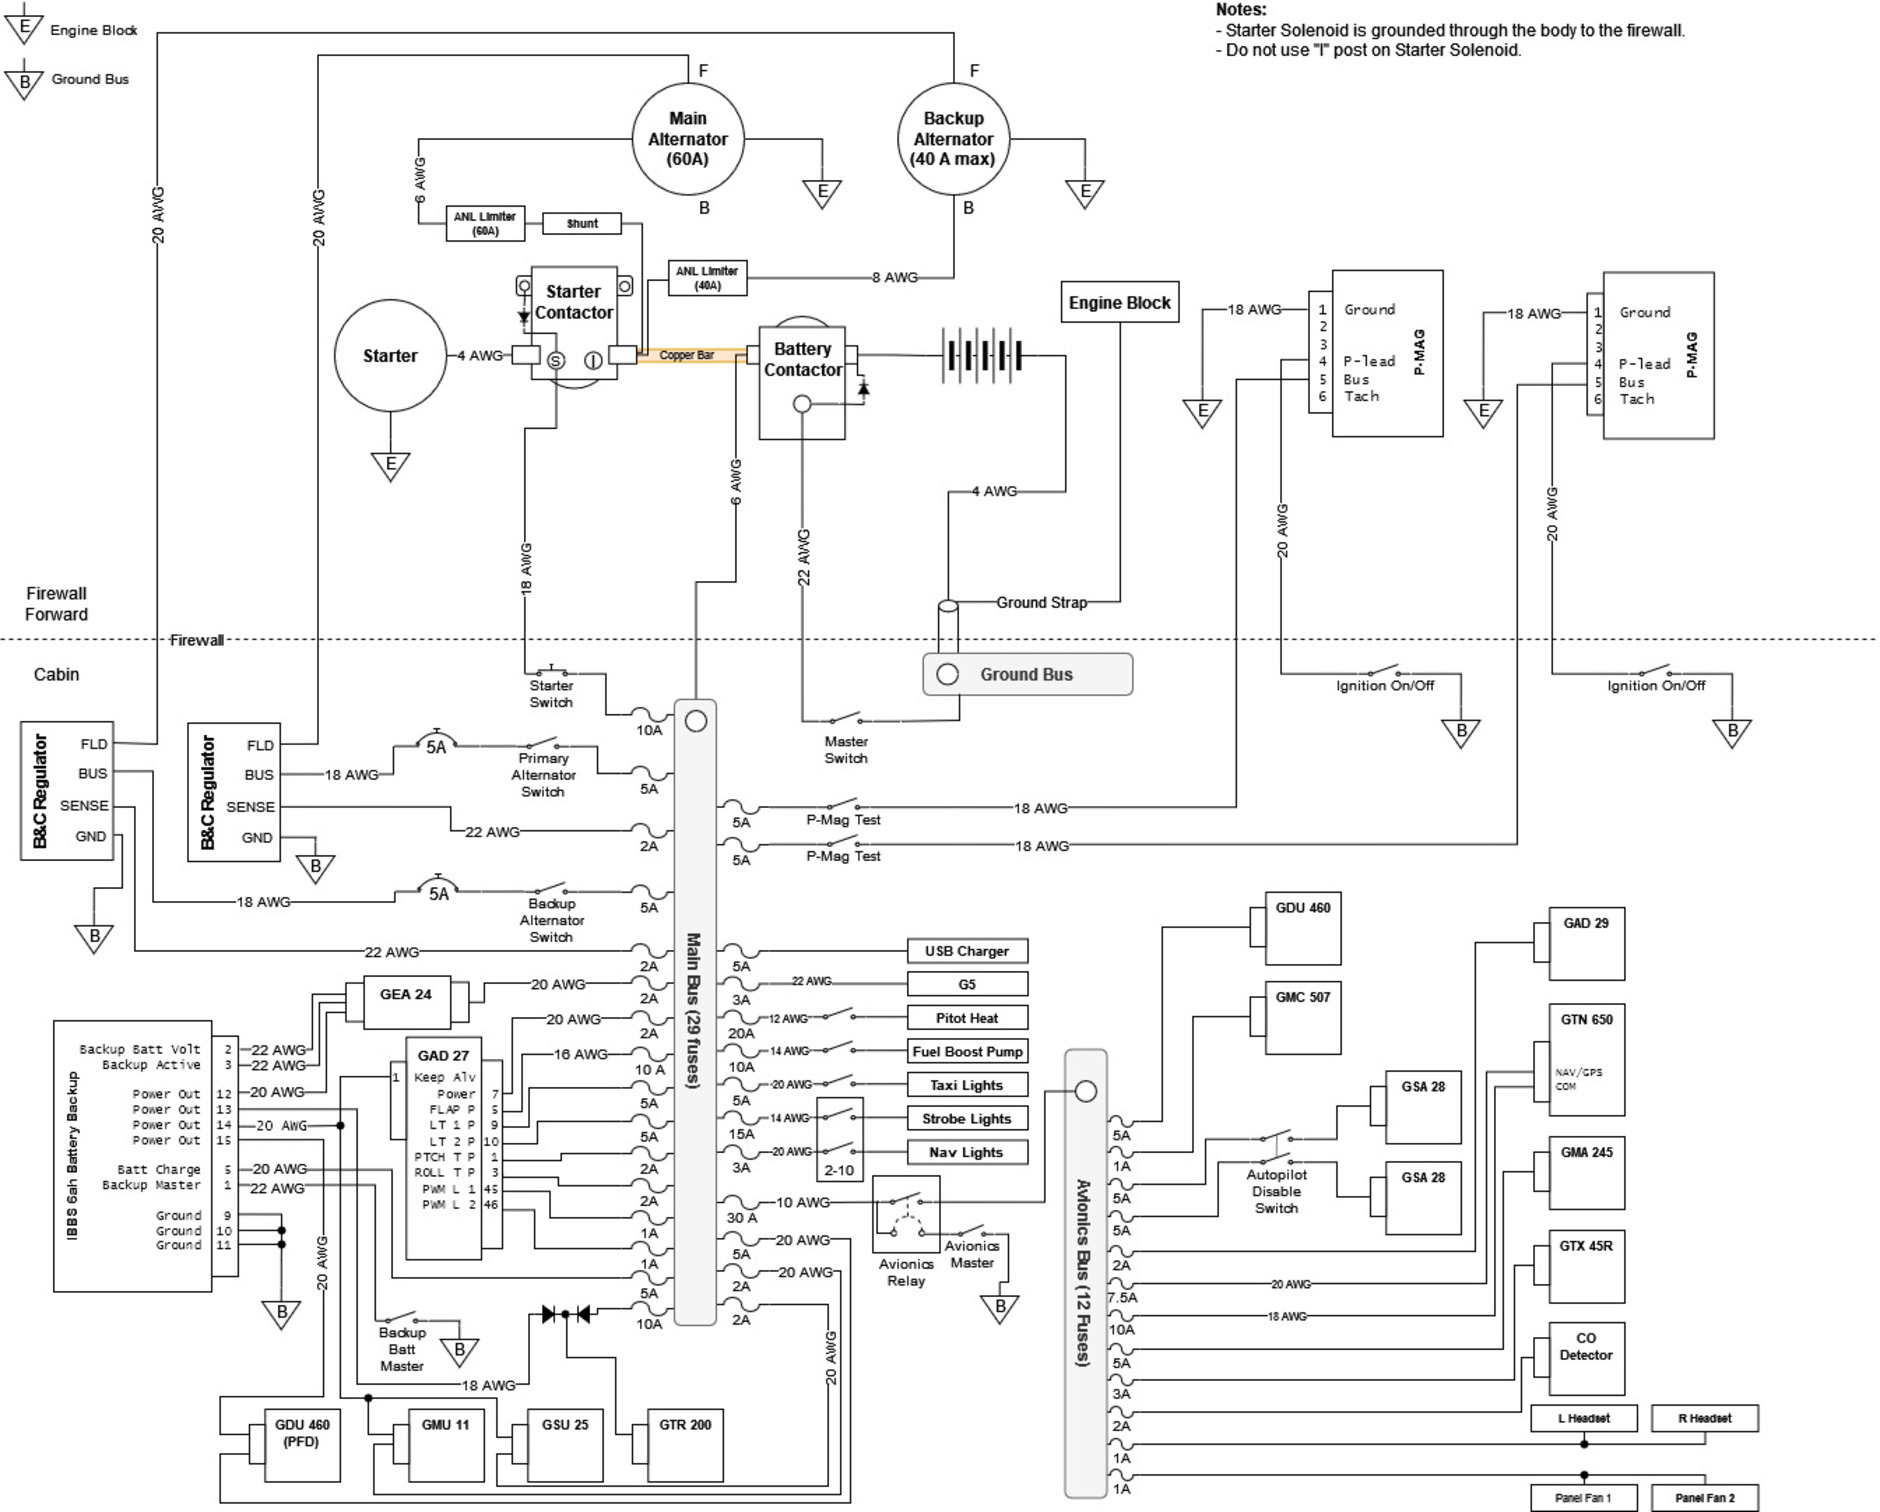
By the way, I worked up this power plan for the plane a year ago or so and thought I'd toss it in here so there's a record of it in this log.
Only actual building work on the seat back was counted toward this log entry. None of the planning or fit testing time is included.
| Previous - Index - Next |
This work is licensed under Attribution-NonCommercial-NoDerivatives 4.0 International![]()
![]()
![]()
![]()