Log (By Day)
Log (By Category)
Pictures
Pics of Me Working
Links
| ||||||||||||
Friday February 2, 2024
Landing Gear and Leg Fairings, Brakes and Lines
(0.2 Hours
Firewall Forward, 5.0 Hours
Landing Gear)
5.2 Hours Total
| Previous - Index - Next |
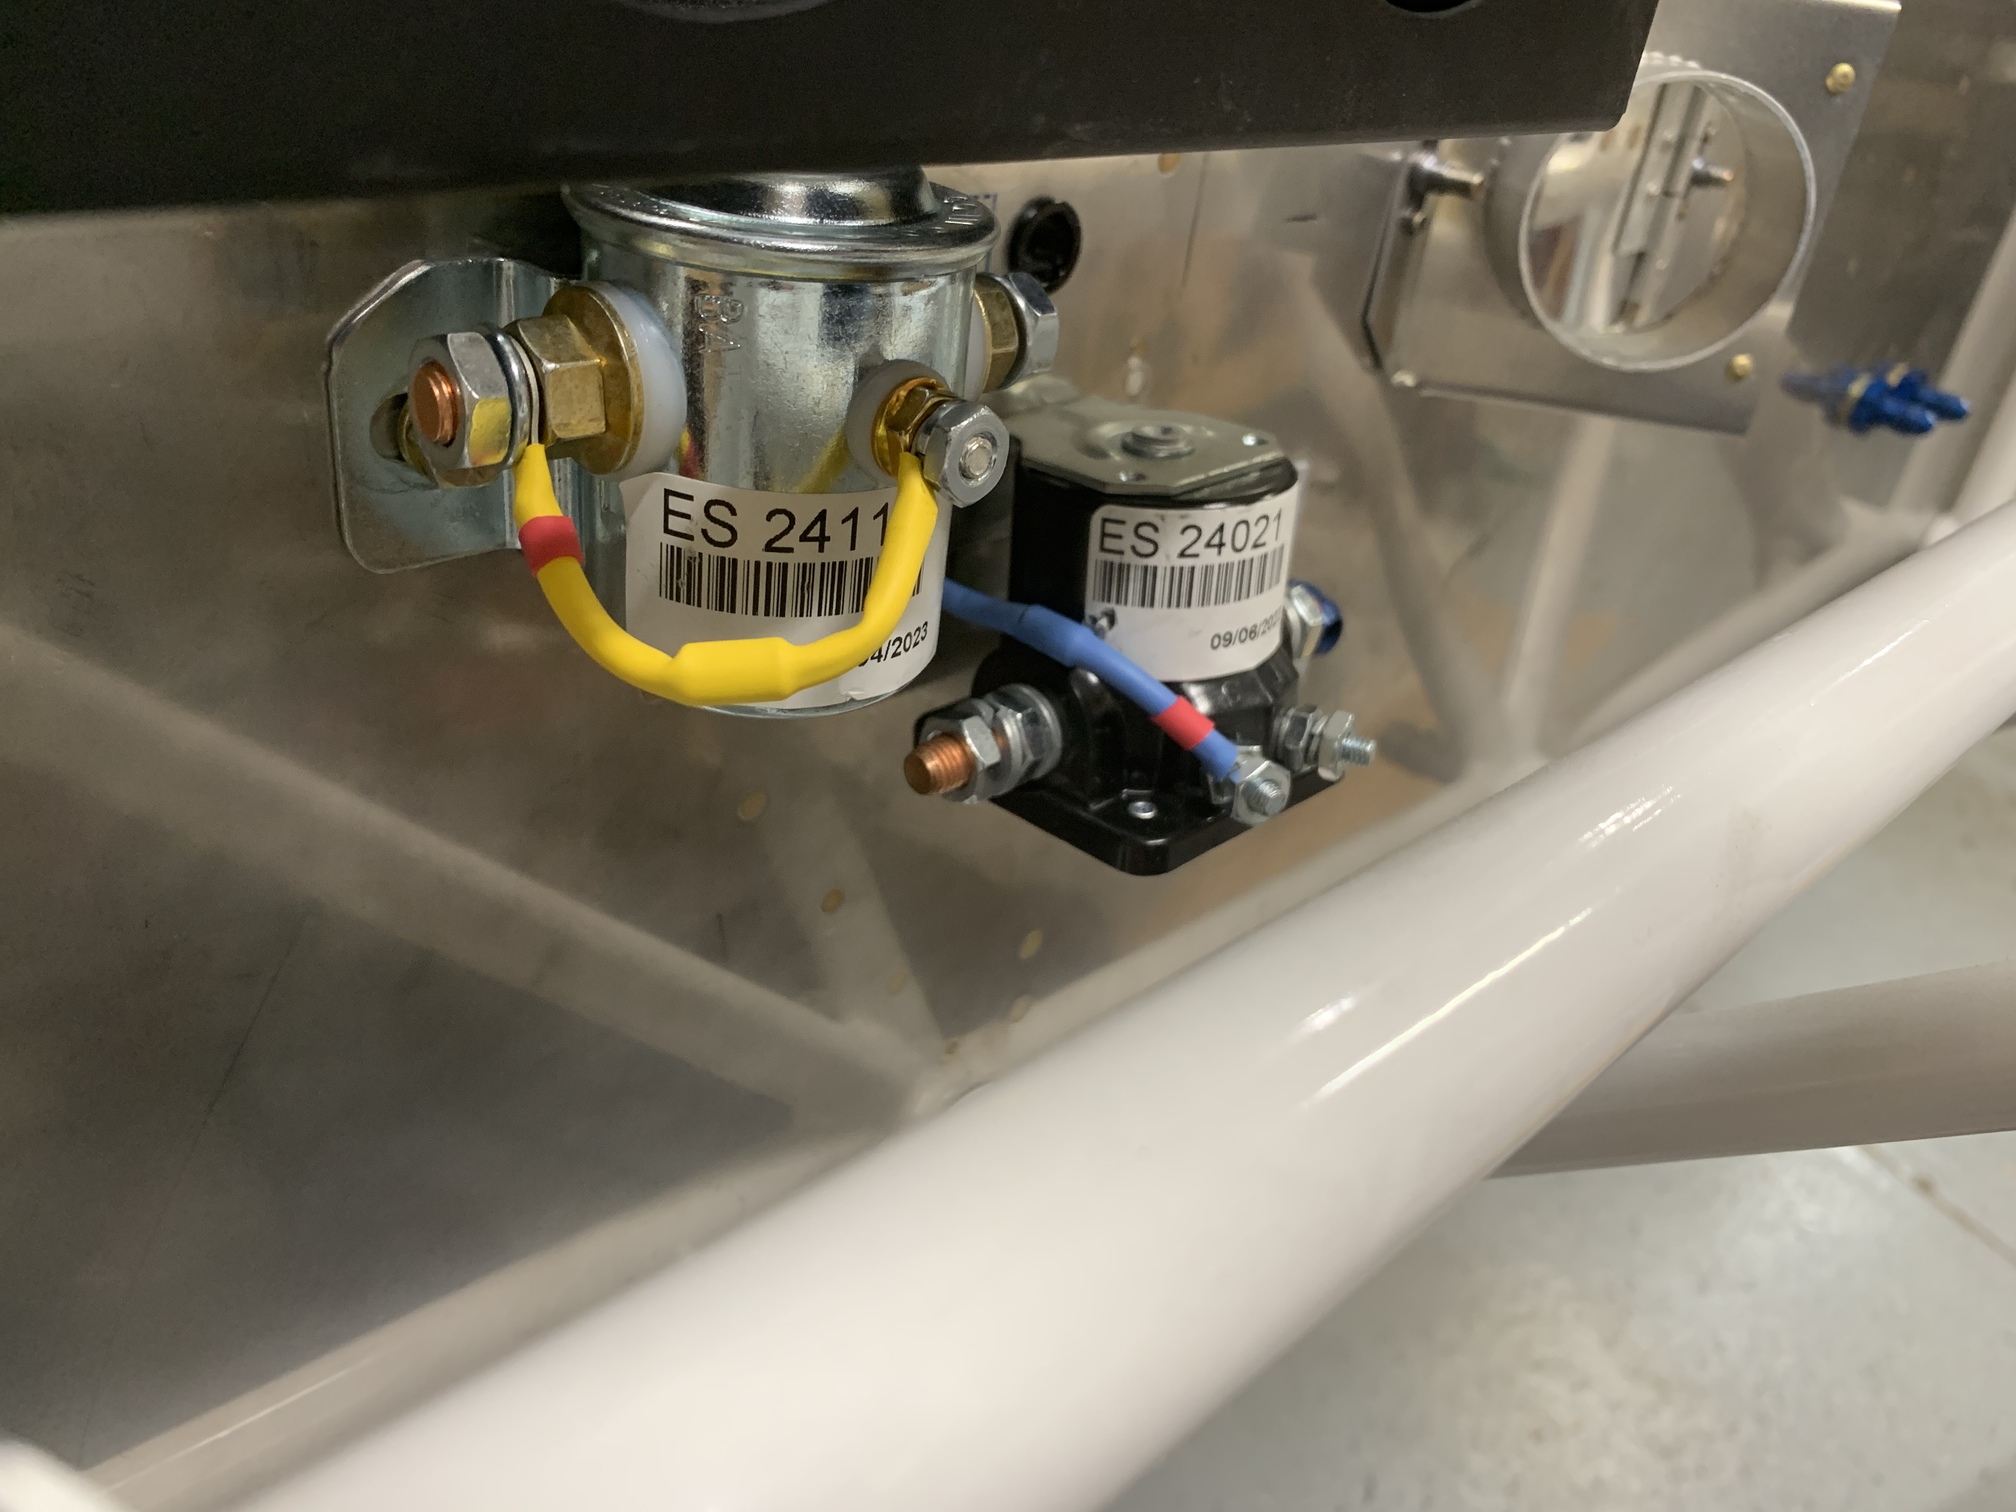
A few days ago I installed the diodes on the solenoids.
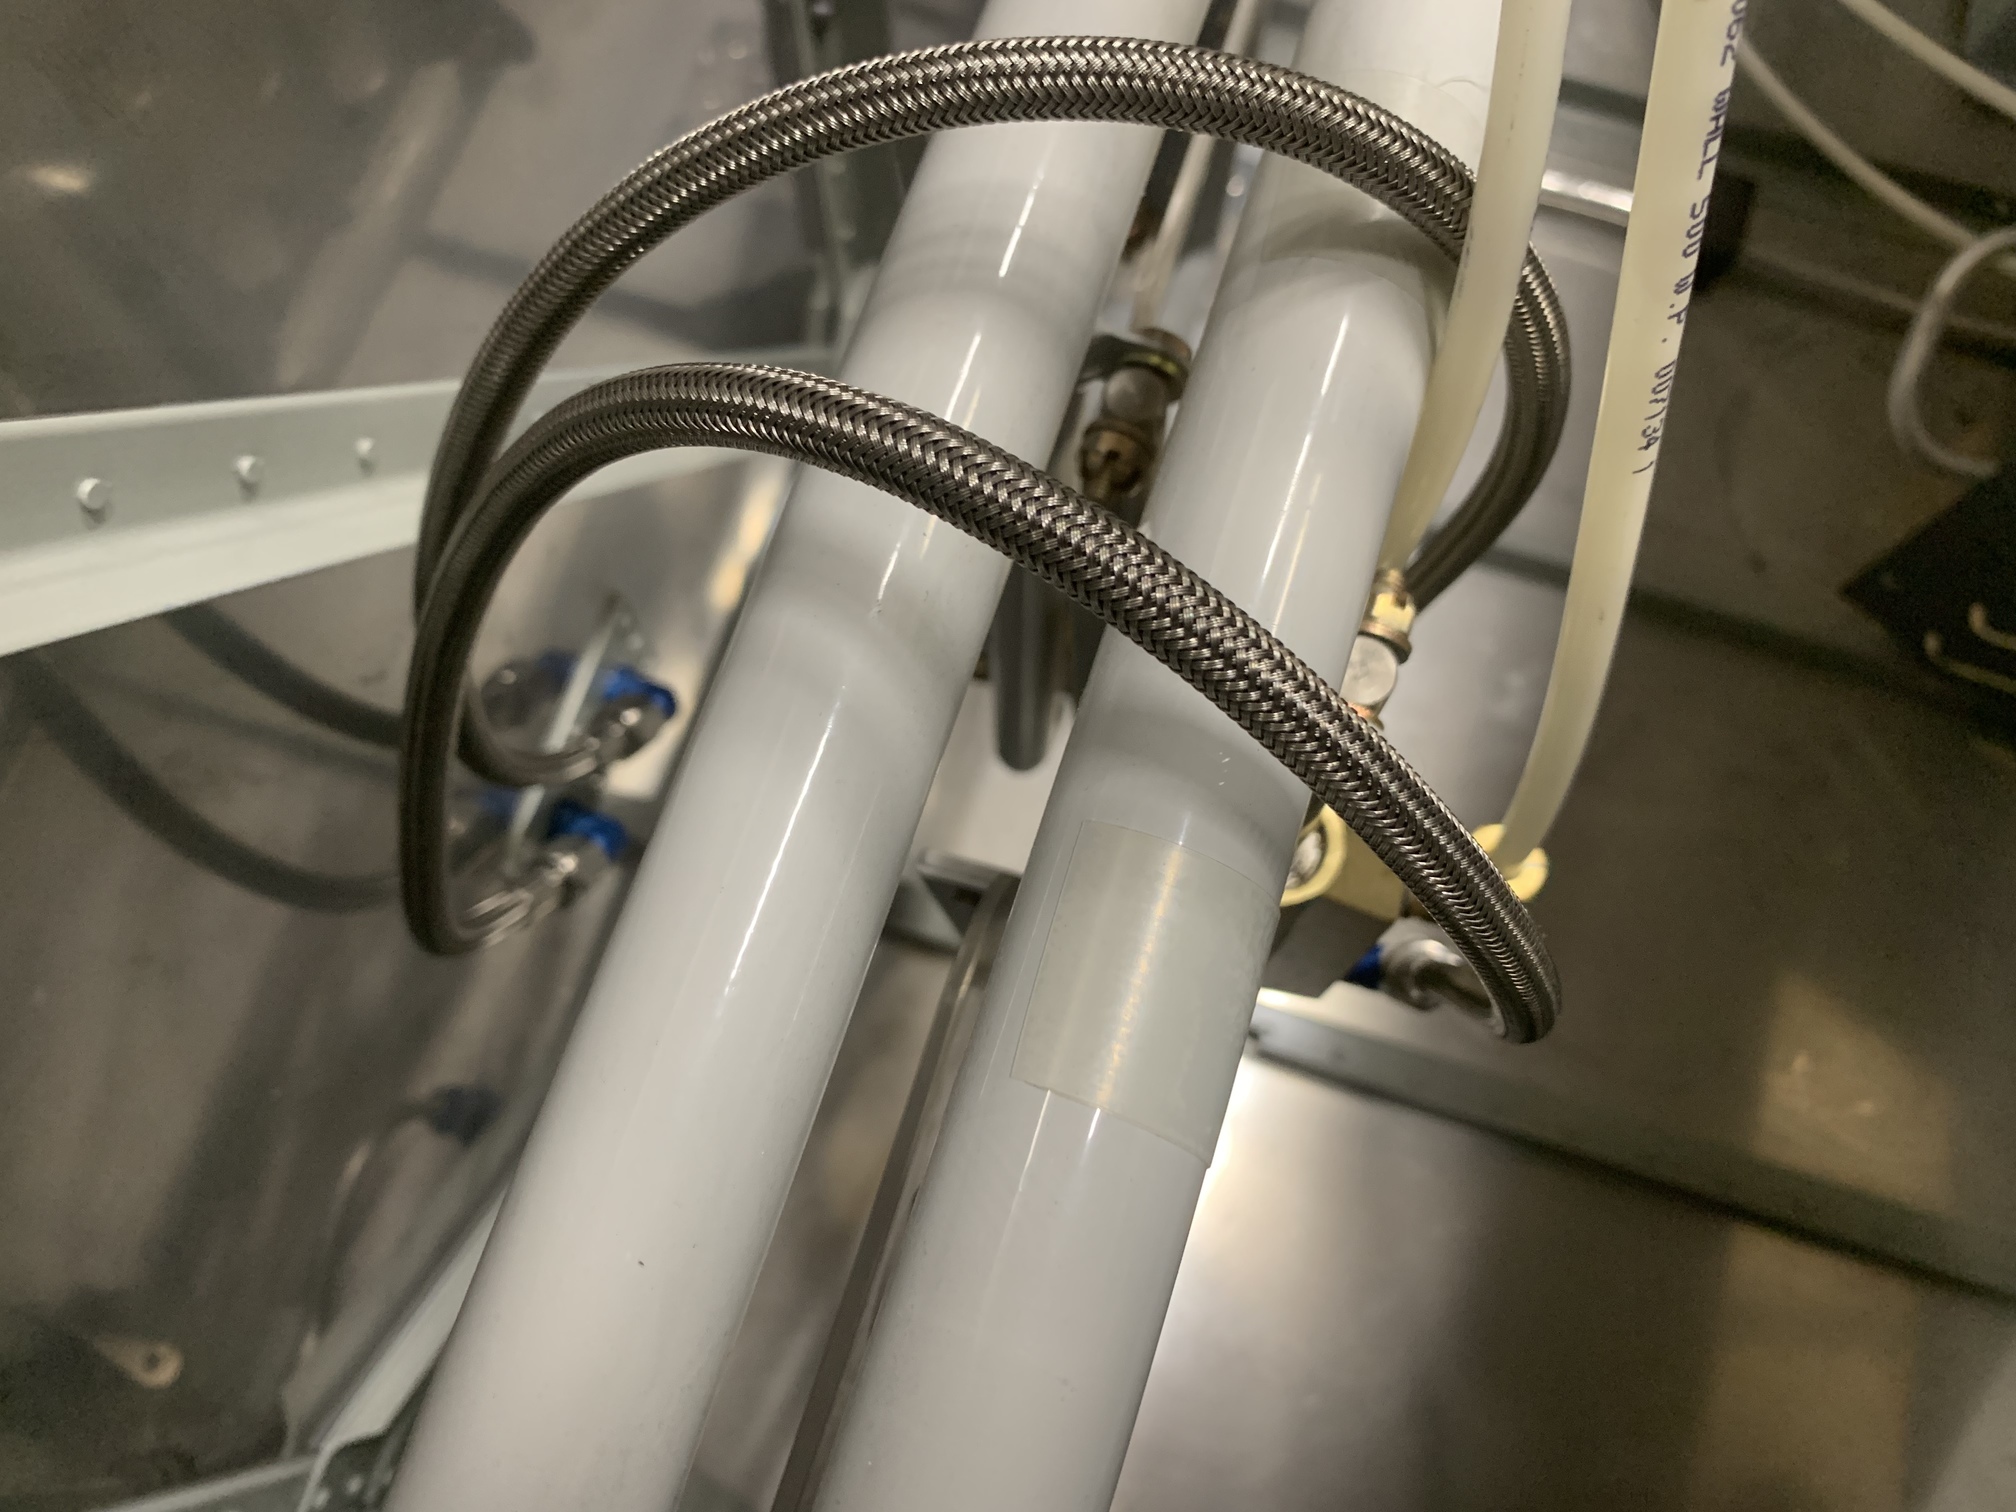
I had ordered custom length hoses for the connection from the brake master cylinders to the firewall. After taking this shot, I zip tied the two together and installed some UHMW tape on the rudder pedal weldments where the hoses were rubbing.
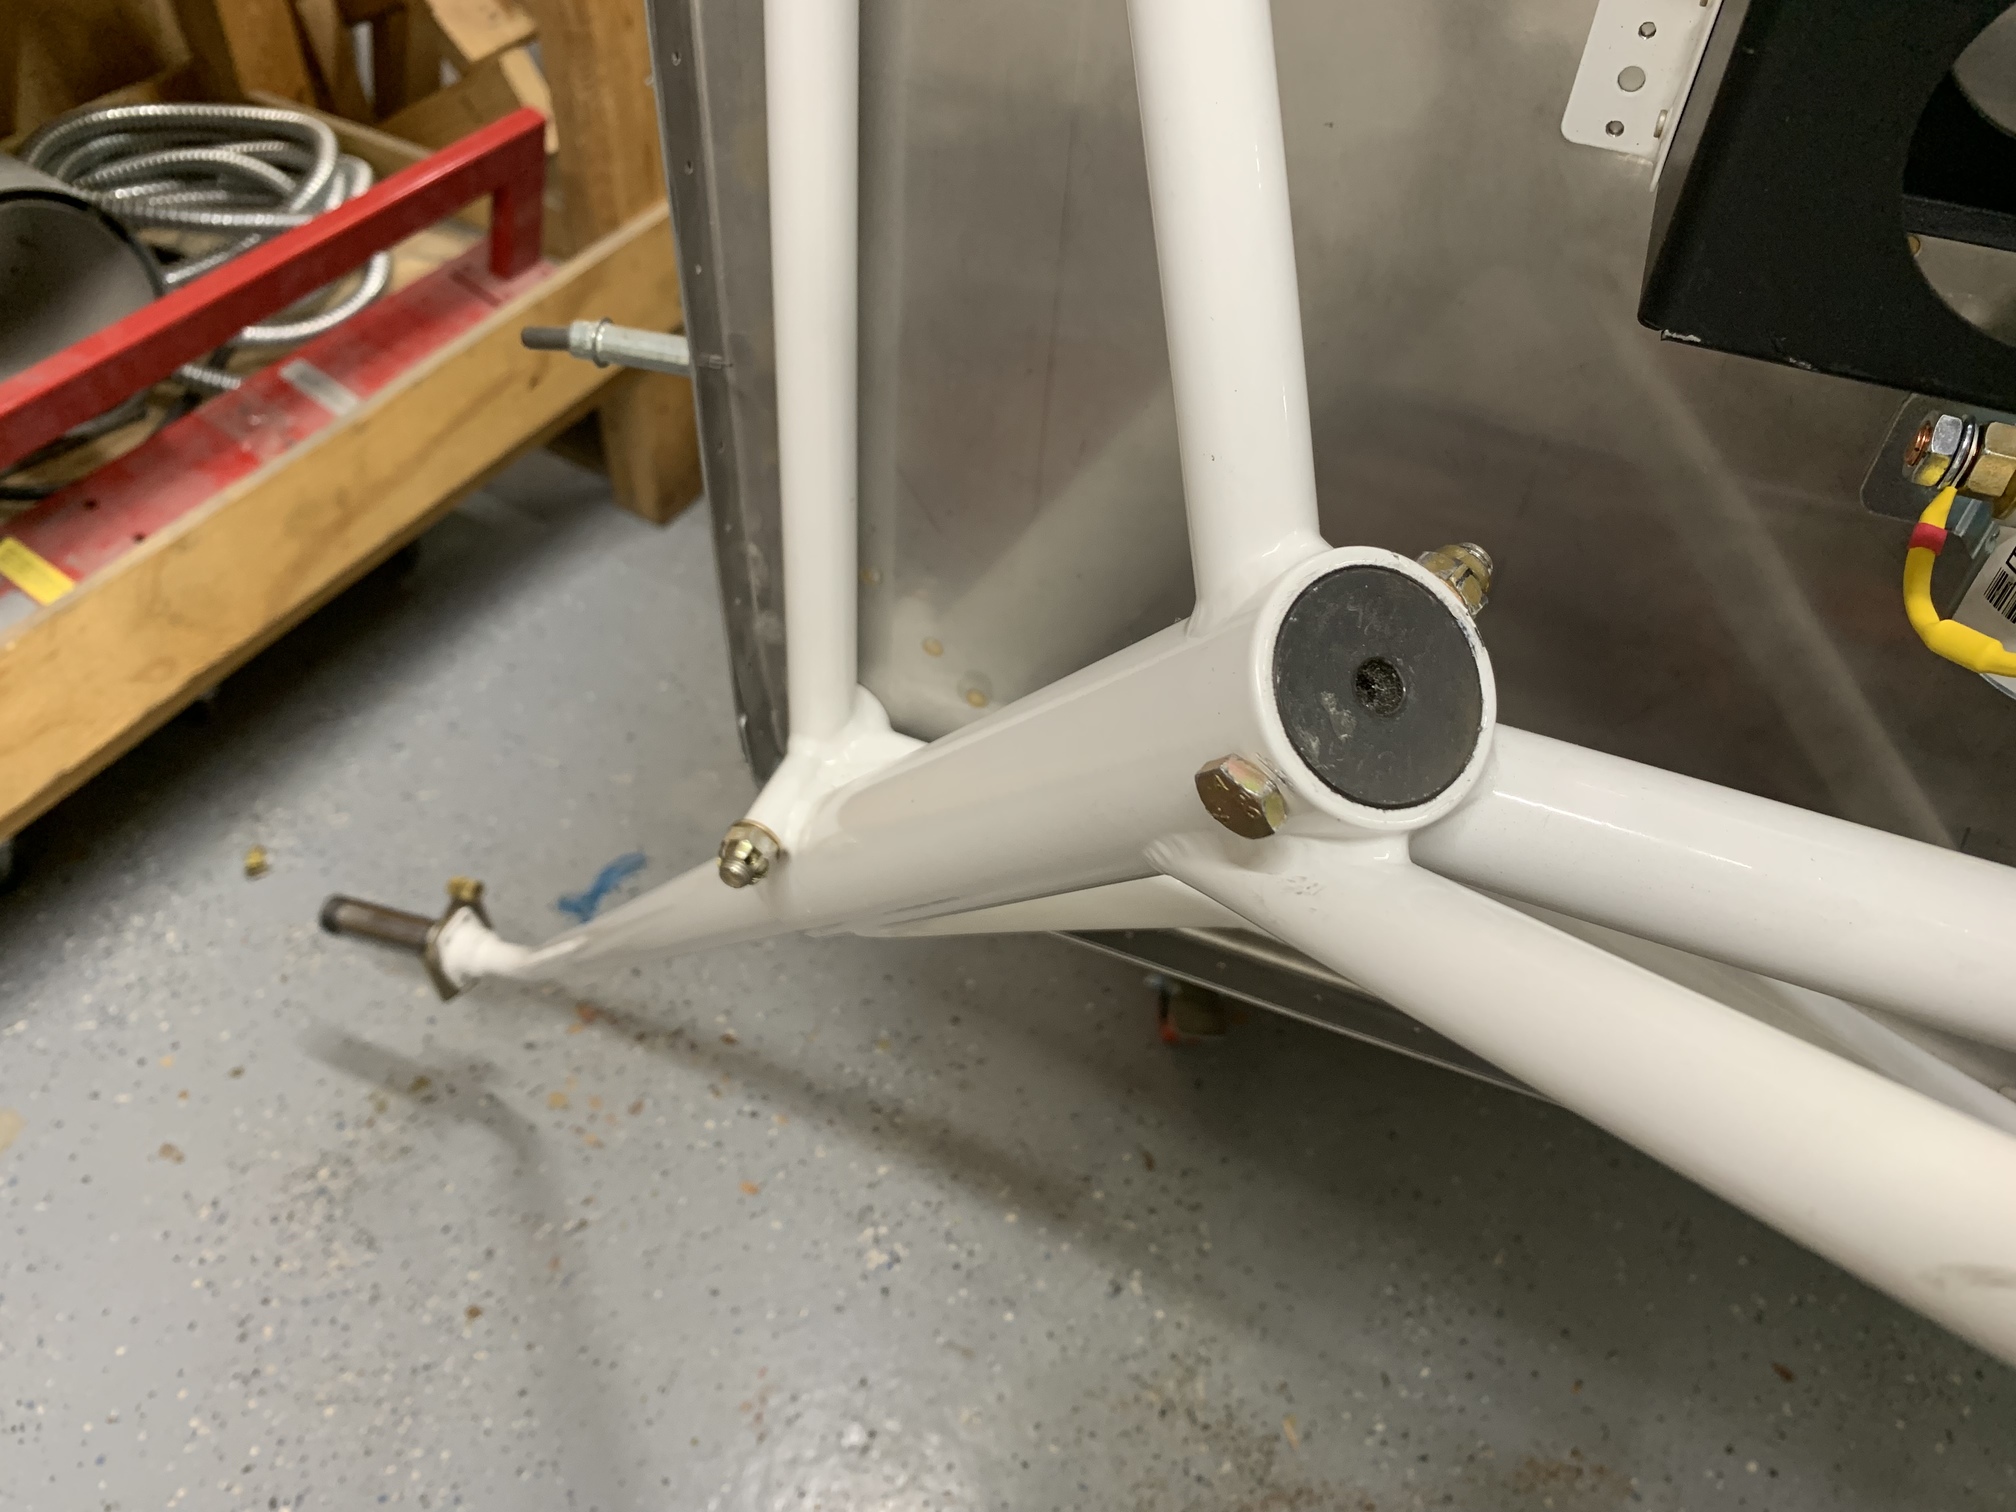
I reinstalled the landing gear legs into the engine mount, bolted and torqued them.
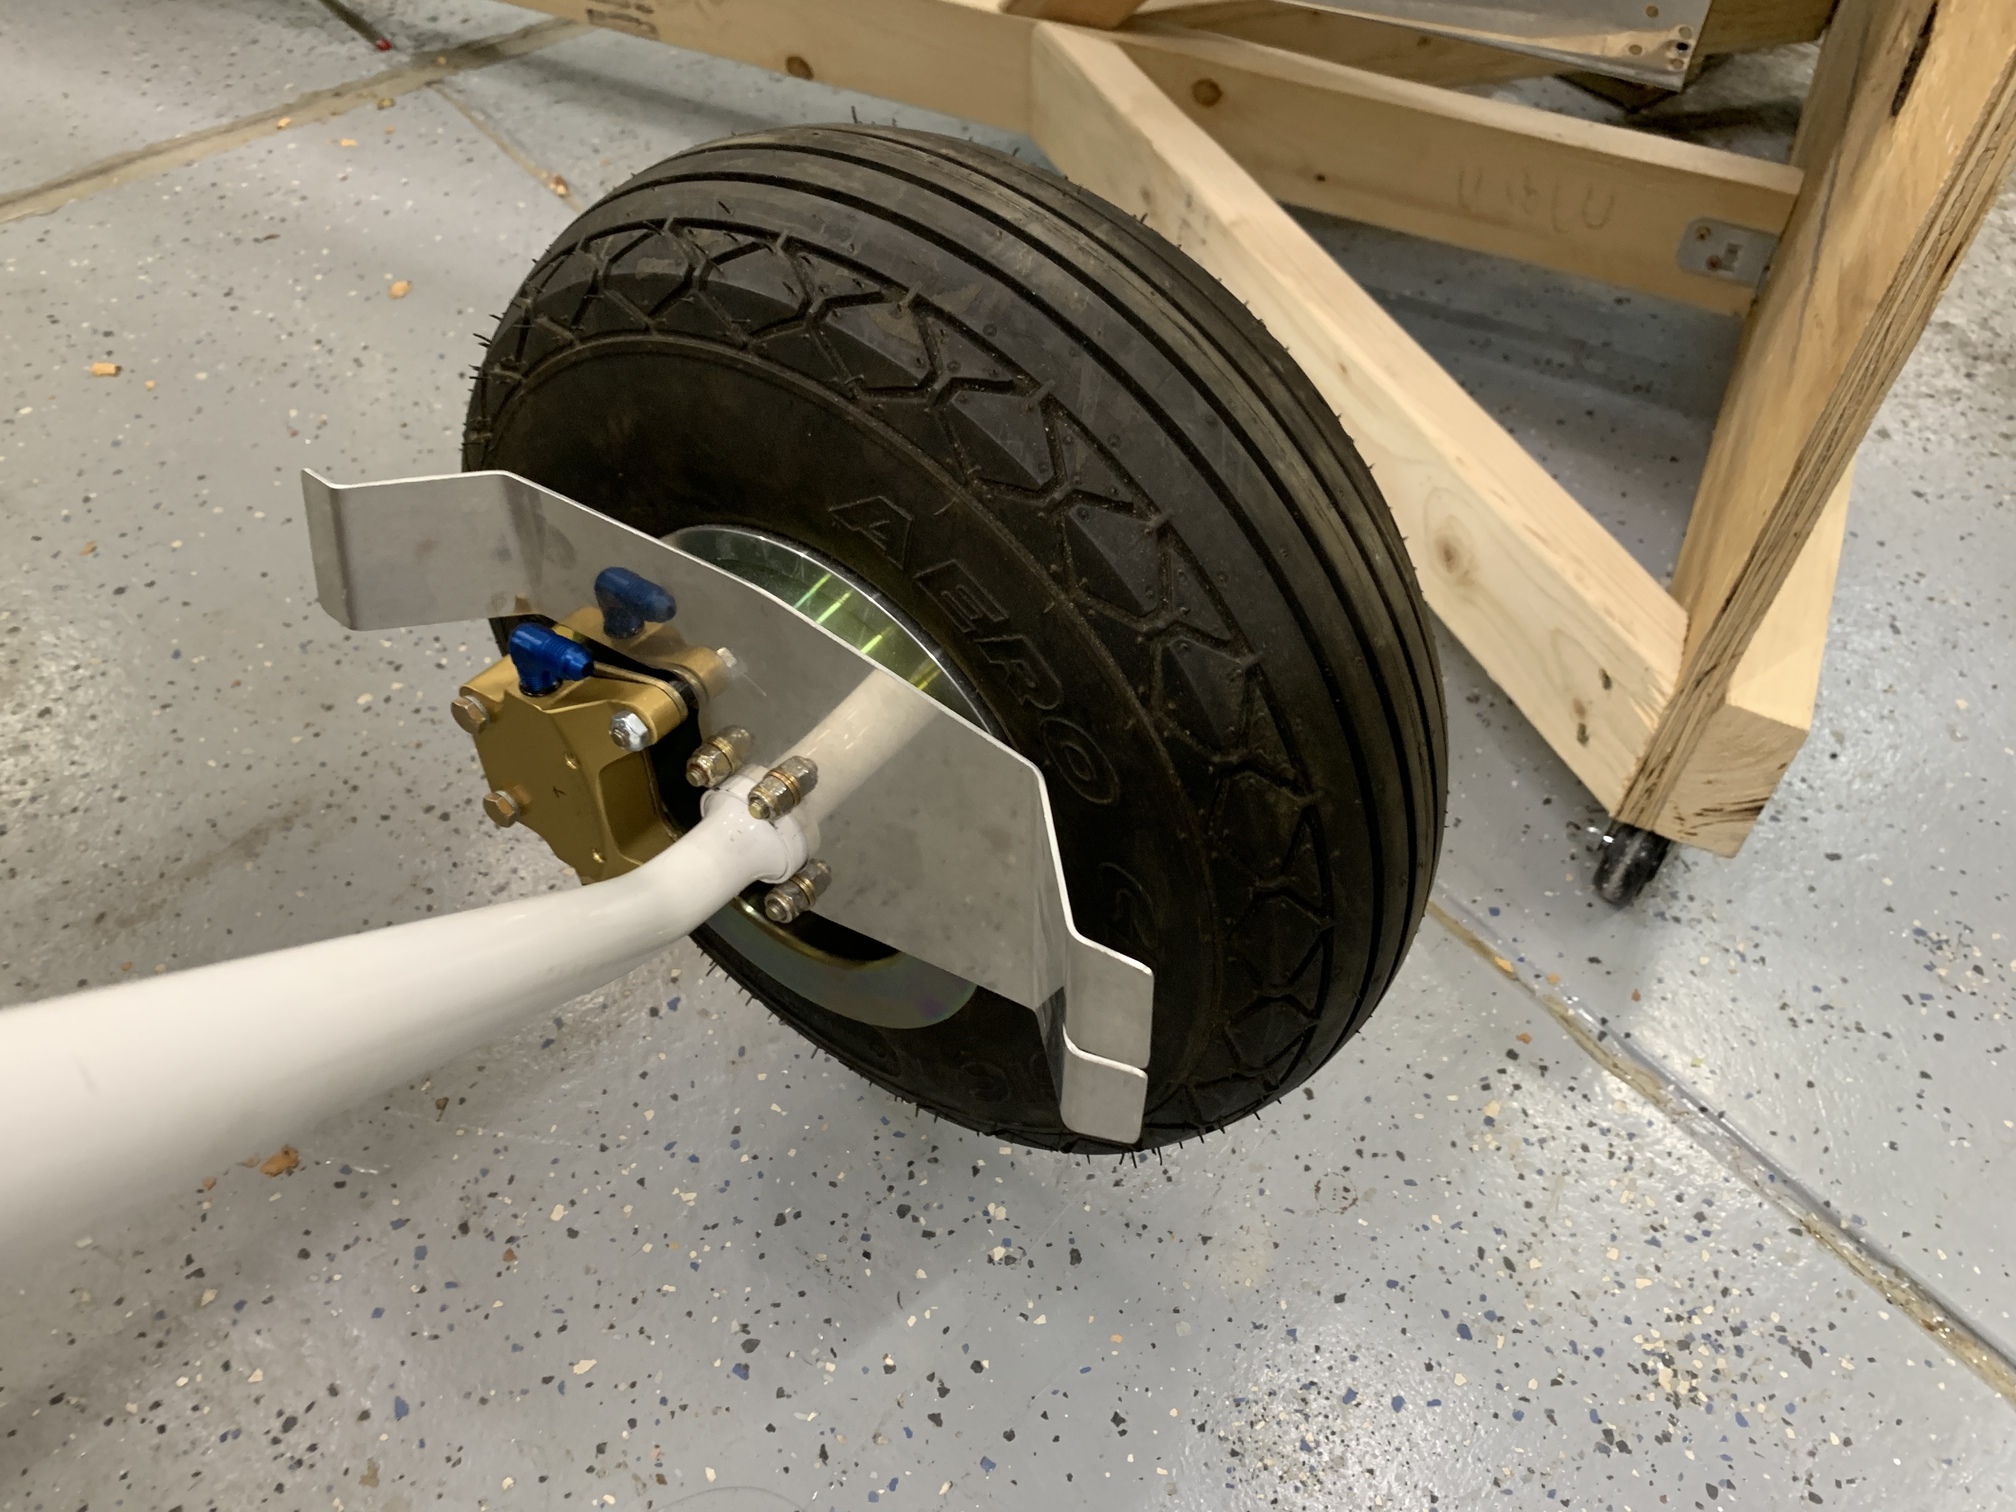
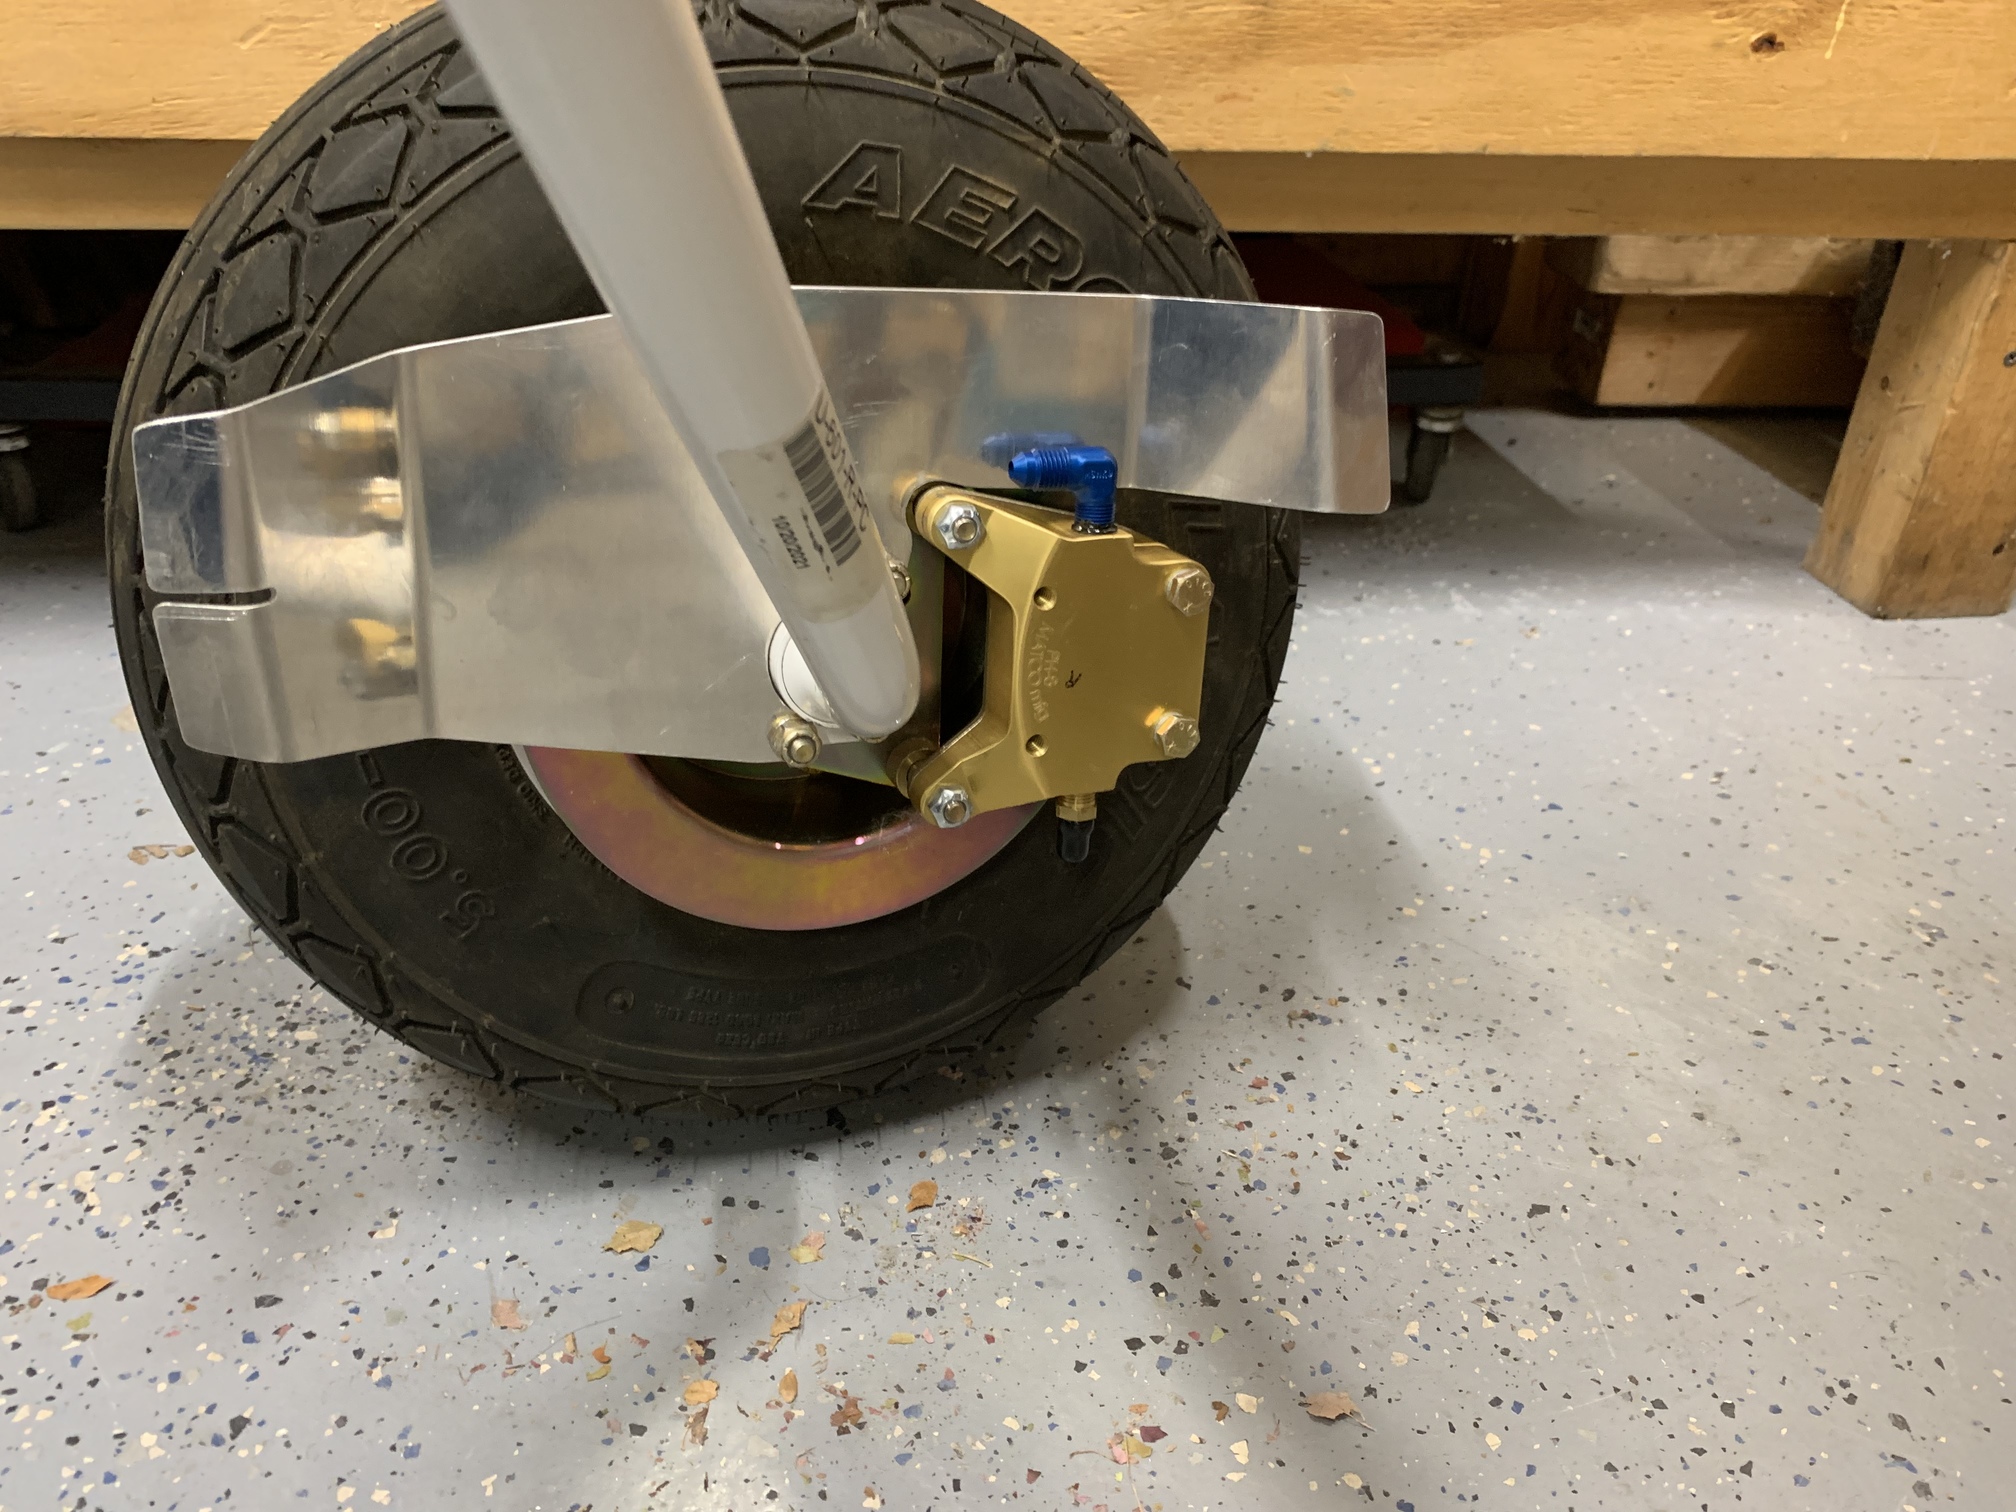
I reinstalled the wheels, brake calipers, and fairing brackets.
The other side.
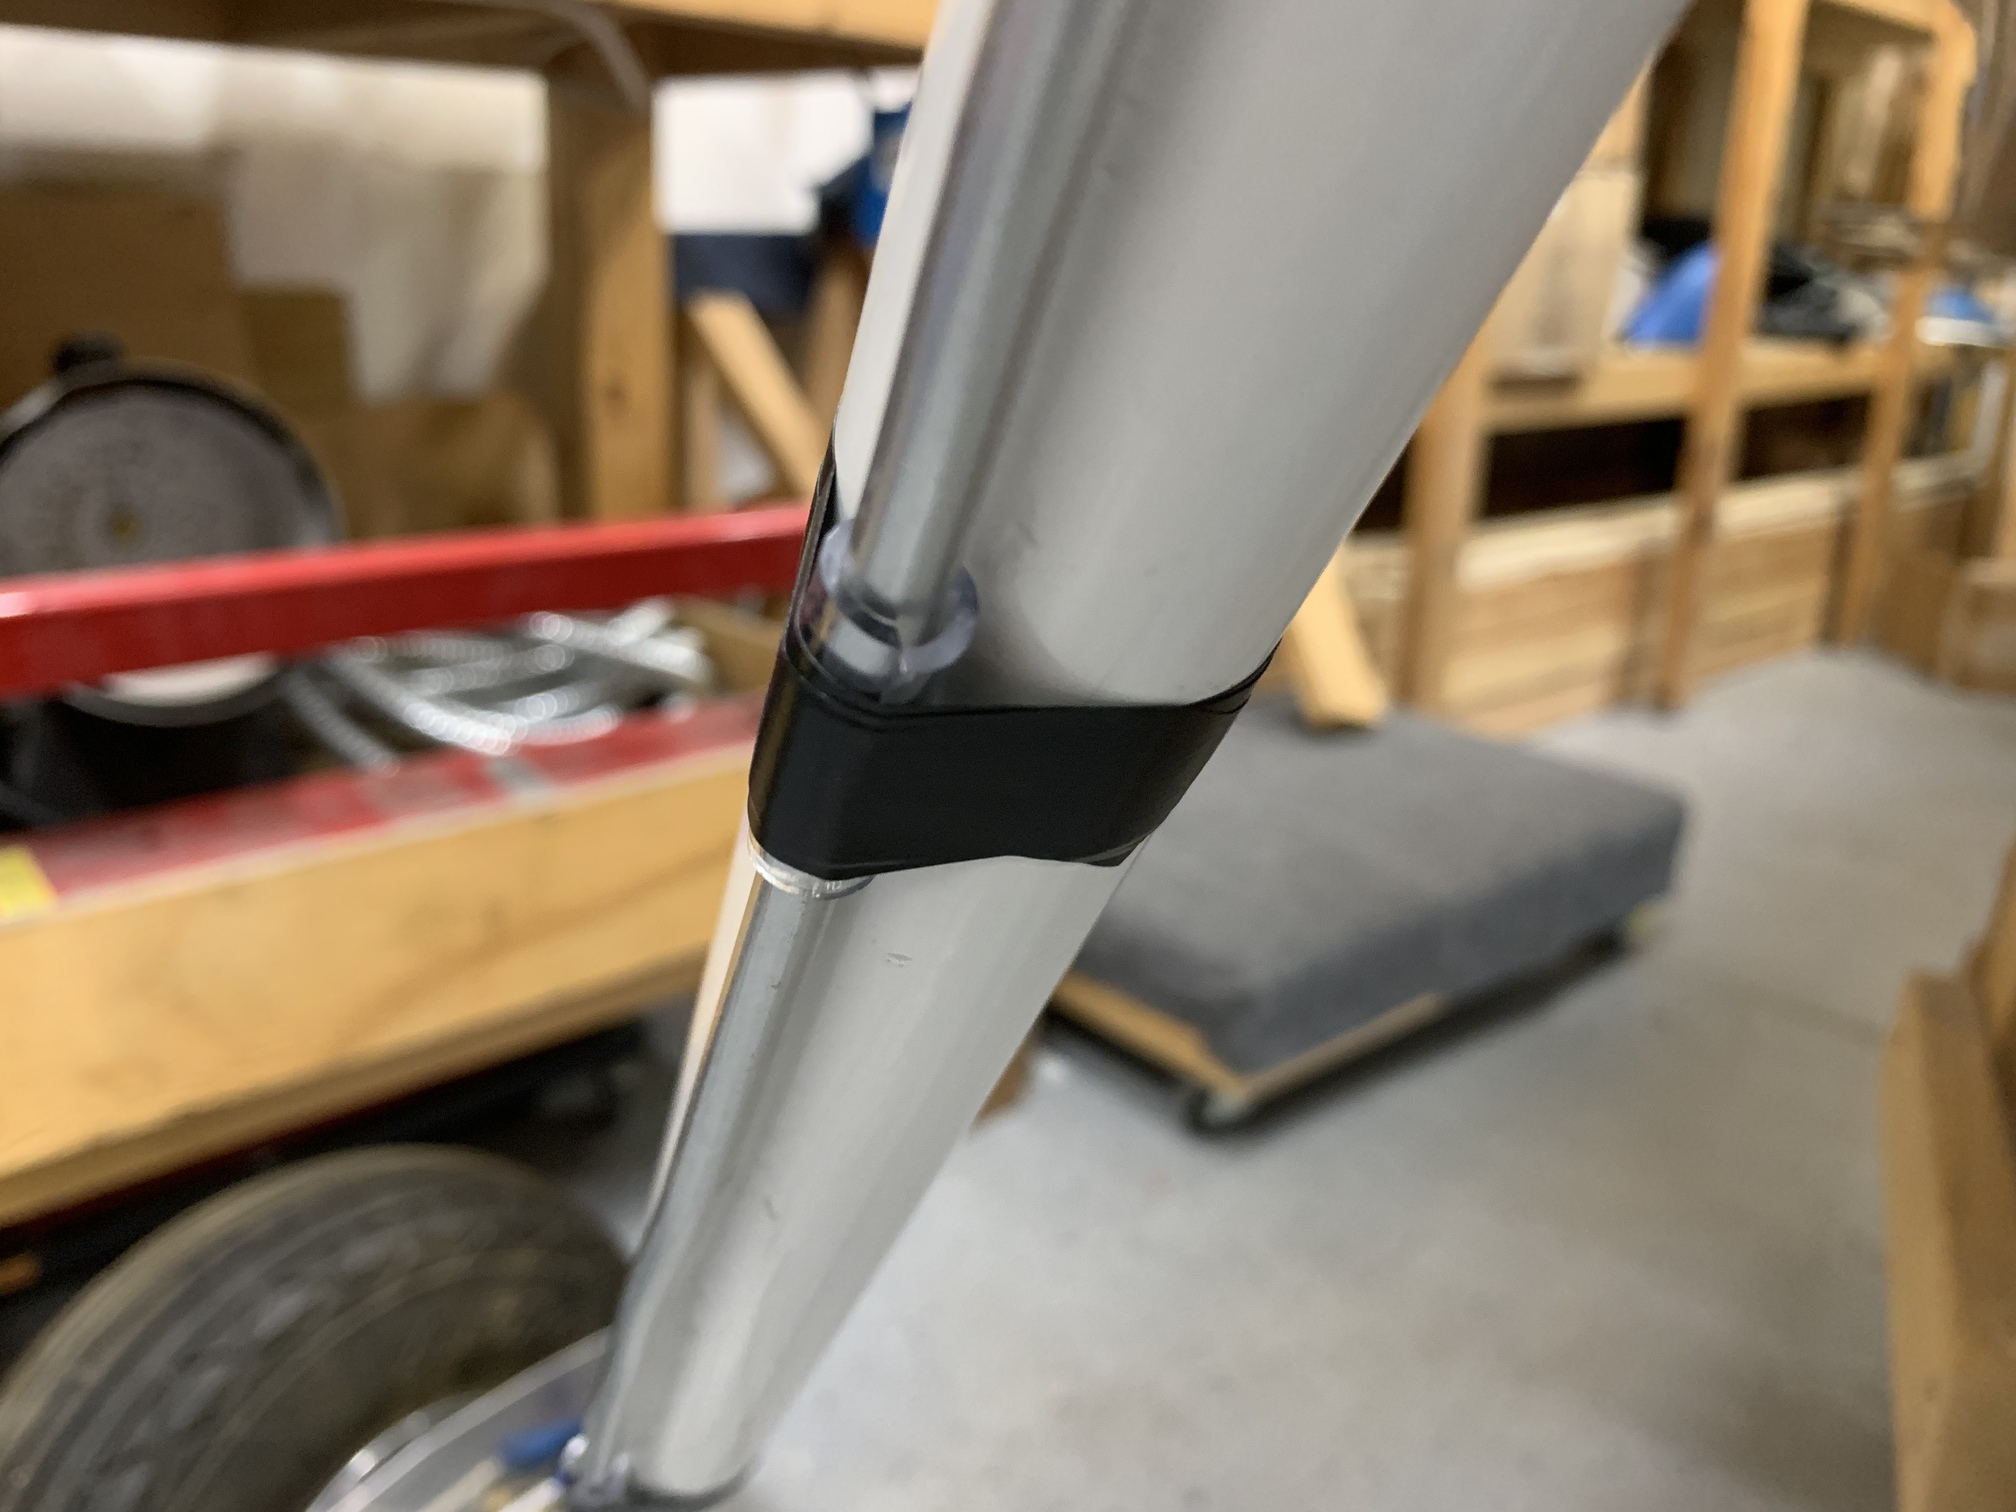
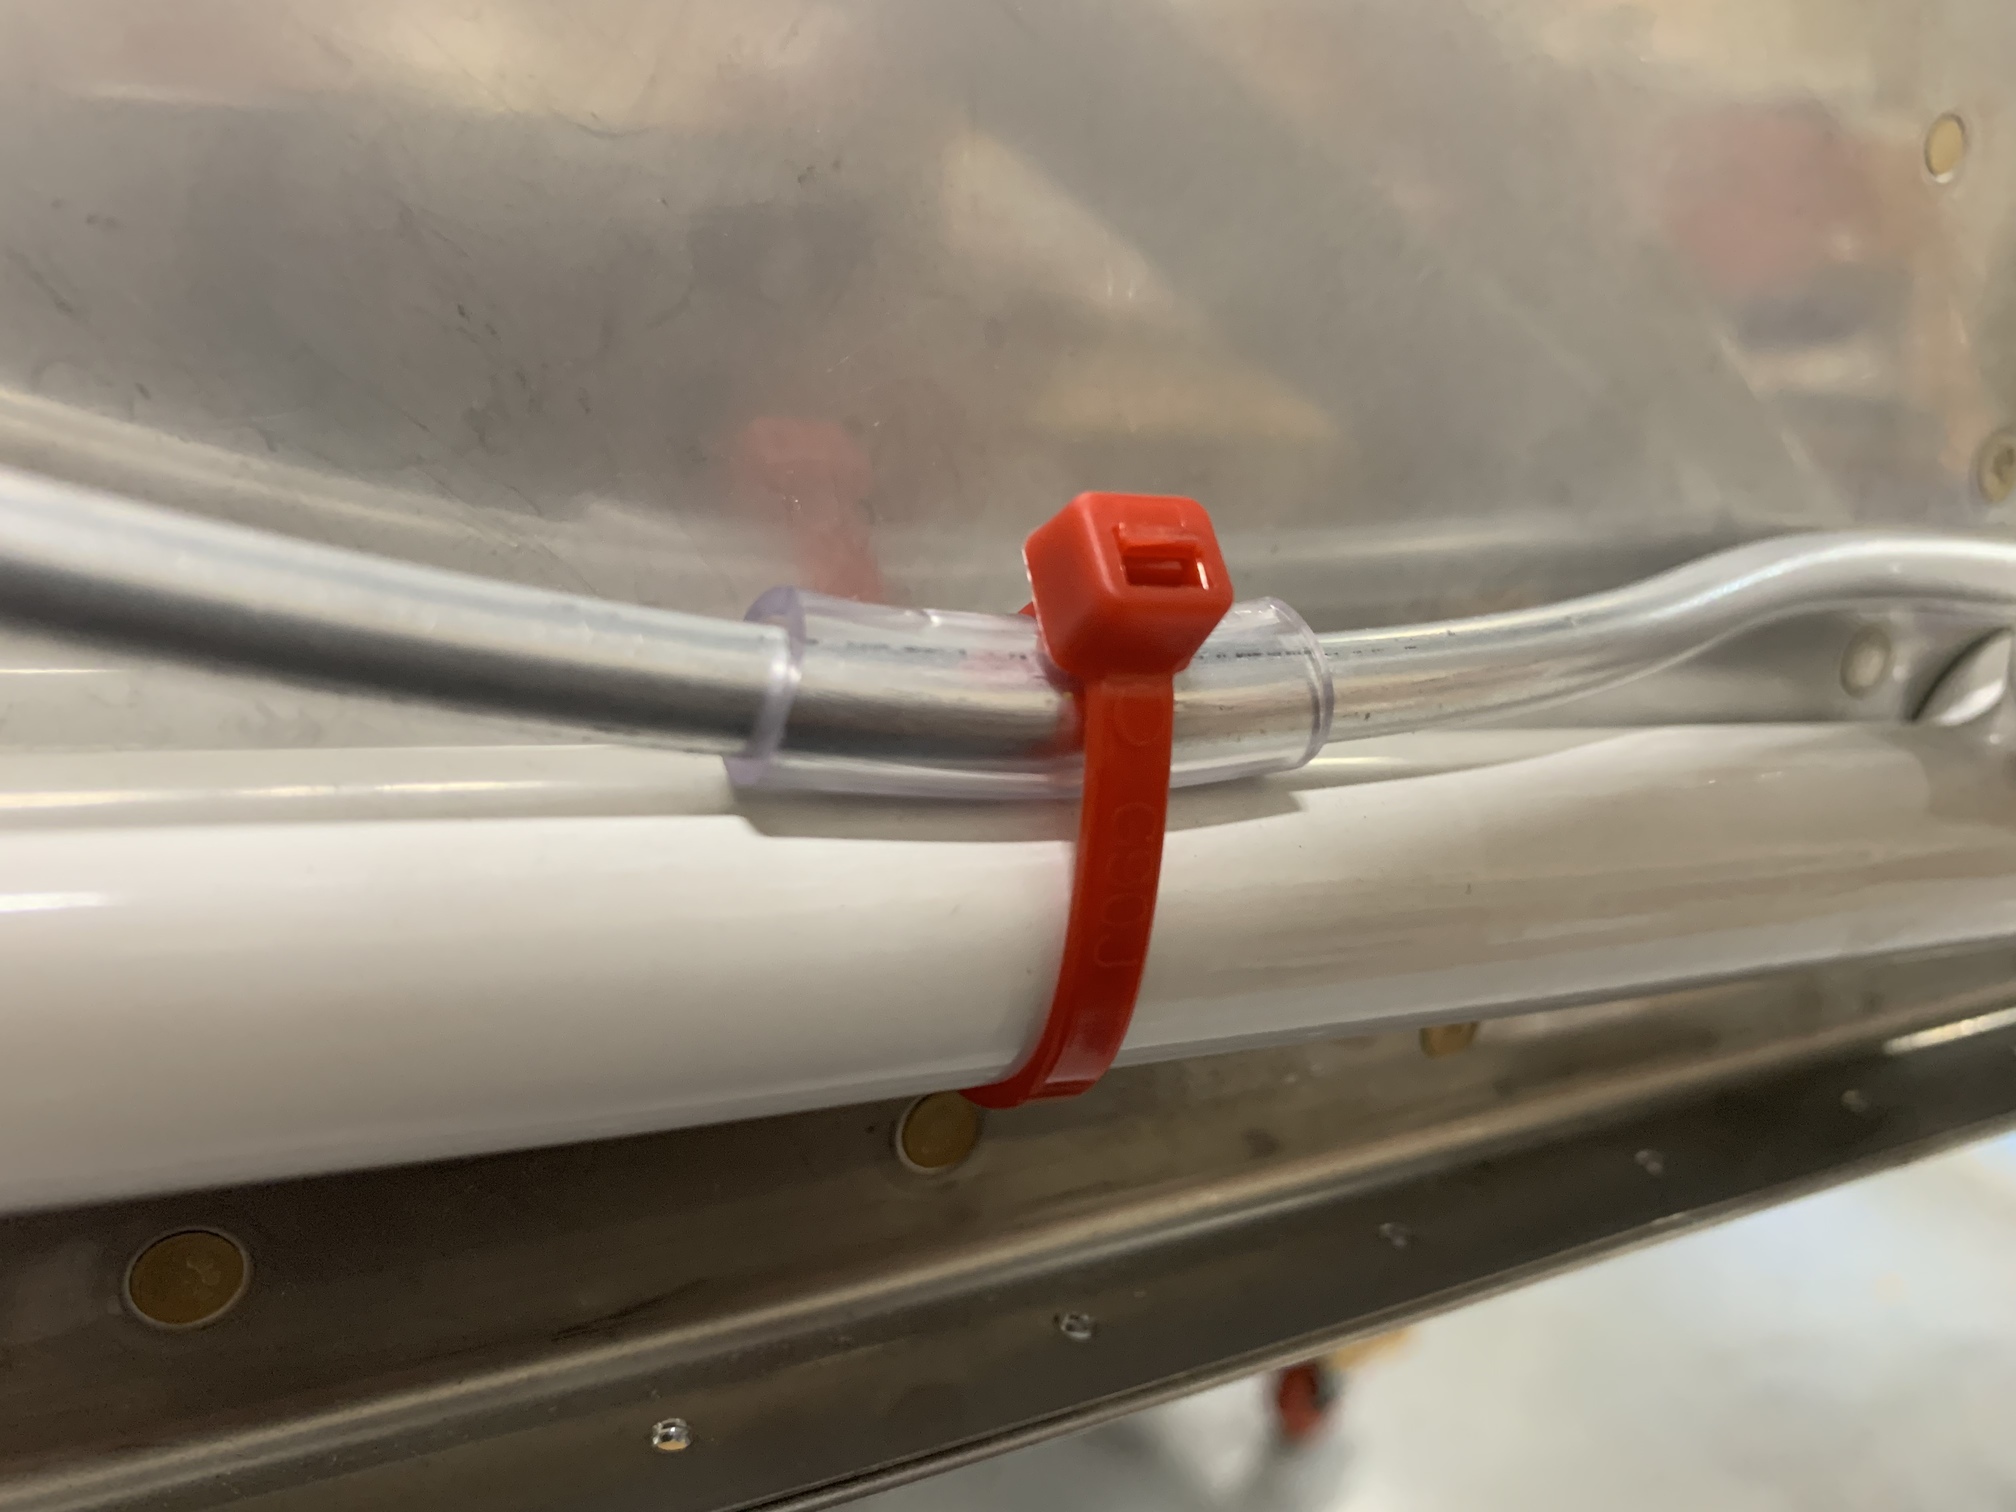
I installed the forward brake line on the left side per the plans. I used some 1/4" ID vinyl tubing as stand-off for the line from the engine mount and gear legs. Inside the engine compartment, I used high temp zip ties and on the gear legs, electrical tape.
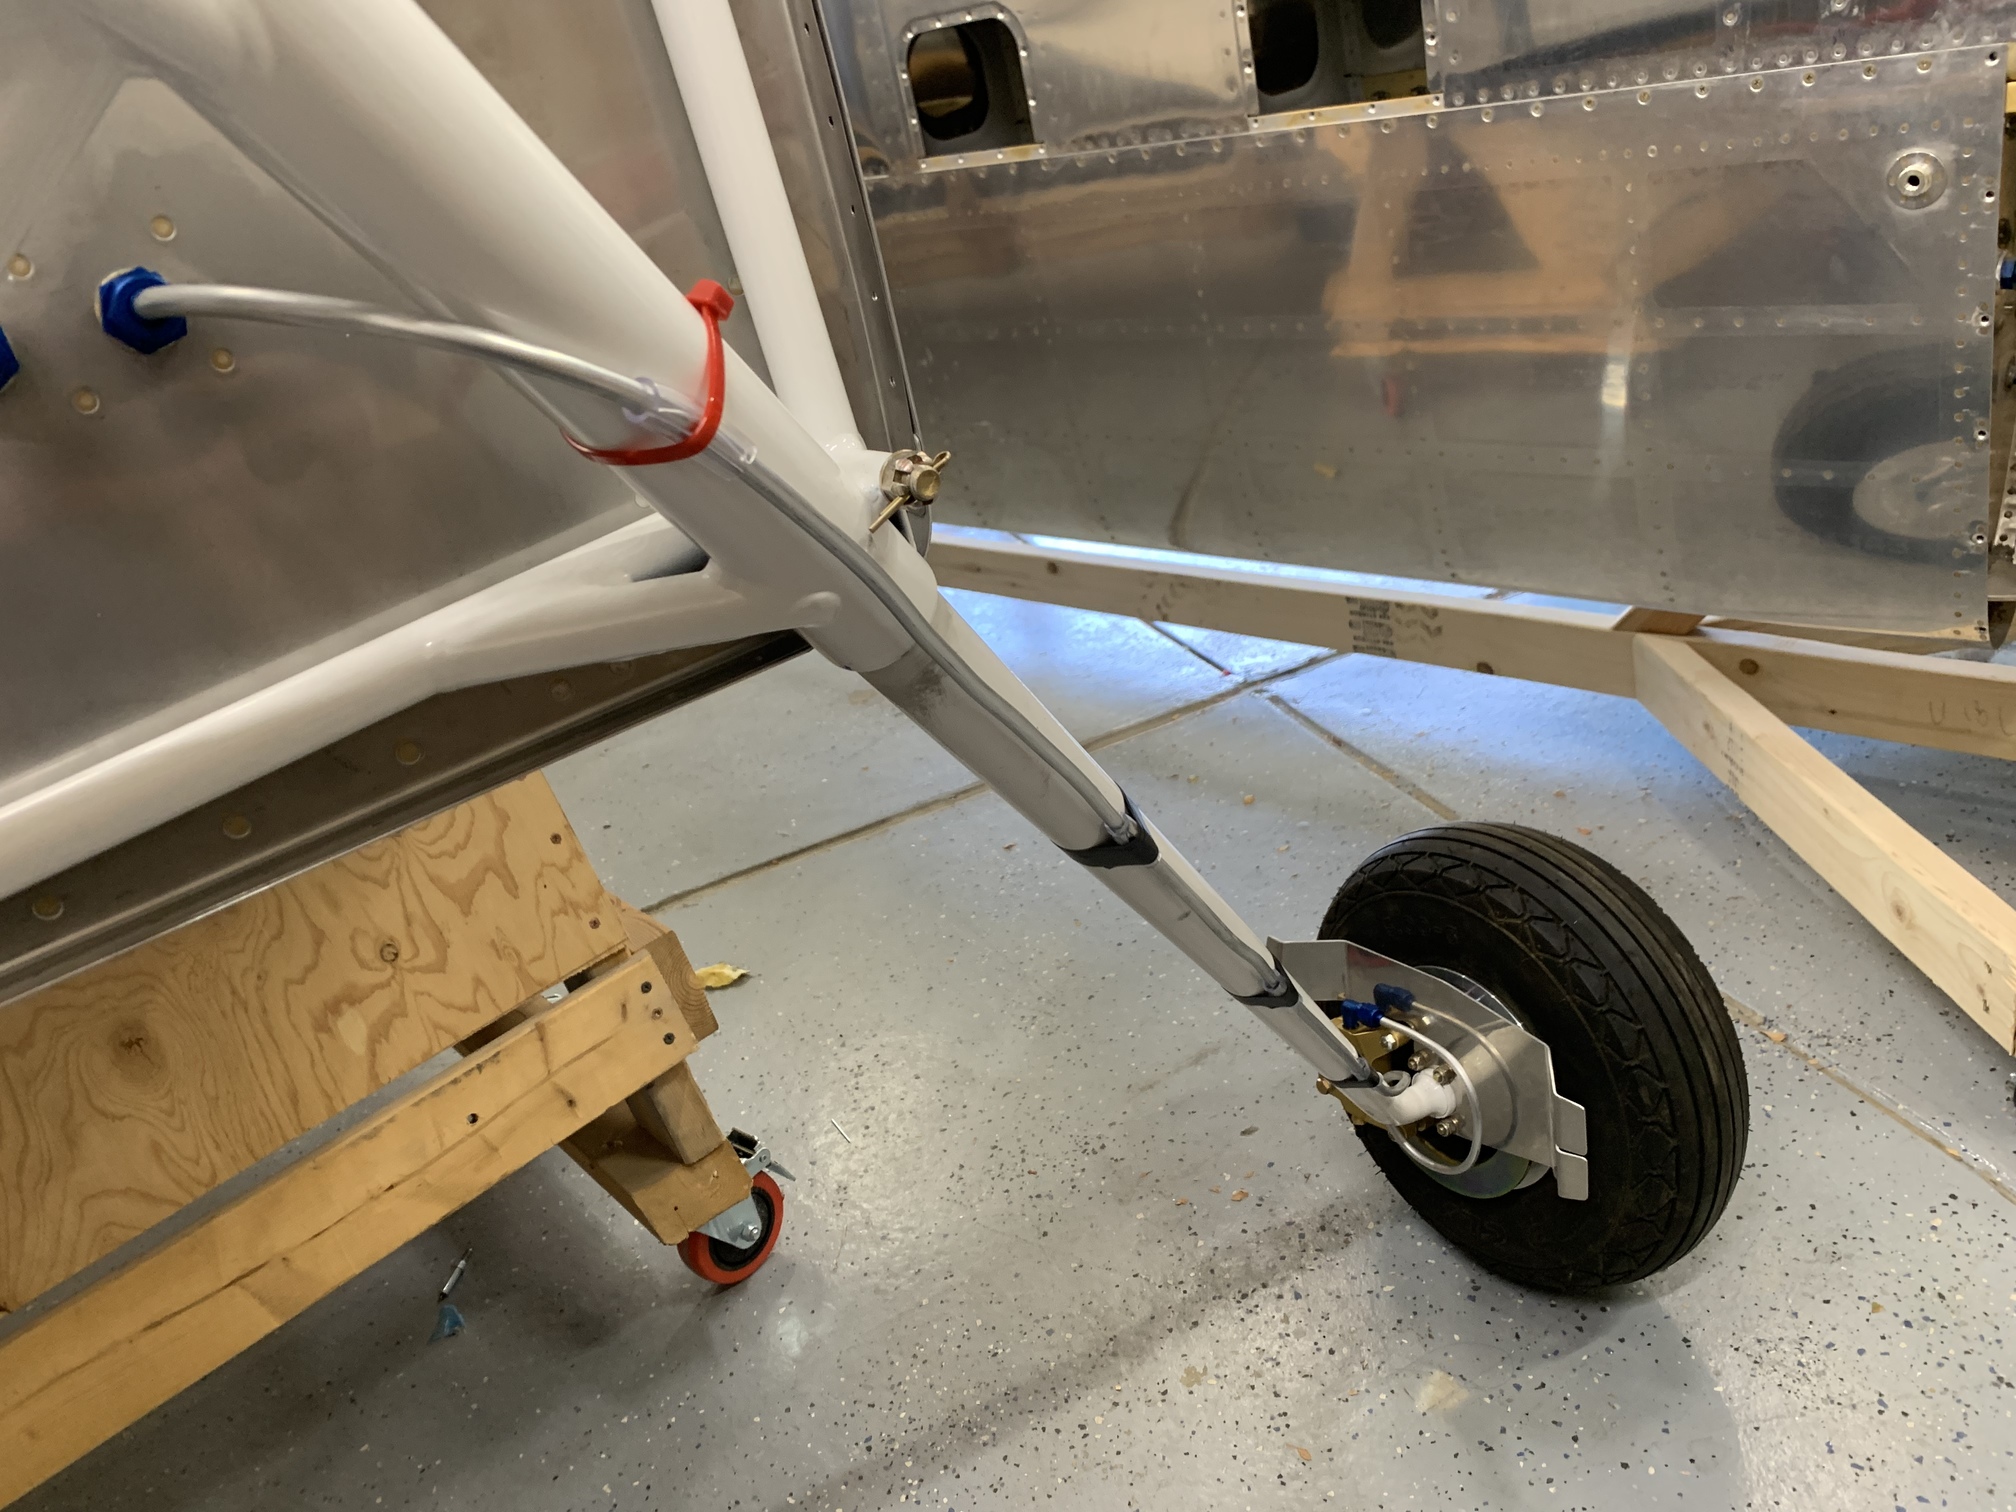
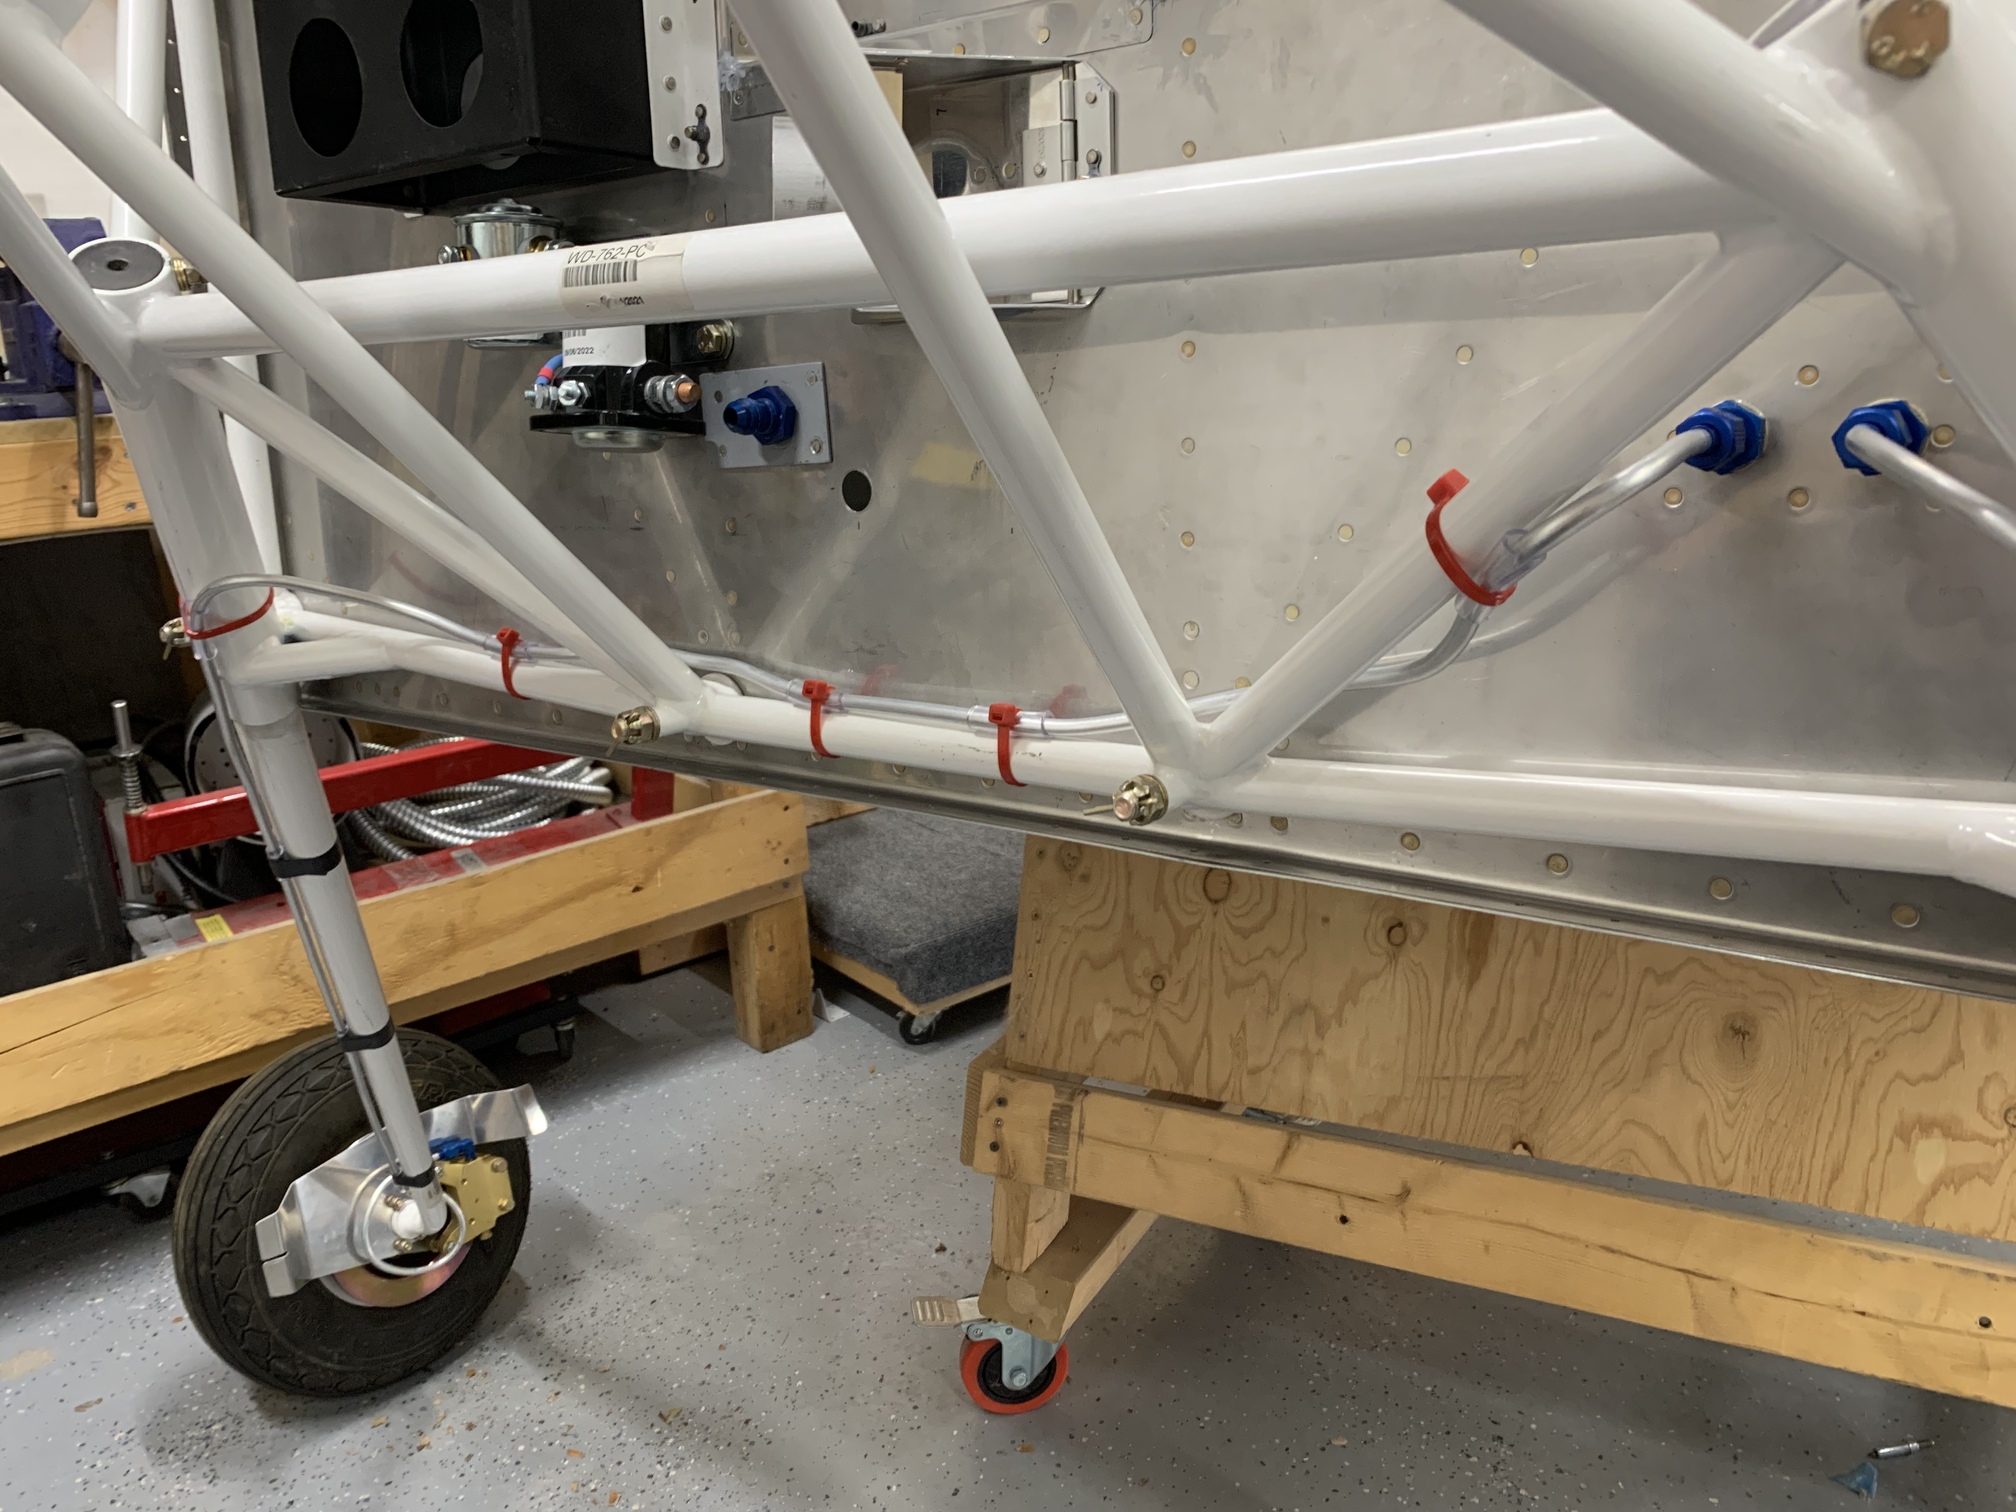
For the right brake line, I secured it to the engine mount with the vinyl tubing as stand-off and high temp zip ties to secure them.
Here's a close-up of how the tubing is secured to the gear leg.
And a close-up of the engine mount securement.
Now, I need to get some of the appropriate flavor of brake fluid and the equipment to bleed the brakes.
Today, I pulled out the gear leg fairings and started working on them. I spent several hours trying to make sure they had no twist in them. Some of the time was simply learning what I was doing trying to measure the twist and some was repeatedly taping the trailing edges together in a twist-free way.
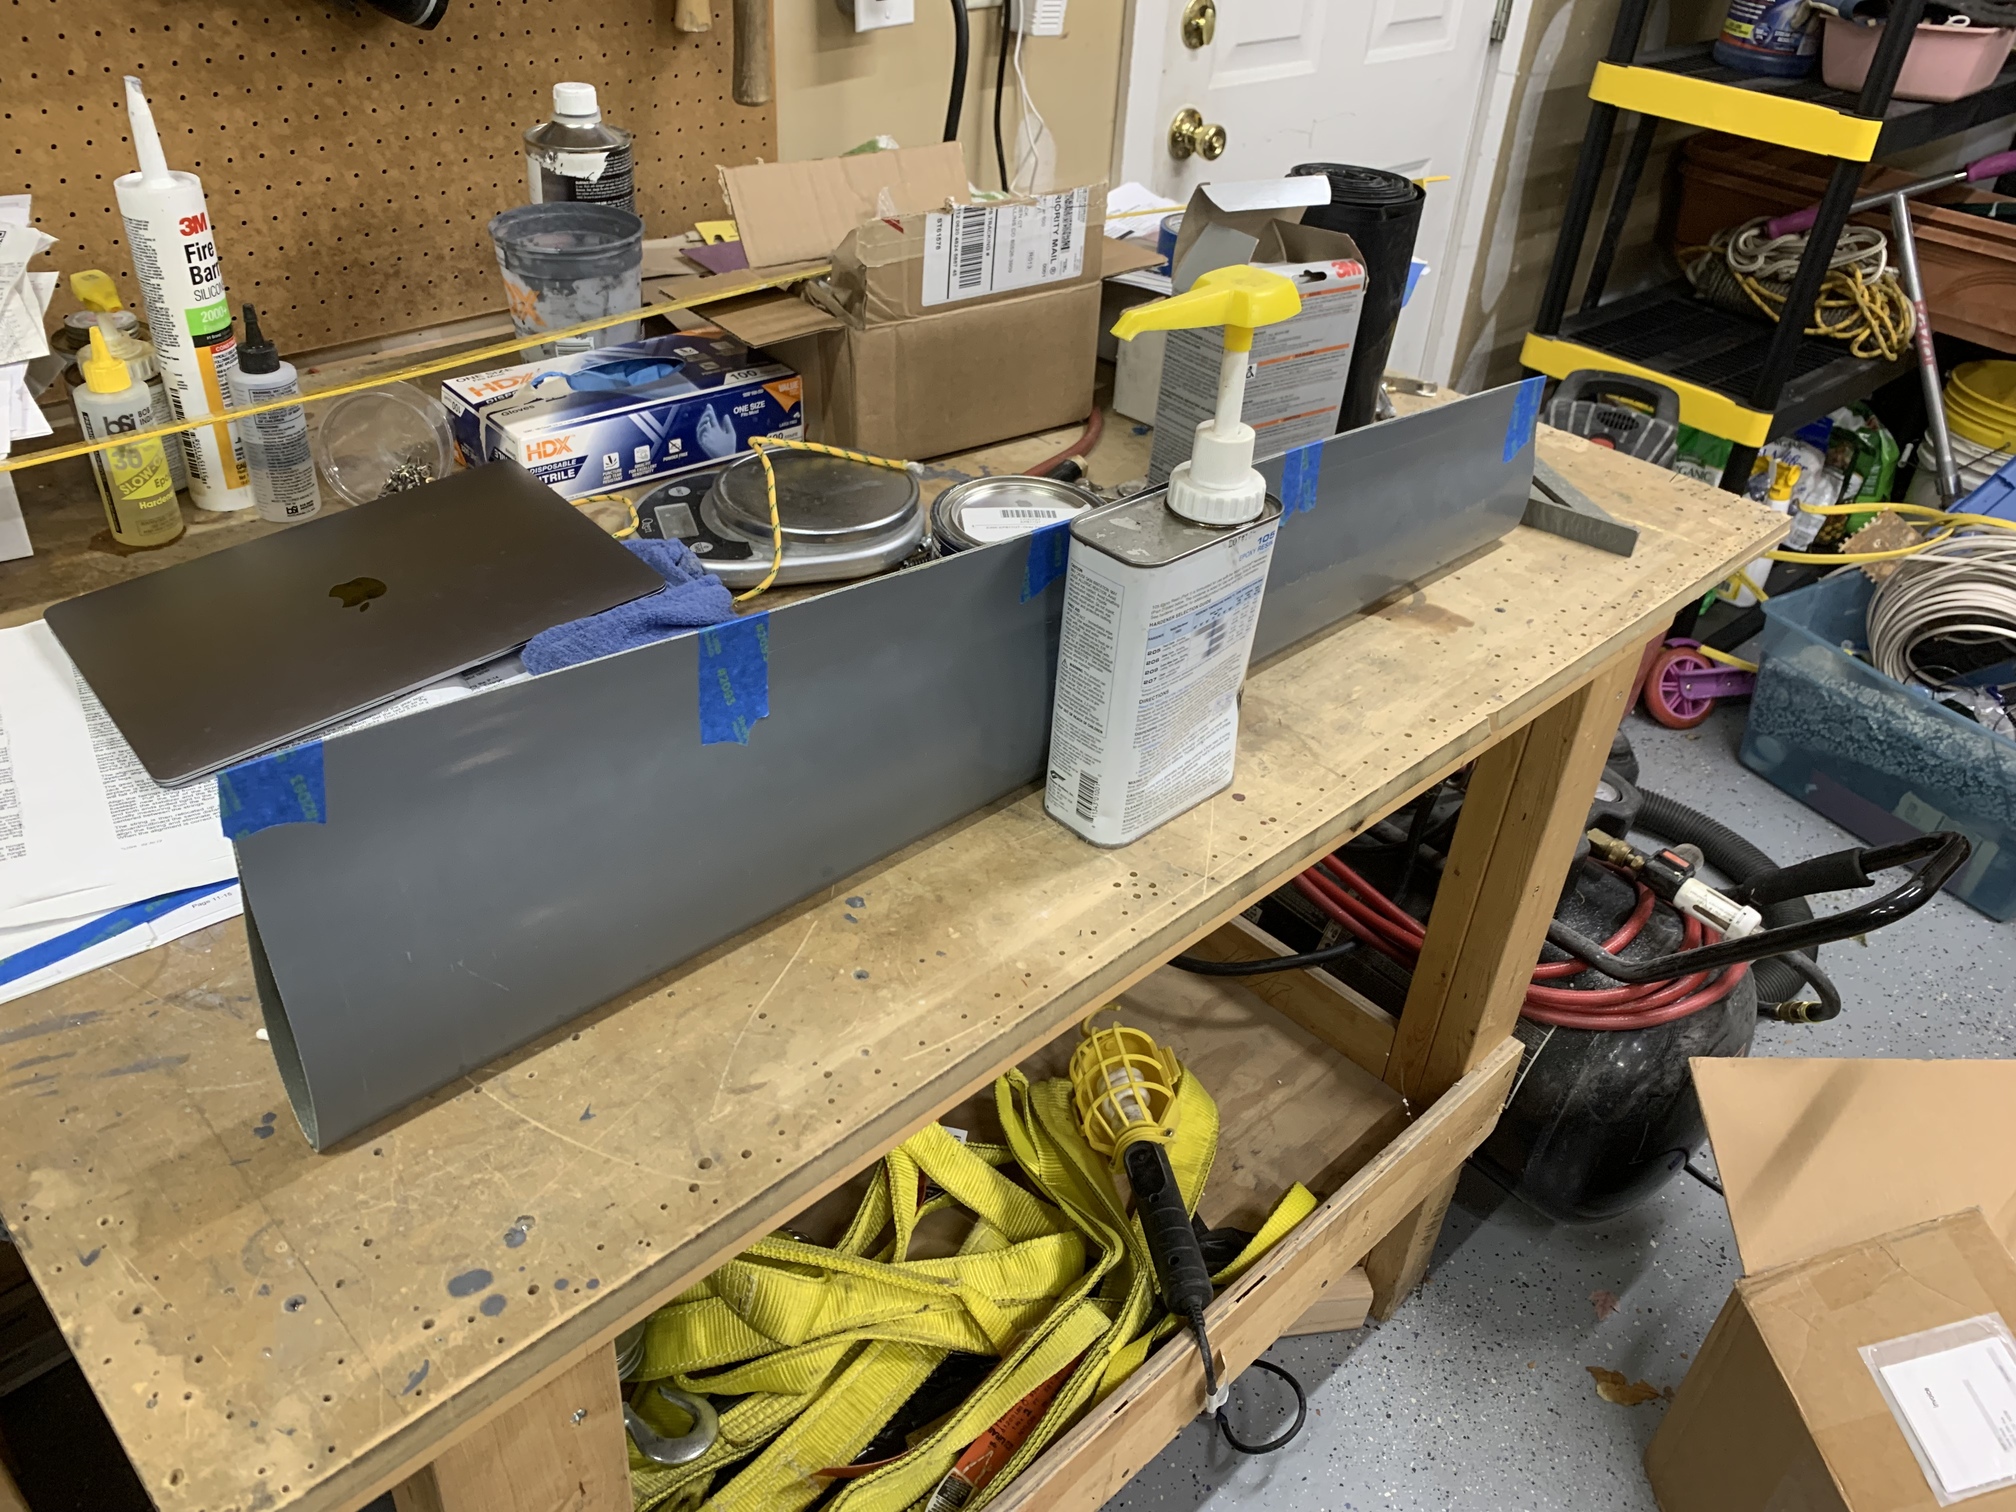
After a lot of struggle, I got them both to where I wanted them.
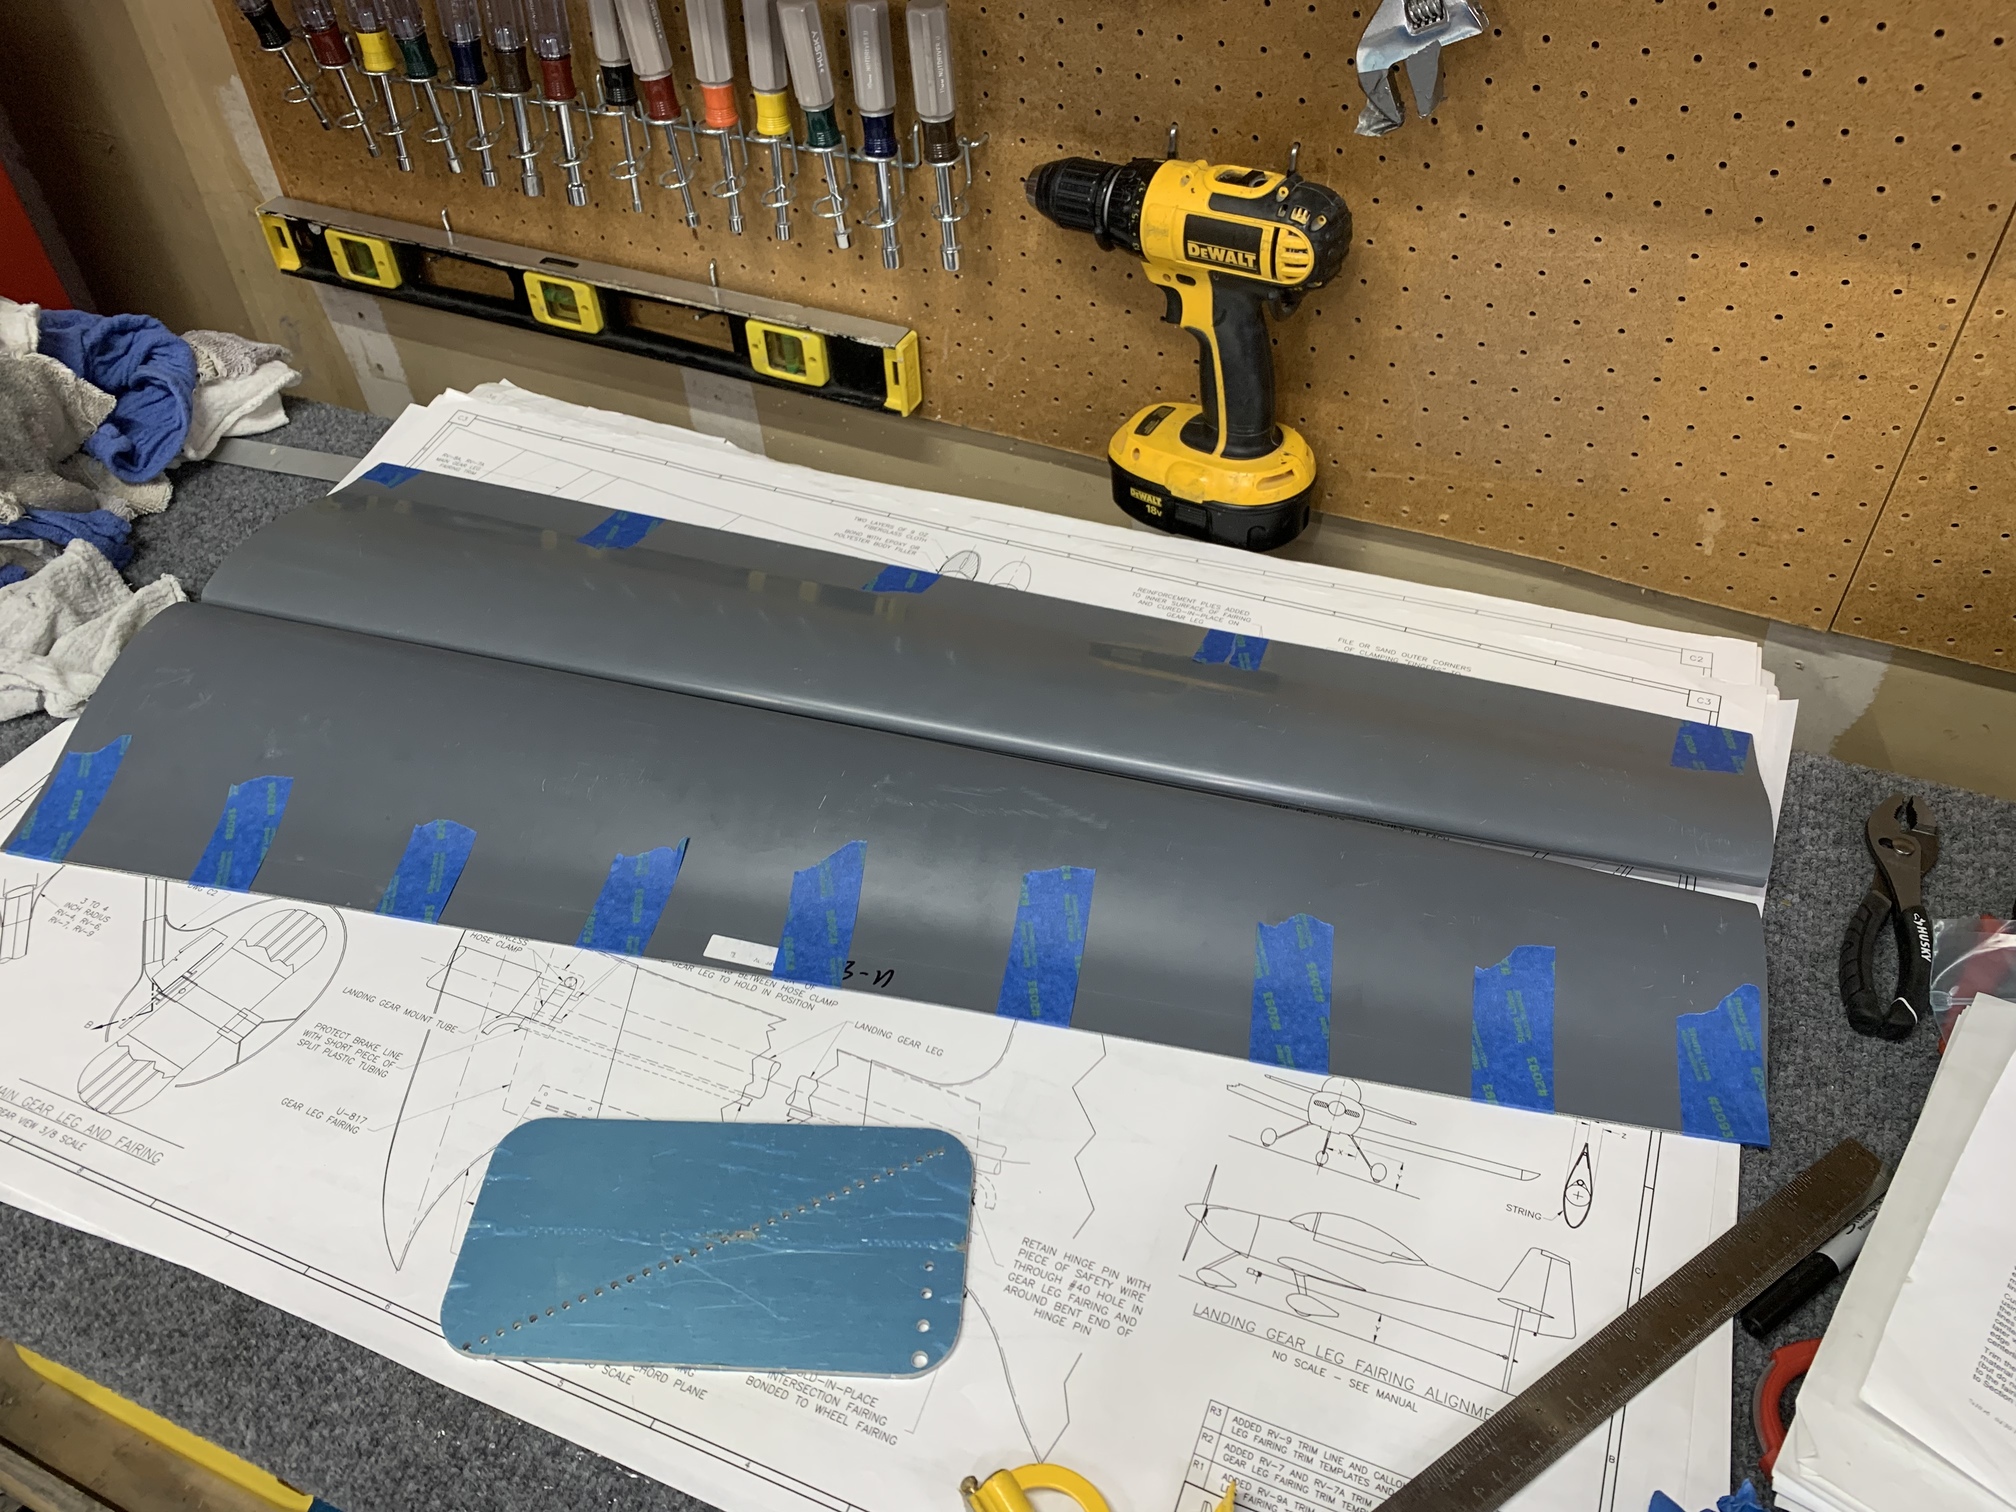
Then, I cut out the template and transferred the appropriate RV-7 measurements to both of the fairings.

Next up: trim the fairings to the cut lines.
| Previous - Index - Next |
This work is licensed under Attribution-NonCommercial-NoDerivatives 4.0 International![]()
![]()
![]()
![]()